background image

4-10

Chapter 4: BIOS setup

System Time 

[12:56:38] 

System Date 

[Mon 12/14/2009 


  Primary IDE Master           :[Not Detected]

  Primary IDE Slave 

:[Not Detected]

  SATA 1       

:[Not Detected]

  SATA 2  

:[Not Detected]

  SATA 3   

:[Not Detected]                                                                       

  SATA 4  

:[Not Detected] 


  Storage Configuration    

  System Information


      Select Screen

      Select Item

Enter Go to Sub-screen

F1    General Help

F10   Save and Exit

ESC   Exit

v02.61 (C)Copyright 1985-2009, American Megatrends, Inc.

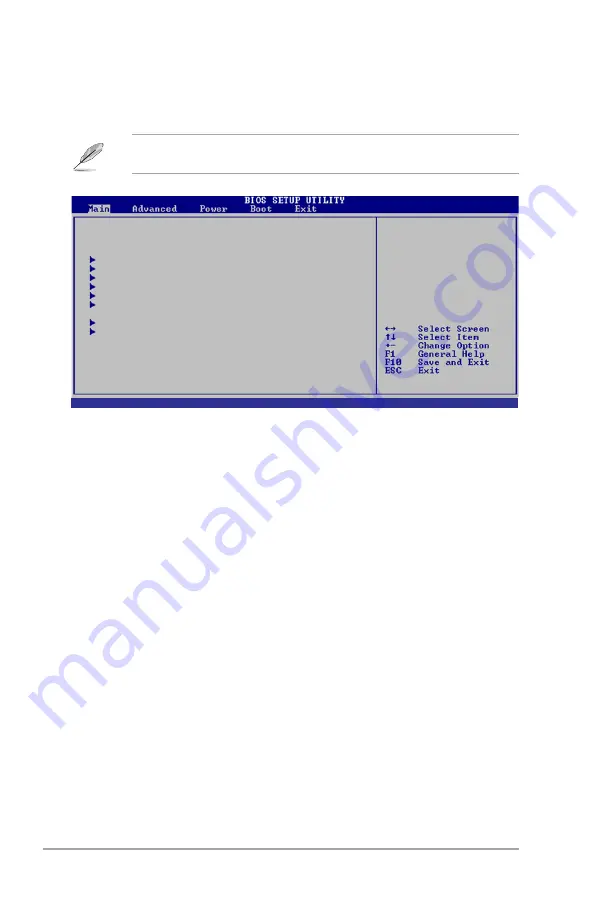
4.3 

Main menu

When you enter the BIOS Setup program, the Main menu screen appears, giving 

you an overview of the basic system information.

4.3.1.

System.Time.[xx:xx:xx]

Allows you to set the system time.

4.3.2.

System.Date.[Day.xx/xx/xxxx]

Allows you to set the system date.

Refer to section “4.2.1  BIOS menu screen” for information on the menu screen 

items and how to navigate through them.

Use [ENTER], [TAB]

or [SHIFT-TAB] to 

select a field.

Use [+] or [-] to

configure system time.

Содержание V*-V6-P5G41H Series

Страница 1: ...V series P5G41E ASUS PC Desktop Barebone User s Manual R ...

Страница 2: ...ICULAR PURPOSE IN NO EVENT SHALL ASUS ITS DIRECTORS OFFICERS EMPLOYEES OR AGENTS BE LIABLE FOR ANY INDIRECT SPECIAL INCIDENTAL OR CONSEQUENTIAL DAMAGES INCLUDING DAMAGES FOR LOSS OF PROFITS LOSS OF BUSINESS LOSS OF USE OR DATA INTERRUPTION OF BUSINESS AND THE LIKE EVEN IF ASUS HAS BEEN ADVISED OF THE POSSIBILITY OF SUCH DAMAGES ARISING FROM ANY DEFECT OR ERROR IN THIS MANUAL OR PRODUCT SPECIFICATI...

Страница 3: ...nts 1 8 1 5 Qualified Vendors Lists QVL 1 9 Chapter 2 Starting up 2 1 Installing an operating system 2 2 2 2 Powering up 2 2 2 3 Support DVD information 2 2 2 3 1 Running the support DVD 2 3 2 3 2 Utilities menu 2 4 2 3 3 ASUS Contact information 2 5 2 3 5 Other information 2 6 2 4 Software information 2 8 2 4 1 ASUS AI Manager 2 8 2 4 2 ASUS Express Gate 2 14 Chapter 3 Motherboard info 3 1 Introd...

Страница 4: ...7 Pop up window 4 9 4 2 8 Scroll bar 4 9 4 2 9 General help 4 9 4 3 Main menu 4 10 4 3 1 System Time 4 10 4 3 2 System Date 4 10 4 3 3 Primary IDE Master Slave SATA1 4 4 11 4 3 4 Storage Configuration 4 12 4 3 5 System Information 4 13 4 4 Advanced menu 4 14 4 4 2 CPU Configuration 4 14 4 4 2 Chipset 4 16 4 4 3 Onboard Devices Configuration 4 19 4 4 4 USB Configuration 4 20 4 4 5 PCI PnP 4 21 4 5 ...

Страница 5: ...f contents 4 6 Boot menu 4 25 4 6 1 Boot Device Priority 4 25 4 6 2 Boot Settings Configuration 4 26 4 6 3 Security 4 27 4 7 Tools menu 4 29 4 7 1 ASUS EZ Flash 2 4 29 4 7 2 Express Gate 4 30 4 8 Exit menu 4 31 ...

Страница 6: ... user is encouraged to try to correct the interference by one or more of the following measures Reorient or relocate the receiving antenna Increase the separation between the equipment and receiver Connect the equipment to an outlet on a circuit different from that to which the receiver is connected Consult the dealer or an experienced radio TV technician for help Canadian Department of Communicat...

Страница 7: ...are connected If possible disconnect all power cables from the existing system before you add a device Before connecting or removing signal cables from the motherboard ensure that all power cables are unplugged Seek professional assistance before using an adapter or extension cord These devices could interrupt the grounding circuit Ensure that your power supply is set to the correct voltage in you...

Страница 8: ...owledge of personal computers How this guide is organized This guide contains the following parts 1 Chapter 1 System introduction This chapter gives a general description of the ASUS V series P5G41E The chapter lists the system features including introduction on the front and rear panel and internal components 2 Chapter 2 Starting up This chapter helps you power up the system and install drivers a...

Страница 9: ...ebsites The ASUS websites worldwide provide updated information on ASUS hardware and software products Refer to the ASUS contact information 2 Optional Documentation Your product package may include optional documentation such as warranty flyers that may have been added by your dealer These documents are not part of the standard package ...

Страница 10: ...r the following items If any of the items is damaged or missing contact your retailer immediately Item description 1 ASUS V series P5G41E barebone system with ASUS motherboatd Power supply unit ASUS chassis 2 Cable AC power cable 3 Support DVD 4 Quick Installation Guide ...

Страница 11: ...em introduction This chapter gives a general description of the ASUS V series P5G41E The chapter lists the system features including introduction on the front and rear panel and internal components Chapter 1 ...

Страница 12: ... 2 Extreme Core 2 Duo Core 2 Quad Pentium dual core Celeron processors in the 775 land package The system supports up to 8 GB of system memory using DDR3 1066 800 DIMMs High resolution graphics via integrated graphics controller or PCI Express x16 slot Serial ATA USB 2 0 and 8 channel audio feature the system and take you ahead in the world of power computing 1 2 Front panel The front panel includ...

Страница 13: ...ia Card slot 5 CompactFlash Microdrive card slot 6 USB 2 0 ports These Universal Serial Bus 2 0 USB 2 0 ports are available for connecting USB 2 0 devices such as a mouse printer scanner camera PDA and others 7 Microphone port This Mic pink port connects a microphone 8 Headphone port This Line Out lime port connects a headphone with a stereo mini plug 9 Power button Press this button to turn the s...

Страница 14: ... Serial Bus 2 0 USB 2 0 ports are available for connecting USB 2 0 devices such as a mouse printer scanner camera PDA and others 5 Headphone port This Line Out lime port connects a headphone with a stereo mini plug 6 Microphone port This Mic pink port connects a microphone 7 CompactFlash Microdrive card slot 8 MemoryStick Memory Stick Pro card slot 9 Secure Digital Multimedia Card slot This V seri...

Страница 15: ...g to the voltage supply in your area See the section Voltage selector on page 1 6 before adjusting this switch 2 Power connector This connector is for the power cable and plug 3 Power supply unit fan vent This vent is for the PSU fan that provides ventilation inside the power supply unit Do NOT cover the rear vent and the ambient temperature is limited up to 35o C to prevent the system from overhe...

Страница 16: ... Local Area Network LAN through a network hub Refer to the table below for the LAN port LED indications Activity Link Speed LED Status Description Status Description OFF No link OFF 10 Mbps connection ORANGE Linked ORANGE 100 Mbps connection BLINKING Data activity GREEN 1 Gbps connection LAN port LED indications SPEED LED ACT LINK LED LAN port 13 Microphone port pink This port connects a microphon...

Страница 17: ...ng to the voltage supply in your area If the voltage supply in your area is 100 127 V set this switch to 115 V If the voltage supply in your area is 200 240 V set this switch to 230 V Setting the switch to 115V in a 230V environment or 230V in a 115V environment will seriously damage the system 115V 230V Voltage selector 16 Expansion slot covers Remove these covers when installing expansion cards ...

Страница 18: ... cover 2 5 25 inch optical drive bays 3 3 5 inch drive bay 4 Hard disk drive bay 5 Power supply unit 6 CPU socket 7 DIMM sockets 8 ASUS motherboard 9 PCI Express x16 slot 10 PCI Express x1 slot 11 PCI slots 12 Metal bracket lock P5G41T M LX2 GB 1 4 2 3 5 6 7 8 9 10 11 12 Refer to the bundled Quick Installation Guide for installing additional system components and get assistance from professionals ...

Страница 19: ...Micron 8ED22D9JNL Micron MT8JTF12864AZ 1G1F1 1024MB SS Micron 9GF22D9KPT 7 Micron MT16JTF25664AY 1G1D1 2048MB DS Micron 8LD22D9JNL Micron MT16JTF25664AZ 1G1F1 2048MB DS Micron 9HF22D9KPT 7 OCZ OCZ3SOE10662GK 2048MB Kit of 2 DS N A Heat Sink Package 7 7 7 16 1 75V SAMSUNG M378B2873EH1 CF8 1024MB SS Samsung SEC 901 HCF8 K4B1G0846E SAMSUNG M378B5273BH1 CF8 4096MB DS SAMSUNG 846 K4B2G0846B HCF8 Elixir...

Страница 20: ...1 10 Chapter 1 System introduction ...

Страница 21: ...R This chapter helps you power up the system and install drivers and utilities from the support DVD Chapter 2 Starting up ...

Страница 22: ...e setup procedures presented in this chapter for general reference only Refer to your OS documentation for more information Screen display and driver options may not be the same for different operating system versions The contents of the support DVD are subject to change at any time without notice Visit the ASUS website at www asus com for updates Windows XP OS setup cannot recognize Serial ATA ha...

Страница 23: ...e click the ASSETUP EXE to run the DVD Click an item to install Click an icon to display support DVD motherboard information ASUS InstAll Launches the ASUS InstAll driver installation wizard PC cillin 2010 Installs the PC cillin 2010 to protect your system from the latest threats Intel Graphics Driver Installs the Intel graphics driver VIA Audio Driver Installs the VIA audio driver and application...

Страница 24: ...llows you to download the latest version of the BIOS from the ASUS website Before using the ASUS Update make sure that you have an Internet connection so you can connect to the ASUS website ASUS AI Manager Installs the ASUS AI Manager Adobe Reader 9 Installs the Adobe Reader that allows you to open view and print documents in Portable Document Format PDF ASUS Express Gate Installer Installs the AS...

Страница 25: ...ound DirectX improves the multimedia features of you computer so you can enjoy watching TV and movies capturing videos or playing games in your computer Visit the Microsoft website www microsoft com for updates 2 3 3 ASUS Contact information Click the Contact tab to display the ASUS contact information You can also find this information on the inside front cover of this user guide ...

Страница 26: ... the screen give additional information on the motherboard and the contents of the support DVD Click an icon to display the specified information Motherboard Info Displays the general specifications of the motherboard Browse this DVD Displays the support DVD contents in graphical format ...

Страница 27: ...2 7 ASUS V series P5G41E Filelist Displays the contents of the support DVD and a brief description of each in text format ...

Страница 28: ...ch the AI Manager from the Windows desktop click Start All Programs ASUS AI Manager 1 xx xx AI Manager The AI Manager quick bar appears on the desktop After launching the application the AI Manager icon appears in the Windows taskbar Right click this icon to switch between quick bar and main window and to launch the AI Manager either from the quick bar or taskbar 2 4 Software information Most of t...

Страница 29: ... bar Click the Minimize button to keep the AI Manager on the taskbar Click the Close button to quit the AI Manager Main The Main menu contains five utilities AI Disk AI Security AI Boosting and AI Probe Click the arrow on the Main menu icon to browse through the utilities in the main menu AI Disk AI Disk allows you to easily clear temporary IE files IE cookies IE URLs IE history or the Recycle Bin...

Страница 30: ...nfirm the password 3 Key in the password hint recommended 4 When done click Ok 5 Select the device you want to lock then click Apply 6 Key in the password you have set previously then click Ok The selected device is locked and not accessible To unlock the selected device 1 Uncheck the checkbox of the selected device then click Apply 2 Key in the password you have set previously then click Ok The s...

Страница 31: ...k on the left right button to specify the boot sequence 2 When done press Apply AI Probe AI Probe automatically detects and displays the motherboard and CPU temperatures CPU fan speed and the voltage output You can adjust the values as you need Click the Temperature Voltage or Fan Speed tab then select an item to enable and change the value by dragging the bar ...

Страница 32: ... throughout your computer To add an application 1 Click Add then locate the application you want to add to My Favorites 2 Click Open on the file location window The application is added to My Favorites list Right click on the application icon to launch delete or rename the selected application You can also double click to launch the selected application ...

Страница 33: ...ort window to go to the ASUS website technical support website download support website or contact information Information Click the tab on the Information window to see the detailed information about your system motherboard CPU BIOS installed device s and memory ...

Страница 34: ...ing on the computer ASUS Express Gate supports SATA devices in IDE mode only ASUS Express Gate supports SATA devices connected to motherboard chipset controlled onboard SATA ports only All onboard extended SATA ports and external SATA ports are NOT supported See section 1 2 1 Motherboard layout for the exact location of the onboard SATA ports Ensure that your monitor supports the screen resolution...

Страница 35: ...mputer The actual boot time depends on the system configuration To enter the motherboard BIOS Setup program click Exit on the splash screen and then hold down Del during POST Click in the Express Gate environment for the detailed software instructions Click an application icon to enter the Express Gate environment and launch the selected application Turn off the computer Continue booting to the ex...

Страница 36: ...plications and configure the Express Gate settings The LaunchBar can be configured to auto hide and dock at the bottom or top of the screen The indicator under an application icon indicates that the application is running If an application stops responding right click its icon then select Close to force it to close Launches the Online Games Launches the Photo Manager Launches the Chat instant mess...

Страница 37: ...s connected Left click this icon to launch the File Manager window Right click it to eject the removable storage device USB drive Exits ASUS Express Gate Click Yes to enter the operating system you installed on the hard disk drive Powers off the computer Accessing the Internet To configure the network settings 1 Click Configuration Panel on the LaunchBar 2 Click Network 3 Make the proper network c...

Страница 38: ... cable into a different port while Express Gate is running e g move the cable from LAN1 to LAN2 restart Express Gate to activate the new setting WiFi settings if supported If you want to connect to a wireless network click Setup to configure the WiFi options In the WiFi tab of the Advanced Network Settings box key in the network name of the wireless access point in the SSID field If Security is en...

Страница 39: ...TA ports are NOT supported Using the Online Games Express Gate introduces a Splashtop Gaming portal site which provides interesting games in different categories Enable the Internet connection to use the Online Games feature Restoring to factory settings To restore Express Gate to the factory settings 1 Click Configuration Panel on the LaunchBar 2 Click Environment Settings 3 Click Restore from th...

Страница 40: ...tart normally reinstall the software or use the repair utility to repair Express Gate To repair Express Gate Click Start All Programs Express Gate Express Gate Installer Repair this software then follow the onscreen instructions to complete the repair ASUS EZ Flash 2 Express Gate Auto Enter OS Timer 10 Seconds Reset User Data No BIOS SETUP UTILITY Main Advanced Power Boot Tools Exit Press ENTER to...

Страница 41: ...R This chapter gives information about he motherboard that comes with the system This chapter includes the motherboard layout jumper settings and connector locations Chapter 3 Motherboard info ...

Страница 42: ... 2 Motherboard layout P5G41T M LX2 GB PCIEX16 PCIEX1 PCI2 PCI1 PRI_IDE USB56 USB78 F_PANEL AAFP ICS 9LPRS441 ATX12V EATXPWR CPU_FAN Intel G41 Lithium Cell CMOS Power Super I O AUDIO VIA VT1705 RTL 8112L KBMS 8Mb BIOS SB_PWR CLRTC USBPW1 4 USBPW5 8 CHASSIS KBPWR 19 1cm 7 5in 24 4cm 9 6in LGA775 Intel ICH7 DDR3 DIMM_A1 64bit 240 pin module DDR3 DIMM_B1 64bit 240 pin module LAN1_USB12 USB34 SATA1 SAT...

Страница 43: ... Keep the cap on pins 2 3 for about 5 10 seconds then move the cap back to pins 1 2 3 Plug the power cord and turn ON the computer 4 Hold down the Del key during the boot process and enter BIOS setup to re enter data Except when clearing the RTC RAM never remove the cap on CLRTC jumper default position Removing the cap will cause system boot failure If the steps above do not help remove the onboar...

Страница 44: ...power mode P5G41T M LX2 GB P5G41T M LX2 GB USB Device Wake Up 2 1 2 3 5V Default 5VSB USBPW5 8 2 1 2 3 5V 5VSB Default USBPW1 4 3 Keyboard power 3 pin KBPWR This jumper allows you to enable or disable the keyboard wake up feature When you set this jumper to pins 2 3 5VSB you can wake up the computer by pressing a key on the keyboard the default is the Space Bar This feature requires an ATX power s...

Страница 45: ...TA_TXN3 RSATA_TXP3 GND P5G41T M LX2 GB P5G41T M LX2 GB SATA connectors 2 USB connectors 10 1 pin USB56 USB78 These connectors are for USB 2 0 ports Connect the USB module cable to any of these connectors then install the module to a slot opening at the back of the system chassis These USB connectors comply with USB 2 0 specification that supports up to 480 Mbps connection speed Never connect a 139...

Страница 46: ...h the covered hole on the Ultra DMA cable connector This prevents incorrect insertion when you connect the IDE cable Use the 80 conductor IDE cable for Ultra DMA 100 66 IDE devices If any device jumper is set as Cable Select ensure that all other device jumpers have the same setting Drive jumper setting Mode of device s Cable connector Single device Cable Select or Master Black Two devices Cable S...

Страница 47: ...s 4 ATX power connectors 24 pin EATXPWR 4 pin ATX12V These connectors are for ATX power supply plugs The power supply plugs are designed to fit these connectors in only one orientation Find the proper orientation and push down firmly until the connectors completely fit P5G41T M LX2 GB P5G41T M LX2 GB ATX power connectors EATXPWR PIN 1 GND 5 Volts 5 Volts 5 Volts 5 Volts GND GND GND PSON GND 12 Vol...

Страница 48: ...PU FAN PWR GND Rotation 12V GND CHA_FAN P5G41T M LX2 GB P5G41T M LX2 GB fan connectors 7 Chassis intrusion connector 4 1 pin CHASSIS This connector is for a chassis mounted intrusion detection sensor or switch Connect one end of the chassis intrusion sensor or switch cable to this connector The chassis intrusion sensor or switch sends a high level signal to this connector when a chassis component ...

Страница 49: ...definition audio capability By default this connector is set to HD Audio If you want to connect a High Definition front panel audio module to this connector set the Front Panel Type item in the BIOS to HD Audio See section 4 4 2 Chipset for details P5G41T M LX2 GB P5G41T M LX2 GB Front panel audio connector AAFP PIN 1 GND PRESENCE SENSE1_RETUR SENSE2_RETUR PORT1 L PORT1 R PORT2 R SENSE_SEND PORT2 ...

Страница 50: ...LED cable to this connector The HD LED lights up or flashes when data is read from or written to the HDD ATX power button soft off button 2 pin PWRBTN This 2 pin connector is for the system power button Reset button 2 pin RESET This 2 pin connector is for the chassis mounted reset button for system reboot without turning off the system power 9 System panel connector 10 1 pin F_PANEL This connector...

Страница 51: ...R BIOS setup This chapter tells how to change system settings through the BIOS Setup menus and describes the BIOS parameters Chapter 4 ...

Страница 52: ...o install ASUS Update 1 Place the support DVD in the optical drive The Drivers menu appears 2 Click the Utilities tab then click Install ASUS Update 3 The ASUS Update utility is copied to your system 4 1 1 ASUS Update utility The ASUS Update is a utility that allows you to manage save and update the motherboard BIOS in Windows environment The ASUS Update utility allows you to Save the current BIOS...

Страница 53: ...Next Updating the BIOS through the Internet To update the BIOS through the Internet 1 Launch the ASUS Update utility from the Windows desktop by clicking Start Programs ASUS ASUSUpdate ASUSUpdate The ASUS Update main window appears 2 Select Update BIOS from the Internet option from the drop down menu then click Next ...

Страница 54: ...om a file option from the drop down menu then click Next 4 From the FTP site select the BIOS version that you wish to download Click Next 5 Follow the screen instructions to complete the update process The ASUS Update utility is capable of updating itself through the Internet Always update the utility to avail all its features 3 Locate the BIOS file from the Open window then click Open 4 Follow th...

Страница 55: ...and press Enter to enable it You can switch between drives by pressing Tab before the correct file is found Then press Enter 4 When the correct BIOS file is found EZ Flash 2 performs the BIOS update process and automatically reboots the system when done 1 Insert the USB flash disk that contains the BIOS file to the the USB port Press Alt F2 during POST to display the following This function can su...

Страница 56: ...r motherboards without the floppy connector prepare a USB flash disk before using this utility Recovering the BIOS To recover the BIOS 1 Turn on the system 2 Insert the support DVD to the optical drive or the removable device that contains the BIOS file to the USB port or to the floppy disk drive if supported 3 The utility automatically checks the devices for the BIOS file When found the utility r...

Страница 57: ...If you wish to enter Setup after POST reboot the system by doing any of the following procedures Restart using the OS standard shut down procedure Press Ctrl Alt Del simultaneously Press the reset button on the system chassis Press the power button to turn the system off then back on The default BIOS settings for this motherboard apply for most conditions to ensure optimum performance If the syste...

Страница 58: ...power management APM configuration Boot For changing the system boot configuration Tools For configuring options for special functions Exit For selecting the exit options and loading default settings 4 2 1 BIOS menu screen To select an item on the menu bar press the right or left arrow key on the keyboard until the desired item is highlighted Some of the navigation keys differ from one screen to a...

Страница 59: ...Refer to 2 2 7 Pop up window 4 2 7 Pop up window Select a menu item then press Enter to display a pop up window with the configuration options for that item 4 2 8 Scroll bar A scroll bar appears on the right side of a menu screen when there are items that do not fit on the screen Press the Up Down arrow keys or Page Up Page Down keys to display the other items on the screen 4 2 9 General help At t...

Страница 60: ...ave and Exit ESC Exit v02 61 C Copyright 1985 2009 American Megatrends Inc 4 3 Main menu When you enter the BIOS Setup program the Main menu screen appears giving you an overview of the basic system information 4 3 1 System Time xx xx xx Allows you to set the system time 4 3 2 System Date Day xx xx xxxx Allows you to set the system date Refer to section 4 2 1 BIOS menu screen for information on th...

Страница 61: ...the type of device connected to the system BIOS SETUP UTILITY Main Advanced Power Boot Tools Exit LBA Large Mode Auto Enables or disables the LBA mode Setting to Auto enables the LBA mode if the device supports this mode and if the device was not previously formatted with LBA mode disabled Configuration options Disabled Auto Block Multi sector Transfer M Auto Enables or disables data multi sectors...

Страница 62: ... change the configurations for the IDE devices installed in the system Select an item then press Enter if you wish to configure the item Storage Configuration ATA IDE Configuration Enhanced Enahnced Mode Support On S ATA IDE Detect Time Out Sec 35 ATA IDE Configuration Enhanced Allows you to configure ATA IDE Configuration options Disabled Compatible Enhanced Enhanced Mode Support On S ATA Allows ...

Страница 63: ...items in this menu BIOS Information Displays the auto detected BIOS information Processor Displays the auto detected CPU specification System Memory Displays the auto detected system memory BIOS Information Version 0201 Build Date 12 03 09 Processor Type Intel R Core TM 2 Duo CPU 2 66GHz Speed 2666MHz System Memory Installed Size 1024MB Usable Size 990MB ...

Страница 64: ... Help F10 Save and Exit ESC Exit v02 61 C Copyright 1985 2009 American Megatrends Inc 4 4 2 CPU Configuration The items in this menu show the CPU related information that the BIOS automatically detects Configure advanced CPU settings Manufacturer Intel Brand String Intel R Core TM 2 Duo CPU 2 66GHz Frequency 2 66GHz FSB Speed 1333MHz Cache L1 64 KB Cache L2 4096 KB Ratio Status Unlocked Min 06 Max...

Страница 65: ...el Virtualization Technology Virtualization enhanced by Intel Virtualization Technology allows a platform to run multiple operating systems and applications in independent partitions With Virtualization one computer system can function as multiple virtual systems Configuration options Enabled Disabled CPU TM Function Enabled Enables or disables Intel CPU Thermal Monitor TM function a CPU overheati...

Страница 66: ...allows you to change the advanced chipset settings Select an item then press Enter to display the sub menu Advanced Chipset Settings WARNING Setting wrong values in below sections may cause system to malfunction North Bridge Configuration South Bridge Configuration Configure North Bridge features North Bridge Configuration ENABLE Allow remapping of overlapped PCI memory above the total physical me...

Страница 67: ...bled Enabled 32MB Enabled 64MB Enabled 128MB DVMT Memory 256MB Allows you to select the DVMT memory Configuration options 128MB 256MB Maximum DVMT The Maximum DVMT option only appears when installing 1GB DDR2 DIMMs into the DIMM sockets Protect Audio Video Path Mode Lite Allows you to set the Protected Audio Video Path PAVP Configuration options Disabled Lite Paranoid To use the High Bandwidth Dig...

Страница 68: ...to select the front panel support type If High Definition Audio Front Panel is used set this item to HD Audio mode Configuration options AC97 HD Audio The following item does not appear when the Audio Controller item is set to Disabled Onboard Gigabit LAN Enabled Allows you to enable or disable the onboard LAN controller Configuration options Enabled Disabled Onboard LAN Boot ROM Disabled Allows y...

Страница 69: ...ns Disabled 378 278 3BC Parallel Port Mode Normal Allows you to select the Parallel Port mode Configuration options Normal EPP ECP EPP ECP EPP Version 1 9 Appears on ly when the Parallel Port Mode item is set to EPP or EPP ECP This item allows you to set the Prallel Port EPP version Configuration options 1 9 1 7 ECP Mode DMA Channel DMA3 Appears only when the Parallel Port Mode item is set to ECP ...

Страница 70: ...ions Enabled Allows you to enable or disable the USB functions Configuration options Disabled Enabled USB 2 0 Controller Enabled Allows you to enable or disable USB 2 0 controller Configuration options Enabled Disabled Legacy USB Support Auto Allows you to enable or disable support for USB devices on legacy operating systems OS Setting to Auto allows the system to detect the presence of USB device...

Страница 71: ...all a Plug and Play operating system the operating system configures the Plug and Play devices not required for boot Configuration options No Yes NO lets the BIOS configure all the devices in the system YES lets the operating system configure Plug and Play PnP devices not required for boot if your system has a Plug and Play operating system Select Screen Select Item Enter Go to Sub screen F1 Gener...

Страница 72: ... ACPI 2 0 Support Disabled Allows you to add more tables for Advanced Configuration and Power Interface ACPI 2 0 specifications Configuration options Disabled Enabled 4 5 3 ACPI APIC Support Enabled Allows you to enable or disable the Advanced Configuration and Power Interface ACPI support in the Application Specific Integrated Circuit ASIC When set to Enabled the ACPI APIC table pointer is includ...

Страница 73: ...cond appear with set values Configuration options Disabled Enabled Resume On By External Modem Disabled Allows you to enable or disable external modem to generate a wake event Configuration options Disabled Enabled Resume On By PCI E Devices Disabled When set to Enabled this parameter allows you to wake the system through a PCI PCI Express card This feature requires an ATX power supply that provid...

Страница 74: ...onboard hardware monitor automatically detects and displays the CPU fan speed in rotations per minute RPM If the fan is not connected to the motherboard the field shows N A Select Ignored if you do not wish to display the detected speed Chassis Fan Speed xxxxRPM or N A or Ignored The onboard hardware monitor automatically detects and displays the chassis fan speed in rotations per minute RPM If th...

Страница 75: ...nce from the available devices The number of device items that appears on the screen depends on the number of devices installed in the system Configuration options Removable Device Hard Drive ATAPI CD ROM Disabled Specifies the Boot Device Priority sequence A virtual floppy disk drive Floppy Drive B may appear when you set the CD ROM drive as the first boot device Specifies the boot sequence from ...

Страница 76: ...ease the time needed to boot the system When set to Disabled BIOS performs all the POST items Configuration options Disabled Enabled Full Screen Logo Enabled This allows you to enable or disable the full screen logo display feature Configuration options Disabled Enabled Add On ROM Display Mode Force BIOS Sets the display mode for option ROM Configuration options Force BIOS Keep Current Bootup Num ...

Страница 77: ...nter again to disabled password Change Supervisor Password Select this item to set or change the supervisor password The Supervisor Password item on top of the screen shows the default Not Installed After you set a password this item shows Installed To set a Supervisor Password 1 Select the Change Supervisor Password item and press Enter 2 On the password box key in a password containing up to six...

Страница 78: ...Select the Change User Password item and press Enter 2 On the password box key in a password containing up to six letters or numbers or both then press Enter 3 Confirm the password when prompted The message Password Installed appears after you set your password successfully To change the user password follow the same steps as in setting a user password Clear User Password Select this item to clear...

Страница 79: ...it ASUS EZ Flash 2 Express Gate Auto Enter OS Timer 10 Seconds Reset User Data No Press ENTER to run the utility to select and update BIOS This utility doesn t support 1 NTFS format 4 7 1 ASUS EZ Flash 2 Allows you to run ASUS EZ Flash 2 When you press Enter a confirmation message appears Use the left right arrow key to select between Yes or No then press Enter to confirm your choice Please see se...

Страница 80: ...ions Prompt User 1 Second 3 Seconds 5 Seconds 10 Seconds 15 Seconds 20 Seconds 30 Seconds Reset User Data No Allows you to clear Express Gate s user data Configuration options No Reset When setting this item to Reset the user data is cleared the next time you enter the Express Gate User data includes the Express Gate s settings as well as any personal information stored by the web browser such as ...

Страница 81: ...es to the non volatile RAM Exit Save Changes Once you are finished making your selections choose this option from the Exit menu to ensure the values you selected are saved to the CMOS RAM An onboard backup battery sustains the CMOS RAM so it stays on even when the PC is turned off When you select this option a confirmation window appears Select OK to save changes and exit 4 8 Exit menu Pressing Es...

Страница 82: ...Chapter 4 BIOS setup Manufacturer ASUSTeK Computer Inc Address No 150 LI DE RD PEITOU TAIPEI 112 TAIWAN Authorised representative in Europe ASUS Computer GmbH Address HARKORT STR 21 23 40880 RATINGEN GERMANY ...

Отзывы: