


ASUS STRIX B250I GAMING
3-3
Chapter 3
3.2.1
EZ Mode
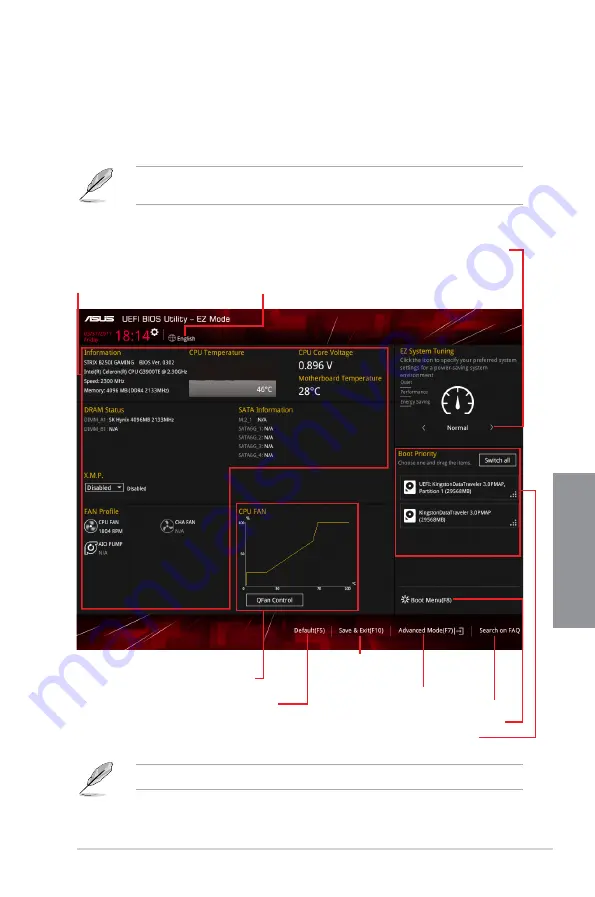
By default, the EZ Mode screen appears when you enter the BIOS setup program. The EZ
Mode provides you an overview of the basic system information, and allows you to select
the display language, system performance, mode and boot device priority. To access the
Advanced Mode, click
Advanced Mode(F7)
or press <F7>.
The default screen for entering the BIOS setup program can be changed. Refer to the
Setup Mode
item in section
Boot menu
for details.
The boot device options vary depending on the devices you installed to the system.
Selects the display language
of the BIOS setup program
Displays the CPU/motherboard temperature,
CPU voltage output, CPU/chassis fan speed,
and SATA information
Displays the system properties of the selected mode.
Click < or > to switch EZ System Tuning modes
Loads optimized
default settings
Displays the CPU Fan’s speed. Click
the button to manually tune the fans
Saves the changes
and resets the system
Click to display boot devices
Selects the boot device priority
Click to go to Advanced mode
Search on the FAQ
Содержание STRIX B250I GAMING
Страница 1: ...Motherboard STRIX B250I GAMING ...
Страница 14: ...xiv ...
Страница 35: ...ASUS STRIX B250I GAMING 2 5 Chapter 2 To uninstall the CPU heatsink and fan assembly ...
Страница 36: ...2 6 Chapter 2 Basic Installation Chapter 2 To remove a DIMM 2 1 4 DIMM installation ...
Страница 37: ...ASUS STRIX B250I GAMING 2 7 Chapter 2 2 1 5 ATX power connection Ensure to connect the 8 pin power plug ...
Страница 38: ...2 8 Chapter 2 Basic Installation Chapter 2 2 1 6 SATA device connection OR ...
Страница 40: ...2 10 Chapter 2 Basic Installation Chapter 2 2 1 9 M 2 installation 1 3 2 ...
Страница 48: ...2 18 Chapter 2 Basic Installation Chapter 2 ...
Страница 70: ...3 22 Chapter 3 BIOS Setup Chapter 3 ...