


Chapter 2: Hardware Information
2-12
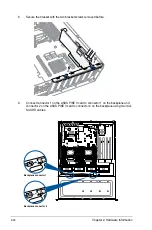
2.4
Hard disk drives
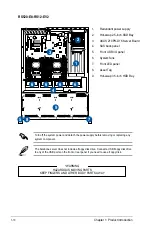
The system supports 8 (RS520-E8-RS8 V2) or 12 (RS520-E8-RS12-EV2) hot-swap 3.5-inch
SATAII/SAS hard disk drives. Two hot-swap 2.5-inch hard disk drives are supported on the
rear panel of RS520-E8-RS12-EV2. The hard disk drive installed on the drive tray connects
to the motherboard SATAII/SAS ports via SATAII/SAS backplane.
1
2
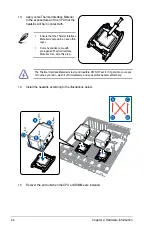
3.
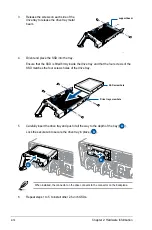
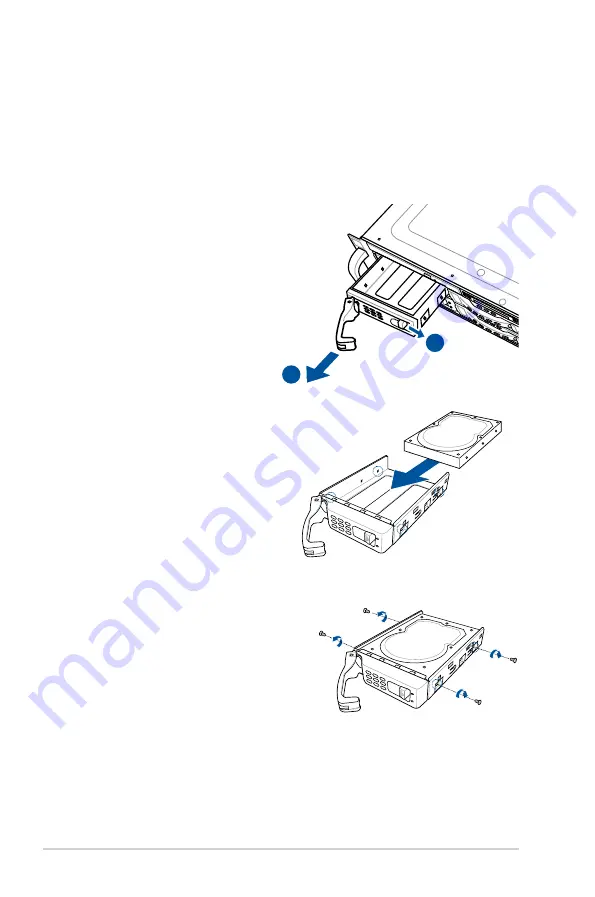
Slide the HDD into the drive tray with
the SATA port facing towards the back
of the expansion slot.
Ensure that the screw holes on the
HDD matches the screw holes on the
tray.
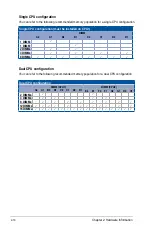
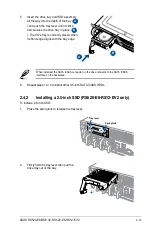
4.
Secure the HDD in the HDD tray with four
screws (two on each side).
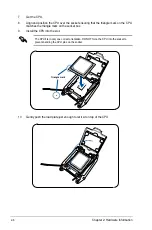
Tray lever
Spring lock
2.4.1
Installing a 3.5-inch HDD
To install a 3.5-inch HDD:
1.
Press the spring lock to release to the
tray lever.
2.
Firmly hold the tray lever then pull the
drive tray out of the bay.
Содержание RS520-E8-RS12-EV2
Страница 1: ...Server User Guide RS520 E8 RS8 V2 RS520 E8 RS12 EV2 ...
Страница 12: ...xii ...
Страница 56: ...Chapter 2 Hardware Information 2 32 ...
Страница 82: ...Chapter 4 Motherboard Information 4 22 ...
Страница 106: ...5 24 Chapter 5 BIOS Setup 5 5 IntelRCSetup menu ...
Страница 136: ...5 54 Chapter 5 BIOS Setup ...
Страница 174: ...6 38 Chapter 6 RAID Configuration ...
Страница 202: ...7 28 Chapter 7 Driver Installation ...
Страница 203: ...A Contact Information Appendices ...


