background image

Chapter 5: Work hard, play harder

91

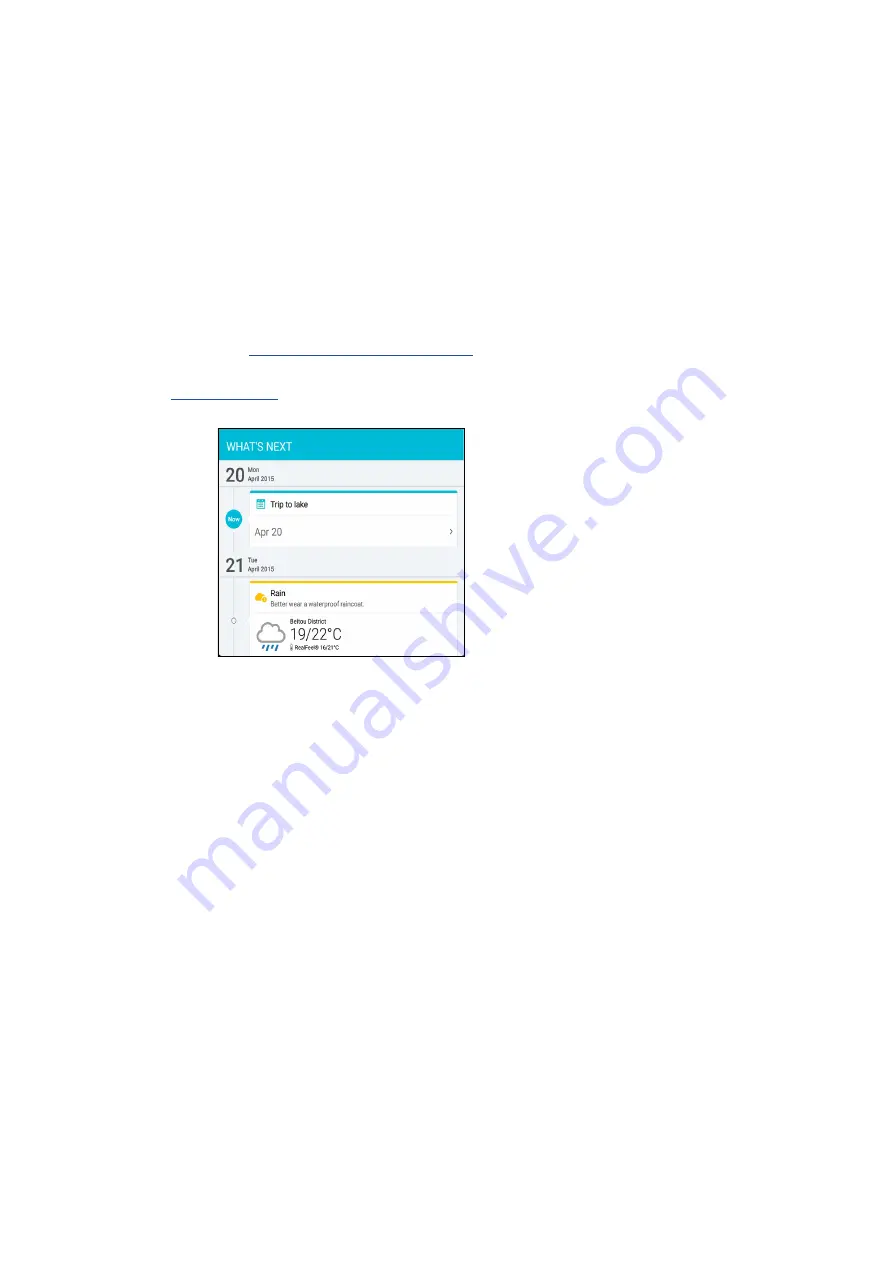
What’s Next

Do not miss out on important events, having fun out in the sun, or getting messages/emails/calls 

(on selected models) from your VIP contacts. Set up your calendar of events, VIP groups, or weather 

update settings to get alerts and reminders of What’s Next. View your What’s Next alerts from the 

Lock screen, System notifications panel, and What’s Next widget or app.

Getting event reminders

To get your What’s Next event reminders and notifications, ensure the following:

 • Set up your VIPs’ events info such as birthdays or anniversaries on the Contacts app. For 

details, see 

Adding an event to a VIP contact

.

 • You can set up an event and set the reminder time in the Calendar app. For details, see 

Creating events

.

Содержание DA01

Страница 1: ...ASUSTablet ...

Страница 2: ...OUT NOTICE AND SHOULD NOT BE CONSTRUED AS A COMMITMENT BY ASUS ASUS ASSUMES NO RESPONSIBILITY OR LIABILITY FOR ANY ERRORS OR INACCURACIES THAT MAY APPEAR IN THIS MANUAL INCLUDING THE PRODUCTS AND SOFTWARE DESCRIBED IN IT Copyright 2015 ASUSTeK COMPUTER INC All Rights Reserved LIMITATION OF LIABILITY Circumstances may arise where because of a default on ASUS part or other liability you are entitled...

Страница 3: ...ging your ASUS Mobile Dock 25 Pairing your ASUS Tablet with ASUS Mobile Dock 26 Pairing your Bluetooth devices with ASUS Mobile Dock 27 Docking your ASUS Tablet 28 Using the special keys 28 Undocking your ASUS Tablet 30 Using the touchscreen 31 ZenMotion 33 2 There s no place like Home Zen Home features 35 Home screen 35 Personalizing your Home screen 37 App shortcuts 37 Widgets 38 Wallpapers 39 E...

Страница 4: ...t time 70 Advanced camera features 74 Using the Gallery 79 Viewing files from your social network or cloud storage 79 Viewing the photo location 80 Sharing files from the Gallery 81 Deleting files from the Gallery 81 Editing images 81 Using MiniMovie 82 Using PlayTo 83 5 Work hard play harder Browser 85 Launching the Browser app 85 Sharing pages 86 Reading the pages later 86 Adding a new tab 86 Bo...

Страница 5: ...d 98 File Manager 99 Accessing the internal storage 99 Accessing the external storage device 99 Accessing Cloud Storage 99 The Cloud 100 ASUS WebStorage 100 Data Transfer 101 ASUS Support 102 6 Fun and entertainment Using a headset 103 Connecting the audio jack 103 Music 104 Launching Music 104 Playing songs 104 Streaming Cloud music 105 Creating a playlist 106 PlayTo other devices 107 7 Staying c...

Страница 6: ... clock 118 Stopwatch 118 Timer 119 9 ZenLink Knowing ZenLink 121 Share Link 122 PC Link 123 Remote Link 125 10 Zen Everywhere Special Zen Tools 129 Calculator 129 Quick Memo 131 Sound Recorder 132 Audio Wizard 134 Splendid 135 Power Saver 138 11 Maintain your Zen Keeping your device up to date 141 Updating your system 141 Storage 141 Backup and reset 141 Securing your ASUS Tablet 142 Appendix Noti...

Страница 7: ... near medical equipment near gas or fuel construction sites blasting sites and other areas Use only AC adapters and cables approved by ASUS for use with this device Refer to the rating label on the bottom of your device and ensure that your power adapter complies with this rating Do not use damaged power cables accessories and other peripherals with your device Keep your device dry Do not use or e...

Страница 8: ... crossed out wheeled bin indicates that the product electrical electronic equipment and mercury containing button cell battery should not be placed in municipal waste Check local regulations for disposal of electronic products Do not throw the battery in municipal waste The symbol of the crossed out wheeled bin indicates that the battery should not be placed in municipal waste DO NOT throw the dev...

Страница 9: ... Water or other liquids can cause the touch screen to malfunction 1 Get your Zen ready Power button Ambient light sensor Volume button Microphone Speaker Headset port Micro USB 2 0 port Accessory connector Micro SIM microSD card compartment Rear camera Audio speakers Front camera Touch screen panel NOTE The card compartment s layout may vary per model The micro SIM card slot is available on select...

Страница 10: ...amage to your device or memory card or both CAUTION Be extra careful when handling a memory card ASUS is not responsible for any data loss or damage incurred to your memory card To install a memory card 1 Orient your device as shown and open the micro SIM microSD card compartment CAUTION Be careful not to damage the slot cover or injure your fingernails when you remove the cover Do not forcibly re...

Страница 11: ...memory card you can access its contents from ASUS File Manager Internal storage sdcard 2 Align and insert a memory card into the memory card slot 3 Push the memory card all the way into the slot until it is seated firmly in place 4 Put back the memory card slot cover ...

Страница 12: ...safely remove it from device To eject the memory card go to Settings Storage Unmount external storage To remove a memory card 1 Orient your device as shown and open the micro SIM microSD card compartment CAUTION Be careful not to damage the slot cover or injure your fingernails when you remove the cover Do not forcibly remove shear or distort the memory card slot cover NOTE The card compartment s ...

Страница 13: ...Chapter 1 Get your Zen ready 13 2 Press the memory card to eject then pull it out 3 Put back the memory card slot cover ...

Страница 14: ...card without a SIM adapter or the use of a cutter CAUTION Be extra careful when handling a micro SIM card ASUS is not responsible for any data loss or damage incurred to your micro SIM card To install a micro SIM card 1 Orient your device as shown and open the micro SIM microSD card compartment CAUTION Be careful not to damage the slot cover or injure your fingernails when you remove the cover Do ...

Страница 15: ...Get your Zen ready 15 2 Align and insert a micro SIM card into the micro SIM card slot 3 Push the micro SIM card all the way into the slot until it is seated firmly in place 4 Put back the memory card slot cover ...

Страница 16: ...loss or damage incurred to your micro SIM card 2 Press the micro SIM card to eject then pull it out To remove a micro SIM card 1 Orient your device as shown and open the micro SIM microSD card compartment CAUTION Be careful not to damage the slot cover or injure your fingernails when you remove the cover Do not forcibly remove shear or distort the memory card slot cover ...

Страница 17: ... device is DC 5 2V 1 35A When using your ASUS Tablet while plugged in to a power outlet the power outlet must be near your device and easily accessible Do not use or expose your ASUS Tablet near liquids rain or moisture Do not use your ASUS Tablet near heating equipment or in places where there is likelihood of high temperature Keep your ASUS Tablet away from sharp objects Do not place objects on ...

Страница 18: ...rge is indicated by the following icons Low Not Charging Charging Full 4 When fully charged disconnect the USB cable from your ASUS Tablet first before unplugging the AC power adapter from the power outlet NOTE You can use your device while charging but it may take longer to fully charge the device Charging your device via USB port of a computer may take longer to fully charge the device If your c...

Страница 19: ...evice starts up Turning your device off To turn your device off 1 If your screen is turned off press the power button to turn it on If your screen is locked unlock the device screen 2 Press and hold the power button then when prompted tap Power off then tap OK Sleep mode To put your device in sleep mode press the power button once until the screen turns off ...

Страница 20: ...h quality photos and videos Do It Later Get hold and act on your important emails SMS messages interesting websites or other important tasks when it is more convenient for you to do so What s Next View meeting details emails and other event alerts or notifications at a glance right from your Home screen Lock Screen or What s Next app ZenLink Get maximum productivity from ZenLink which comprises of...

Страница 21: ...t go ahead and create one Google Account Using a Google Account allows you to fully utilize these Android OS features Organize and see all your information from anywhere Automatically backup all your data Leverage Google services conveniently from anywhere ASUS Account Having an ASUS Account gets you to enjoy the following perks Personalized ASUS support service and warranty extension for register...

Страница 22: ...tery Close all running apps that are not in use When not in use press the power button to put the device in sleep mode Activate Smart Saving in Power Saver app Set audio to Smart Mode Decrease brightness of display Keep the speaker volume to a low level Disable Wi Fi feature Disable Bluetooth feature Disable PlayTo feature Disable GPS Disable the screen auto rotate feature Disable all auto sync fe...

Страница 23: ...perience the best audio quality available from DTS HD Premium Sound Keyboard Power switch Bluetooth pairing switch Audio speakers Keyboard Bluetooth indicator Hinge Two color battery indicator Audio Bluetooth indicator Package contents NOTE If any of the items is damaged or missing contact your retailer ASUS Mobile Dock USER GUIDE ASUS Mobile Dock User Guide ...

Страница 24: ...ge status Refer to the following table for details Left View Keyboard and Audio indicator Color Status Blinking Blue 1 Power on lights off after two 2 seconds 2 Pairing successful lights off after two 2 seconds 3 Speaker on flashes once per five 5 seconds The LED provides a visual indication of the pairing status Refer to the following table for details NOTE In the event that your device becomes u...

Страница 25: ...your device via the grounded power outlet instead IMPORTANT Use only the power adapter and micro USB cable of ZenPad 10 to charge your ASUS Mobile Dock Using a different power adapter and cable may damage your device Peel the protective film off from the power adapter and micro USB cable before charging your ASUS Mobile Dock to prevent risk of injury Ensure that you plug the power adapter to the c...

Страница 26: ...ction 2 Tap the notification to start pairing 1 Turn on your ASUS Mobile Dock and its Bluetooth function by pressing the switch all the way to the right and hold for five 5 seconds NOTE Once paired there is no need to pair your ASUS ZenPad 10 with ASUS Mobile Dock again Power on your ASUS Mobile Dock and the Bluetooth connection is established automatically You may also establish the Bluetooth con...

Страница 27: ...d for five 5 seconds 2 Turn on the Bluetooth feature of your devices 3 Search for the name DA01 SPK and DA01 KB under the list of Bluetooth devices for pairing then select both NOTE If the Bluetooth feature of your device is turned on prior to step 1 refresh and search the list of detected devices again Your ASUS Mobile Dock can memorize up to eight 8 paired Bluetooth devices but can only play mus...

Страница 28: ... IMPORTANT Always pick up the entire assembly from the bottom when your ASUS Tablet is attached to ASUS Mobile Dock Using the special keys The special keys on your ASUS Mobile Dock have standalone functions and some must be used with the function key Fn NOTE The placement of the special keys on the Mobile Dock may vary with country or region but their functions remain the same The function key fea...

Страница 29: ...hen playing music Home PgDp PgUp End Starts playing music from your playlist Resumes or pauses the current playback Home PgDp PgUp End Skips to the next track during playback Home PgDp PgUp End Mutes the speaker Home PgDp PgUp End Decreases the speaker volume Home PgDp PgUp End Increases the speaker volume Home PgDp PgUp End Launches the Settings screen Home PgDp PgUp End Deletes texts Returns to ...

Страница 30: ... your Zen ready 30 Undocking your ASUS Tablet To undock your ASUS Tablet 1 Put the entire assembly on a flat and stable surface 2 Lift your ASUS Tablet from the bottom left corner to detach it from ASUS Mobile Dock ...

Страница 31: ... apps or selecting items Do any of the following To launch an app simply tap on it To select an item such as in File Manager app simply tap on it Moving or deleting items Do any of the following To move an app or widget tap and hold then drag it to the location where you want it to be To delete an app or widget from the Home screen tap and hold then drag it to Remove ...

Страница 32: ...your finger to the left or to the right to switch between screens or to flip through a gallery of images Scroll your finger up or down to go through web pages or list of items Zooming in Spread apart your two fingers on the touch panel to zoom in an image in Gallery or Maps or zoom in a web page ...

Страница 33: ...image in Gallery or Maps or zoom out of a web page Gesture Wi Fi 3G LTE models C Camera S Calendar V Gallery W Browser Z ASUS Booster e Email ZenMotion When your touch screen panel is off with these easy and intuitive gestures you can launch apps on your ASUS Tablet in a snap by simply writing down an alphabet ...

Страница 34: ...Chapter 1 Get your Zen ready 34 ...

Страница 35: ...ally matter to you right from your Home screen 2 There s no place like Home 2 There s no place like Home Swipe the Home screen to the left or right to display the extended Home screen NOTE To add more pages to your Home screen see Extended Home screen Swipe down this area to display System notifications and Quick settings Tap to display Time settings Tap to update Weather settings Tap to open Voic...

Страница 36: ... of your ASUS Tablet MicroSD card Shows that a microSD card is inserted in your ASUS Tablet Screenshots Shows that you took screenshots of your ASUS Tablet Airplane mode Shows that your ASUS Tablet is on Airplane mode Wi Fi Hotspot Shows that Wi Fi hotspot of your ASUS Tablet is enabled Smart Saving mode Shows that Smart Saving mode is enabled NOTE For more details see Power Saver Mute mode Shows ...

Страница 37: ...tcuts make it easier to quickly access your often used or favorite apps from your Home screen You can add remove or group your apps into one folder Adding app shortcuts Add shortcuts to quickly access your often used apps right from your Home screen 1 Tap and hold an empty area on your Home screen and select Apps Widgets 2 From the Apps list tap and hold an app then drag it to an empty area on you...

Страница 38: ...which are small dynamic apps on your Home screen Widgets provide you with quick views of the weather forecast calendar events information battery status and more Adding widgets To add a widget 1 Tap and hold an empty area on your Home screen and select Apps Widgets 2 From the Widgets screen tap and hold a widget then drag it to an empty area on your Home screen Removing widgets From your Home scre...

Страница 39: ...tint 1 Tap and hold an empty area on your Home screen and select Wallpapers 2 Select where you want your wallpaper on your Home screen Lock screen or Home and Lock screen If you do not want to add a background tint to your wallpaper skip to step 5 3 Tick Background tint then adjust the transparency level 4 Tap then select a color 5 Select a wallpaper then tap Apply Tap to apply a background tint T...

Страница 40: ...d Lock screen 3 Select an animated wallpaper then tap Apply NOTE You can also set up your wallpaper settings from Settings Display Extended Home screen Extending your Home screen You can add more pages to extend your Home screen and put more app shortcuts and widgets on it 1 Tap and hold an empty area on your Home screen and select Edit pages 2 Tap to a add a new page If you wish to delete an exte...

Страница 41: ...Select the time zone and manually set the date and time 5 You can opt to use the 24 hour format if you prefer 6 Select the date format that you want to display NOTE See also Clock Setting up your ringtone and alert sounds Set up the sound for your notifications such as messages emails and event alerts You can also choose to enable or disable the touch sounds or screen lock sound To set up the soun...

Страница 42: ... NOTE A blue button indicates that the feature is currently enabled while a gray button indicates a disabled feature The green buttons refer to individual utilities that you can quickly access via the Quick Settings Notification Panel Tap to open Settings Tap these buttons to enable or disable their functions Tap these buttons to quick launch these utilities Slide left or right to adjust the scree...

Страница 43: ... an unchecked box means the opposite 3 Tap to go back and view the current ASUS Quick settings notification panel System notifications From System notifications you can see the latest updates done and system changes made on your ASUS Tablet Most of these changes are data and system related To launch the System notifications panel swipe down with two fingers from the top of your ASUS Tablet Tap thi...

Страница 44: ... Your device s lock screen can also be customized to regulate access to your mobile data and apps Customizing your lock screen If you want to change your lock screen settings from the default Swipe option refer to the following steps 1 Launch Quick settings then tap 2 Scroll down the Settings screen and select Lock screen 3 In the next screen tap Screen lock 4 Tap the screen lock option you would ...

Страница 45: ...buttons to launch other apps on the lock screen using the following steps 1 Launch Quick settings then tap 2 Scroll down the Settings screen and select Lock screen 3 Tap Quick access 4 Under the Quick access screen select which button you would like to customize 5 Tap the app you would like to preset on the quick access button you chose to configure NOTE Scroll up or down to view the current list ...

Страница 46: ... the Voice Search app Using Voice Search you can make voice commands to accomplish the following Search for data and information online or on your ASUS Tablet Launch apps inside your ASUS Tablet Get directions going to a location IMPORTANT Your ASUS Tablet must be connected to the Internet to be able to use this feature Launching Voice Search 1 Launch the Voice Search app by doing any of the follo...

Страница 47: ... results from the Tablet search group If you want to set parameters for the voice search results gathered from your Google account and your ASUS Tablet s data you may do so using the following steps 1 On your ASUS Tablet s Home screen tap Voice Search 2 Tap Settings ...

Страница 48: ...48 Chapter 2 There s no place like Home 3 Tap Tablet search 4 Tick the box of the search groups you would like to include as source when using Voice Search ...

Страница 49: ...Contacts settings Such display options include displaying only those contacts with phones displaying contacts with source account icons sorting list by first last name or viewing contact names as first last names first You can also choose which of these tabs to display on your Contacts screen Favorites Groups or VIP To set up your Contacts settings tap Settings from the Contacts app Setting up you...

Страница 50: ...Device NOTE You can also save the contact to your SIM card on selected models or your email account If you don t have an email account tap Add account then create one 3 Fill in the necessary information such as mobile or home number email address or group where you want to put the contact in 4 After filling in the information and you want to add more contact numbers or email addresses tap Add New ...

Страница 51: ... also get alerts about any unread messages or emails from your VIPs You ll get all these notices as your What s Next alerts and reminders NOTE For more details see What s Next Set up your VIP from the Contacts app home screen To set up your VIP from the Contacts app home screen 1 Launch the Contacts app tap and hold the contact you want to set up as a VIP then select Add to VIP group Tap to add yo...

Страница 52: ...Select the contact or contacts you want to group as VIPs then tap Add The contact or contacts are added to your VIP list Set up your VIP from the VIP screen To set up your VIP from the VIP screen 1 Launch the Contacts app 2 Tap 3 In the VIP screen tap 4 Select the contact or contacts you want to group as VIPs then tap Add The contact or contacts are added to your VIP list ...

Страница 53: ...ents 3 Select the date for the event then tap Set 4 Ensure that you select VIP under the Group field When finished tap Done 5 The contact s special event will appear in your calendar of events If you want to get an event alert set the reminder time in the Calendar app NOTE Set the reminder time for events in Calendar to get What s Next event alerts or reminders Aside from getting upcoming events r...

Страница 54: ...our VIPs Marking your favorite contacts Set your frequently accessed contacts as your favorites to be able to locate them quickly from the Contacts app 1 Launch the Contacts app by doing any of the following a From the Home screen tap ASUS Contacts app b From the All Apps screen tap Contacts app 2 From the Contacts app screen tap then tap 3 Tick the boxes of the contacts that you wish to add to Fa...

Страница 55: ... contact a Email account s b Device c SIM card on selected models 4 Tick to select the contacts that you wish to import and when done tap Import Exporting contacts Export your contacts to any of the storage accounts in your ASUS Tablet 1 Tap Asus Contacts then tap Manage contacts 2 Tap Import export then select from the following exporting options a Export to SIM card on selected models b Export t...

Страница 56: ... network account Sync your social network account to add the social network accounts of your contacts to your ASUS Tablet 1 Do any of the following to launch the Settings app Launch Quick settings then tap Tap Settings 2 From the Settings screen tap your social network account under Accounts section 3 Tick Contacts to sync the social network accounts of your contacts 4 Launch the Contacts app to v...

Страница 57: ...ssaging Sending messages 1 Launch the Messaging app then tap 2 In the To field enter the number or tap to select a contact from your list 3 Start composing your message in the Type message field 4 When you re done tap Replying messages 1 Tap your message alert from your Home screen or Lock screen 2 Start composing your reply in the Type message field 3 When you re done tap Blocking messages Block ...

Страница 58: ...hen tick Data enabled Mobile data and messaging rates apply when forwarding conversations to others Messaging later on selected models You can set an important message as a reply later task and reply to it later from the Do It Later app 1 In the message screen tap 2 Tap Reply later The message is added to your Do It Later tasks 3 To retrieve and reply to the email tap Asus Do It Later from the Hom...

Страница 59: ...ontact s profile page tap 3 Select all the contact profiles that you think should be linked to one profile then tap Link You can now view and retrieve all your contact s info under one profile Omlet Chat Omlet Chat is an open messaging and mobile sharing app that lets you chat with friends on the spot It also allows you to manage your data by storing them securely to your private Cloud accounts NO...

Страница 60: ...rmation 6 Tap to display the Omlet Chat menu Using your email account To register using your email account 1 Tap then tap Omlet Chat 2 On the Sign Up screen tap Connect a different account here then tap Email 3 Key in your email account then tap Next Omlet Chat app will send a confirmation email to your email account 4 From your email account open the confirmation email from Omlet then tap the lin...

Страница 61: ...ing your Omlet contacts from Contacts app for more information 6 Tap to display the Omlet Chat menu Sending Omlet invites Invite your friends to use Omlet Chat by sending them Omlet invites to their email or Facebook account Sending Omlet invites via Facebook To send an Omlet invite via Facebook 1 From the Omlet Chat screen tap to display Omlet Chat menu 2 Tap Contacts then tap Add Invite friends ...

Страница 62: ...ct that you wish to chat then tap Sending a chat message To send a chat message key in your message in What s up field then tap Sending a voice message To send a voice message tap and hold while saying your message then release to send Sending a virtual sticker To send a virtual sticker tap then select from the available virtual stickers NOTE You can download more virtual stickers from Sticker Sto...

Страница 63: ... Camera app and send the captured picture Tap to use or add more drawer apps to the drawer app list Tap to edit and send a photo Tap to create a sticker from a saved picture Tap to create Bbbler stickers and send to your thread More drawer apps Aside from the default apps in the drawer app list there are other apps listed in your Omlet Chat app that you can use Simply tap from the chat thread then...

Страница 64: ...ntly saved to your device You can view the shared photos using the Gallery app To view the shared photos 1 Launch the Gallery app by doing any of the following a From the Home screen tap ASUS Gallery app b From the All Apps screen tap Gallery app 2 From the Gallery main screen tap then select from the following options a All shared photos b Chat room c Sharer ...

Страница 65: ... touch 65 Viewing all shared photos Tap All shared photos to view all photos shared by you and your Omlet Chat contacts Viewing shared photos by chat room Tap Chat room to view photos shared by chat room or social hotspot ...

Страница 66: ...app you can also view and chat with your Omlet contacts using the Contacts app The integration of your Omlet contacts to the Contacts app makes it easier for you to look up and chat to your Omlet contacts even without launching Omlet Chat app To view Omlet Contacts from Contacts app 1 Launch the Contacts app by doing any of the following a From the Home screen tap ASUS Contacts app b From the All ...

Страница 67: ...roups except Omlet Chat then tap anywhere Your Contacts screen displays all Omlet contacts 4 Tap an Omlet contact to select and view the contact details or chat with that contact directly 2 Tap Contacts to display dropdown list to view the contact groups ...

Страница 68: ...let Chat app uploads your data you have to sync your Cloud account to Omlet Chat app first To do this 1 From the Omlet Chat menu tap Settings 2 Tap Cloud Storage then select from the following Cloud services a Dropbox b Box c Baidu PCS d OneDrive e Google Drive 3 Key in your username and password to log in to your Cloud account Follow the onscreen instructions to sync your Cloud account with Omlet...

Страница 69: ...s Camera app Refer to any of the steps below to open the Camera app From the lock screen Drag down until the camera app is launched From the home screen Tap Using the volume key While your ASUS Tablet is on sleep mode double click the volume key to wake it up and immediately launch the Camera app NOTE Before using the volume key to launch the Camera app enable this function from Settings Lock scre...

Страница 70: ...rt to view the basic tutorial about using Camera 2 After tapping either of these options you will then proceed to the Remember Photo Locations screen Photo Locations After going through the Tutorial screen the Remember Photo Locations screen appears to help you create automatic location tags for your images Refer to the following steps to proceed from this screen 1 On the Remember Photo Locations ...

Страница 71: ... Your ASUS Tablet s camera is equipped with auto scene detection and auto image stabilizer features It also features a video stabilization function that helps prevent shakiness while video recording Tap the icons to start using your camera and explore the image and video features of your ASUS Tablet Record videos Take photos See the gallery ...

Страница 72: ...etection or set Metering mode and Focus mode under this option Image settings Adjust the appearance of your captured images by configuring your camera s settings using the steps below IMPORTANT Apply the settings first before taking images 1 On the camera s home screen tap 2 Scroll down and configure the available options Image Configure the image quality using these options ...

Страница 73: ...tings Adjust the appearance of your recorded videos by configuring your camera s settings using the steps below IMPORTANT Apply the settings first before taking images 1 On the camera s home screen tap 2 Scroll down and configure the available options Image Configure the video quality using these options ...

Страница 74: ...Camera app s home screen tap HDR 2 Tap to start capturing HDR photos Beautification Have fun during and after taking photos of your family and friends using the Beautification feature of your ASUS Tablet When enabled this feature allows you to make live beauty enhancements on your subject s face before you press the shutter button Capturing Beautification photos 1 From the Camera app s home screen...

Страница 75: ...art recording a video Night Take well lit photos even on night time or on low light situations using the Night feature of your ASUS Tablet NOTE Keep your hands steady before and while the ASUS Tablet is capturing the image to prevent blurry results Capturing Night photos 1 From the Camera app s home screen tap Night 2 Tap to start capturing Night photos Depth of Field Take macro shots with a soft ...

Страница 76: ...o and tap to select your preferred effect then tap to save the photo Selfie Take advantage of your rear camera s high megapixel specs without worrying about pressing the shutter button Using face detection you can set your ASUS Tablet to detect up to four faces using the rear camera then automatically capture your selfie or group selfie Capturing Selfie photos 1 From the Camera app screen tap Self...

Страница 77: ... app s home screen tap Panorama 2 Tap then pan your ASUS Tablet to the left or right to capture the scenery NOTE While panning your ASUS Tablet a timeline of thumbnails appears on the lower part of your screen as it captures the scenery 3 Tap when finished Miniature Simulate the tilt shift effect of DSLR lenses via the Miniature feature Using this feature allows you to focus on specific areas of y...

Страница 78: ...after pressing the shutter button automatically detecting faces on the image for comparison Capturing All smiles photos 1 From the Camera app s home screen tap All smiles 2 Tap to start capturing photos that can be edited using All Smiles 3 Touch the subject s face then select the subject s best facial expression 4 Swipe down from the top then tap to save the photo Time lapse The time lapse video ...

Страница 79: ... files on your ASUS Tablet according to their album folders To view the media files from other locations accessible via your ASUS Tablet 1 From the Gallery screen tap 2 Tap any of the following source locations to view their respective media files NOTE You can download photos to your ASUS Tablet from your cloud account and use them as your wallpaper or a contact s cover image For details on adding...

Страница 80: ...etails include the area where the photos are taken as well a map of the location via Google Map or Baidu in China only To view the details of a photo 1 Turn on the location access from Settings Location 2 Ensure that you have shared your location to Google Map or Baidu 3 Launch the Gallery app and select the photo whose photo details you want to view 4 Tap the photo then tap ...

Страница 81: ... 3 Tap the files you want to delete A check mark appears on top of the image you select 4 Tap Editing images The Gallery also features its own image editing tools that you can use to enhance images saved on your ASUS Tablet 1 From the Gallery screen tap the folder where the files are located 2 After opening the folder tap the image you want to edit 3 Once the image is opened tap it again to show i...

Страница 82: ... MiniMovie from a photo folder 1 Launch Gallery then tap to select the location of your photo folder 2 Select the photo folder then tap Auto MiniMovie 3 Select the MiniMovie theme you would like to use for your photo slideshow 4 After selecting a theme tap to save the slideshow 5 You can then share the slideshow to social network sites or instant messaging apps such as Facebook Google Plus or Omle...

Страница 83: ...review 5 After selecting a theme tap to save the slideshow You can access your saved slideshows from ASUS File Manager Movies MiniMovie 6 You can then share the slideshow to social network sites or instant messaging apps such as Facebook Google Plus or Omlet Chat Using PlayTo Play files from your Gallery to a compatible streaming device using PlayTo 1 From the Gallery screen tap or the folder wher...

Страница 84: ...Chapter 4 Your precious moments 84 ...

Страница 85: ...ts Smart Reader feature you can pleasurably read your favorite web contents online or offline without any distracting items such as banner ads You can also mark an interesting page as a read later task which you can retrieve from the Do It Later app and read at your convenient pace IMPORTANT Before doing any Internet surfing or Internet related activities ensure that your ASUS Tablet is connected ...

Страница 86: ... NOTE For details on browsing Read later pages see Catching up on my online reading now Adding a new tab Hide the current website and open a new window to continue surfing or browsing another website 1 From the current page tap New tab or tap beside the current tab 2 Enter the URL address in the URL field and continue enjoying browsing the Internet from your ASUS Tablet 3 If you want to do add ano...

Страница 87: ...ail account or send and receive emails from added accounts For more details see Staying connected Setting up email accounts Set up your existing personal or work email account so you can receive read and send emails from your ASUS Tablet 1 From the Home screen tap Email to launch the Email app 2 Tap the mail provider you want to set up 3 Key in your email address and password and tap Next NOTE Wai...

Страница 88: ...ction to complete this setup process Setting up a Gmail account Set up your Gmail account to get into Google related services and apps as well as receive send and browse emails right from your ASUS Tablet 1 Tap Google then tap Gmail 2 Tap Existing and key in your existing Gmail account and password then tap NOTE Tap New if you do not own a Google account When signing in you have to wait while your...

Страница 89: ...ON You ll get a countdown notice on the System notifications panel as to the days left until this event takes place NOTE For details on the System notifications panel see System notifications 5 On the Reminders field select the time that you want to get an alert or reminder about the event 6 Once finished tap Done to save and exit Adding accounts to Calendar Aside from creating an event logged on ...

Страница 90: ... screen input all the necessary details of your event then tap Done NOTE Your online account must already be added to Calendar before you can proceed with the following steps For more details see Adding accounts to Calendar Enabling alert reminders for events Turn on the alert function from the Calendar app to get alert reminders and notifications for special events such as birthdays anniversaries...

Страница 91: ...d reminders of What s Next View your What s Next alerts from the Lock screen System notifications panel and What s Next widget or app Getting event reminders To get your What s Next event reminders and notifications ensure the following Set up your VIPs events info such as birthdays or anniversaries on the Contacts app For details see Adding an event to a VIP contact You can set up an event and se...

Страница 92: ...will be synced with the Calendar app NOTE For more details see Email and Calendar IMPORTANT Your ASUS Tablet must be connected to a Wi Fi or mobile network to get emailed invites or event related alerts For more details see Staying connected To accept or decline an invite 1 Tap your email invite to open it 2 Tap Yes to accept or No to decline the invite Your reply will be emailed to the event orga...

Страница 93: ...hift in event schedule These event related alerts will be posted on the Lock screen System notifications panel and What s Next widget or app Start event alert A few minutes before the event you ll get a reminder that the event is about to start You can call to give the organizer or host a heads up if you re running late Cancelled event alert You ll get a cancellation alert when the organizer or ho...

Страница 94: ...e measures against harmful ultra violet rays or air pollutants 1 Before getting the weather updates ensure the following Wi Fi or mobile network is turned on when you are indoors and GPS is turned on when you are outdoors Turn on the location access from Settings Location access 2 Launch the Weather app in any of these two ways Tap Weather From your ASUS Tablet s home screen tap the weather icon 3...

Страница 95: ...uTube and IMDb Not all apps can share and add tasks to Do It Later Adding to do tasks Create important to do tasks to organize your work or social activities in your professional or social life 1 From the Home screen tap Asus Do It Later 2 Tap then fill in the necessary information 3 If you want to set the importance level select High in the Importance field 4 When you re done tap OK Prioritizing ...

Страница 96: ...er Replying now on selected models When you ve previously set an SMS message as a reply later task you can retrieve it and reply to the message when it s convenient from the Do It Later app 1 From the Home screen tap Asus Do It Later 2 Select the SMS message that you want to send a reply to then tap Reply now NOTE For details on setting pages as reply later tasks see Messaging later on selected mo...

Страница 97: ...tanding icons Depending on your selected input mode these icons appear as you take down your notes on SuperNote Select this type mode when you want to use the onscreen keyboard to enter your notes Select this write mode when you want to scribble or write your notes Select this draw mode when you want to create drawings or doodles When in write or type mode tap this icon to select text weight and c...

Страница 98: ...tails to proceed with syncing your notebook to the Cloud 4 Once the notebook has been successfully synced to the Cloud the Cloud icon appears on top of the shared notebook Sharing a note to the Cloud Aside from your notebook you may also share individual notes from your Supernote to your Cloud storage account To do this 1 Launch the notebook that contains the note you want to share 2 Tap and hold ...

Страница 99: ...f your ASUS Tablet then tap an item to select Accessing the external storage device To access the external storage device 1 Insert the microSD card into your ASUS Tablet 2 Tap File Manager 3 Tap MicroSD to view the contents of your microSD card Accessing Cloud Storage IMPORTANT Ensure that Wi Fi or mobile network on selected models is enabled on your ASUS Tablet For details see Staying connected T...

Страница 100: ...sign in to ASUS WebStorage and get free cloud storage Automatically upload newly captured photos for instant sharing sync files among different devices or share files via your ASUS WebStorage account NOTE To enjoy the auto upload function enable Instant Upload from Settings Instant Upload in your ASUS WebStorage IMPORTANT Ensure that Wi Fi or mobile network on selected models is enabled on your AS...

Страница 101: ...et via Bluetooth technology To use Data Transfer 1 Pair your old mobile device with your ASUS Tablet via Bluetooth NOTE For more details on pairing devices see Pairing your ASUS Tablet to a Bluetooth device 2 From the All apps screen tap Data transfer 3 Tap Transfer Wizard then follow the onscreen instructions to complete the Data Transfer process ...

Страница 102: ...nd answers from FAQs Frequently Asked Questions or directly interact with other Zen UI users to find and share solutions about ZenUI 2 0 apps To access ZenUI Help 1 Tap ASUS Support 2 Tap ZenUI Tips then select the app that you want to find answers for ...

Страница 103: ...t of your device WARNING Do not insert other objects into the audio jack port Do not insert a cable with electric power output into the audio jack port Listening at a high volume for long periods can damage your hearing NOTE We highly recommend to use only compatible headsets or the bundled headset with this device Unplugging the audio jack while listening to music automatically pauses the music p...

Страница 104: ...ngs To play a song 1 From the Music app tap Music then select Songs You can also select these other options on how you want to browse your music files Album Artist Genres Composer or Folder 2 From your list tap the song that you want to play Tap Play All if you want to play all songs 3 Swipe up from the song title bar to get a full screen of the song that s currently playing NOTE To add several so...

Страница 105: ...et better audio for your songs Sleep timer Set the time when the music will stop playing Settings Tap this option to configure the Music settings Feedback Help Get answers to your questions and you can send us your feedbacks Streaming Cloud music Register or sign in to a cloud account and stream music from your cloud account to your ASUS Tablet IMPORTANT Ensure that Wi Fi or mobile network is enab...

Страница 106: ... tap Save Adding songs to a playlist You can add several songs to your playlist from your local source internal and external storages or cloud accounts 1 From the Music home screen tap 2 Under Playlist tap My playlist then tap the name of your playlist 3 Tap Add songs 4 Tap the music source where you want to get your songs from to add to your playlist 5 Select how you would want to browse your mus...

Страница 107: ...ream music from your ASUS Tablet to other Miracast or DLNA enabled devices nearby To use PlayTo 1 From a currently playing song tap PlayTo 2 Tap the device that you want to stream music to Music from your ASUS Tablet will play or stream on the other device 3 To stop PlayTo tap Disconnect ...

Страница 108: ...Chapter 6 Fun and entertainment 108 ...

Страница 109: ...lide the Wi Fi switch to the right to turn on the Wi Fi NOTE You can also enable the Wi Fi from Quick Settings screen Refer to section Quick settings on how to launch Quick Settings screen Connecting to a Wi Fi network 1 On the Settings screen tap Wi Fi to display all detected Wi Fi networks 2 Tap a network name to connect to it For a secured network you may be prompted to key in a password or oth...

Страница 110: ...ur ASUS Tablet to send or receive files and stream multimedia files with other smart devices over short distances With Bluetooth you can share your media files with your friends smart devices send data for print with a Bluetooh printer or play music files with a Bluetooth speaker Enabling Bluetooth 1 Do any of the following to launch the Settings screen Launch Quick settings then tap Tap Settings ...

Страница 111: ...e the user guide that came with your device to learn how to enable its Bluetooth and and set it to discoverable 2 Turn on the Bluetooth of your ASUS Tablet to make it visible to other Bluetooth devices 3 In the list of available devices tap the Bluetooth device that you want to pair with 4 Ensure that the same pairing code is shown on both devices then tap Pair NOTE Turn off the Bluetooth feature ...

Страница 112: ...TE Internet access via tethering may be slower than the standard Wi Fi or mobile connection Only a limited number of mobile devices can tether to your ASUS Tablet for Internet access Turn off the tethering feature when you re not using it to help save battery power Wi Fi Hotspot Turn your ASUS Tablet into a Wi Fi Hotspot to link with other devices 1 Do any of the following to launch the Settings s...

Страница 113: ... and the other device 2 Pair both devices NOTE For details see Pairing your ASUS Tablet to a Bluetooth device 3 From the Settings screen tap More Tethering then silde Bluetooth tethering to ON 4 From the Tethering screen tap Portable Wi Fi hotspot to turn on the Wi Fi hotspot on your ASUS Tablet 5 Connect other devices to your ASUS Tablet s hotspot connection the same way you connect to a Wi Fi ne...

Страница 114: ...ted display you want to use with your ASUS Tablet 2 Launch Quick settings on your ASUS Tablet then tap PlayTo 3 Refer to the SSID shown on your streaming supported display and select the same SSID on your ASUS Tablet to start pairing Once the connection is made your streaming supported display shows the same content currently shown on your ASUS Tablet From Settings 1 Tap Settings 2 Tap More then t...

Страница 115: ...the weather app Using Weather you can also check other weather details from around the world Launching the Weather app From your Home screen launch the Weather app using either of the following options Tap Weather From your ASUS Tablet s home screen tap the weather icon Travel and Maps 8 8 Travel and Maps ...

Страница 116: ...n the What s Next widget or app and on the Calendar app NOTE For more details see Getting the weather updates Tap to search for a city s weather info Tap to get the area s current weather info refresh the weather info edit the location list or configure the weather settings Swipe up to see other weather information Swipe left or right to see the weather information of other cities in your location...

Страница 117: ...ock app using either of the following options Tap Clock From your ASUS Tablet s home screen tap the digital clock display World Clock Tap to access the world clock settings of your ASUS Tablet Tap this to add a new city to mark on your world clock s map Tap this to access the Clock app settings Tap this to edit the cities marked on your world clock Tap this to set your clock on night mode ...

Страница 118: ...tings of your ASUS Tablet Stopwatch Tap to use your ASUS Tablet as a stopwatch Tap this button to start running the stopwatch feature Tap this to set a new alarm time Tap this to access the settings of the alarm clock feature Tap this to delete any of the previously set alarms ...

Страница 119: ...multiple timer options for your ASUS Tablet To do this follow the steps below Setting the timer 1 Tap to access the timer feature of your ASUS Tablet 2 Use the numeric keypad to input your target time then tap start to start the timer Numeric keypad ...

Страница 120: ...Chapter 8 Travel and Maps 120 ...

Страница 121: ...SUS exclusive ZenLink for maximum productivity With these ZenLink apps you can connect with other devices to share and receive files Your ZenLink comprises of the following apps Share Link PC Link and Remote Link NOTE Some of these ZenLink apps may not be available in your ASUS Tablet ...

Страница 122: ...are larger than 100 MB and lets you share or receive multiple files at the same time Share Link app sends and receives files faster than using Bluetooth Sharing files 1 From your Home screen tap ZenLink Share Link 2 Tap Send file then select from the options that appear on your screen 3 Tap the files that you want to send then tap Share selected files Send 4 After your ASUS Tablet detects the othe...

Страница 123: ...link asus com to download and install PC Link Using PC Link To use PC Link 1 Connect your ASUS Tablet to your computer using a USB cable 2 In your ASUS Tablet a pop up screen Allow USB debugging appears Tap OK to allow connection between your computer and your ASUS Tablet 3 From your computer s desktop launch PC Link then click Connect 4 On the PC Link screen click OK When connected you can access...

Страница 124: ... mirrored ASUS Tablet screen on your computer screen Click this icon to increase or decrease the volume Click this icon to capture a screenshot Click this icon to wake your ASUS Tablet or put it to sleep Click this icon to check for PC Link updates and assign a path for your screenshots ...

Страница 125: ...s com to download PC Link and install it to your computer Ensure to pair your computer and your ASUS Tablet first before using Remote Link Using Remote Link To use Remote Link 1 From your Home screen tap then tap Remote Link 2 Tap Search device then select the device that you want to connect Remote Link touch pad Tap to activate ASUS Smart gesture and navigate your computer Slide your finger acros...

Страница 126: ...go back to previous slide Tap this button to go to next slide Remote Link Windows Media Player controller Tap to control the Windows Media player Tap this button to go back to previous song music file Move this slider to increase decrease the volume Tap this button to go to next song music file Move this seeking button to select a part of a song music file that you want to listen or play ...

Страница 127: ...keyboard input Tap to use keyboard input You can also use the microphone icon for voice input Key in your message in this field Tap this button to send the message to your computer Tap this button to key in your message via voice input ...

Страница 128: ...Chapter 9 ZenLink 128 ...

Страница 129: ... swipe and a tap is all it takes to launch your Calculator When you open the Quick settings panel the Calculator icon is there visibly on top of the list Tap it to get started with your computations Zen Everywhere 10 10 Zen Everywhere Tap this to enable Calculator ...

Страница 130: ...Chapter 10 Zen Everywhere 130 Calculator screen ...

Страница 131: ...member After creating notes you can share them via Share Link and social media sites or turn them into a task inside Do It Later Creating a sticky note You can turn Quick Memo notes into a sticky note so you can view them anywhere on your ASUS Tablet To create a sticky note just tap on the pin icon on the upper right corner of Quick Memo after creating your note ...

Страница 132: ...ing your ASUS Tablet by enabling the Sound Recorder app Launching Sound Recorder To launch Sound Recorder tap Sound Recorder Tap to customize the Sound Recorder settings Tap to start audio recording During recording tap this to temporarily stop or pause the recording ...

Страница 133: ...the recording Tap to play pause your selected recording Tap to share rename or delete your selected recording Recording List From the Recording List you can play rename share or deleted a saved audio recording file View your recording list at the right side of the Sound Recorder main screen Tap to resume the recording Tap to save the recording ...

Страница 134: ...ASUS Tablet for a clearer audio output that fits actual usage scenarios Using Audio Wizard To use AudioWizard 1 Tap ASUS Audio Wizard 2 In the AudioWizard window tap the sound mode you want to activate When enabled the ASUS Tablet auto switches to the best audio quality for the currently running ASUS app ...

Страница 135: ...th its preset screen color modes Using Splendid To use Splendid 1 From your Home screen tap ASUS Splendid 2 Select any of these screen color modes Balance Bluelight Filter Vivid and Customized Balance mode This mode provides a balanced display of color on your ASUS Tablet Move to adjust the color temperature Tap to reset to factory defaults ...

Страница 136: ...color of your ASUS Tablet Bluelight Filter mode This mode provides a mild paper like display that reduces eye strain for a comfortable reading experience on your ASUS Tablet Move to adjust the color temperature Tap to reset to factory defaults Tap to reset to factory defaults Move to adjust the color temperature ...

Страница 137: ...mized mode This mode allows you to adjust the screen display based on your preferred color temperature hue and saturation Move to adjust the color temperature Move to adjust saturation Tap to reset to factory defaults Move to adjust hue ...

Страница 138: ...with some smart power saving options 1 Do any of the following to launch Power Saver Swipe down with two fingers from the top to launch the Quick Settings panel then tap Smart saving Tap ASUS Power Saver 2 Slide Smart saving to ON 3 Select any of these modes Ultra saving mode Disconnects the network connection when your ASUS Tablet is idle to fully maximize its battery life Optimized mode Extends ...

Страница 139: ... apps or enable the auto disconnection of your network when your ASUS Tablet is asleep 1 From Power Saver tick Customized mode 2 From Reduce brightness set the brightness level in percentage 3 If you want to enable the auto disconnection of your network tick IM and other apps using push notification Your ASUS Tablet will automatically disconnect from your network when it is idle and will resume th...

Страница 140: ...Chapter 11 Maintain your Zen 140 ...

Страница 141: ...t connection to transfer or download your files on an online storage Use the bundled USB cable to copy files to or from the computer to your ASUS Tablet Backup and reset Back up data Wi Fi passwords and other settings to Google servers using your ASUS Tablet 1 Tap then tap Settings Backup reset 2 From the Backup reset window you can Backup my data This feature backs up your data Wi Fi passwords an...

Страница 142: ...rity unlocking options that the ASUS Tablet offers you 1 Tap then tap Settings Lock Screen 2 Tap Screen lock then select an option to unlock your ASUS Tablet NOTE Refer to section Unlock screen options for more information To deactivate the unlock screen option that you set tap None on Choose screen lock screen Unlock screen options Choose from these options to unlock your ASUS Tablet Swipe Swipe ...

Страница 143: ... a PIN IMPORTANT Ensure to remember the PIN that you created to unlock your device Pattern Slide your finger on the dots and create a pattern IMPORTANT You can create a pattern with a minimum of four dots Ensure to remember the pattern that you created to unlock your device ...

Страница 144: ...rom the mode of screen lock you can also do the following on the Lock screen window Quick Access Slide the Quick Access switch to ON to launch apps on the lock screen Instant camera Slide the Instant camera switch to ON to launch the Camera app even if your ASUS Tablet is in idle mode by pressing the volume button twice Owner info Tap this to edit and key in the information that you want to appear...

Страница 145: ... mobile carrier and provide the information to blacklist the unauthorized use of your ASUS Tablet To display your ASUS Tablet s identity 1 Tap then tap Settings 2 On the Settings screen slide down then tap About The About screen displays the status legal information model number operating system version hardware and software information of your ASUS Tablet 3 To see the serial number SIM contact nu...

Страница 146: ...Chapter 11 Maintain your Zen 146 ...

Страница 147: ...ons However there is no guarantee that interference will not occur in a particular installation If this equipment causes harmful interference to radio or television reception which can be determined by turning the equipment off and on the user is encouraged to try to correct the interference by doing one or more of the following measures Reorient or relocate the receiving antenna Increase the sepa...

Страница 148: ...subject to the condition that this device does not cause harmful interference This device and its antenna s must not be co located or operating in conjunction with any other antenna or transmitter except tested built in radios The Country Code Selection feature is disabled for products marketed in US Canada Operation is subject to the following two conditions 1 this device may not cause interferen...

Страница 149: ...ns fil de façon à minimiser les contacts humains lors du fonctionnement normal Ce périphérique a été évalué et démontré conforme aux limites SAR Specific Absorption Rate Taux d absorption spécifique d IC lorsqu il est installé dans des produits hôtes particuliers qui fonctionnent dans des conditions d exposition à des appareils portables Ce périphérique est homologué pour l utilisation au Canada P...

Страница 150: ...es is the Specific Absorption Rate SAR and the SAR limit is 2 0 W Kg averaged over 10 gram of body tissue It meets the requirements of the International Commission on Non Ionizing Radiation Protection ICNIRP For next to body operation this device has been tested and meets the ICNRP exposure guidelines and the European Standard EN 50566 and EN 62209 2 SAR is measured with the device at a separation...

Страница 151: ...r bodily injury including death and damage to real property and tangible personal property or any other actual and direct damages resulted from omission or failure of performing legal duties under this Warranty Statement up to the listed contract price of each product ASUS will only be responsible for or indemnify you for loss damages or claims based in contract tort or infringement under this War...

Страница 152: ...ithin 10 minutes user inactivity Users could wake your computer through click the display or press the power button Please visit http www energystar gov powermanagement for detail information on power management and its benefits to the environment In addition please visit http www energystar gov for detail information on the ENERGY STAR joint program For DTS patents see http patents dts com Manufa...

Страница 153: ...bile devices is the Specific Absorption Rate SAR and the SAR limit is 2 0 W Kg averaged over 10 gram of body tissue It meets the requirements of the International Commission on Non Ionizing Radiation Protection ICNIRP For next to body operation this device has been tested and meets the ICNRP exposure guidelines and the European Standard EN 50566 and EN 62209 2 SAR is measured with the device at a ...

Страница 154: ... a default on ASUS part or other liability you are entitled to recover damages from ASUS In each such instance regardless of the basis on which you are entitled to claim damages from ASUS ASUS is liable for no more than damages for bodily injury including death and damage to real property and tangible personal property or any other actual and direct damages resulted from omission or failure of per...

Страница 155: ...m our commitment to the highest standards for protecting our environment We believe in providing solutions for you to be able to responsibly recycle our products batteries other components as well as the packaging materials Please go to http csr asus com english Takeback htm for detailed recycling information in different regions For Model P01T Prevention of Hearing Loss To prevent possible hearin...

Страница 156: ...recognition of conformity The highest CE SAR value for the device is 1 140 W Kg This equipment may be operated in For DTS patents see http patents dts com Manufactured under license from DTS Licensing Limited DTS DTS HD the Symbol DTS or DTS HD and the Symbol together are registered trademarks and DTS HD Premium Sound is a trademark of DTS Inc DTS Inc All Rights Reserved AT BE BG CH CY CZ DE DK EE...

Страница 157: ...nd the European Standard EN 50566 and EN 62209 2 SAR is measured with the device at a separation of 1 5 cm to the body while transmitting at the highest certified output power level in all frequency bands of the mobile device A minimum separation distance of 1 5 cm must be maintained between the user s body and the device including the antenna during body worn operation to comply with the RF expos...

Страница 158: ...ABLE FOR ANY OF THE FOLLOWING 1 THIRD PARTY CLAIMS AGAINST YOU FOR DAMAGES 2 LOSS OF OR DAMAGE TO YOUR RECORDS OR DATA OR 3 SPECIAL INCIDENTAL OR INDIRECT DAMAGES OR FOR ANY ECONOMIC CONSEQUENTIAL DAMAGES INCLUDING LOST PROFITS OR SAVINGS EVEN IF ASUS ITS SUPPLIERS OR YOUR RESELLER IS INFORMED OF THEIR POSSIBILITY Power Safety Requirement Products with electrical current ratings up to 6A and weigh...

Страница 159: ...ons may cause harmful interference to radio communications However there is no guarantee that interference will not occur in a particular installation If this equipment causes harmful interference to radio or television reception which can be determined by turning the equipment off and on the user is encouraged to try to correct the interference by doing one or more of the following measures Reori...

Страница 160: ...5 EC The Declaration of Conformity can be downloaded from http support asus com Limitation of Liability Circumstances may arise where because of a default on ASUS part or other liability you are entitled to recover damages from ASUS In each such instance regardless of the basis on which you are entitled to claim damages from ASUS ASUS is liable for no more than damages for bodily injury including ...

Страница 161: ...ting our environment We believe in providing solutions for you to be able to responsibly recycle our products batteries other components as well as the packaging materials Please go to http csr asus com english Takeback htm for detailed recycling information in different regions Green ASUS notice ASUS is devoted to creating environment friendly products and packaging to safeguard consumers health ...

Страница 162: ...1 893 V1 7 1 2012 06 EN 302 544 2 V1 1 1 2009 01 EN 302 623 V1 1 1 2009 01 EN 50360 2001 EN 62479 2010 EN 50385 2002 EN 62311 2008 EN 300 330 1 V1 7 1 2010 02 EN 300 330 2 V1 5 1 2010 02 EN 301 489 1 V1 9 2 2011 09 EN 301 489 3 V1 6 1 2013 08 EN 301 489 4 V1 4 1 2009 05 EN 301 489 7 V1 3 1 2005 11 EN 301 489 9 V1 4 1 2007 11 EN 301 489 17 V2 2 1 2012 09 EN 301 489 24 V1 5 1 2010 10 EN 302 326 2 V1...

Страница 163: ...1 893 V1 7 1 2012 06 EN 302 544 2 V1 1 1 2009 01 EN 302 623 V1 1 1 2009 01 EN 50360 2001 EN 62479 2010 EN 50385 2002 EN 62311 2008 EN 300 330 1 V1 7 1 2010 02 EN 300 330 2 V1 5 1 2010 02 EN 301 489 1 V1 9 2 2011 09 EN 301 489 3 V1 6 1 2013 08 EN 301 489 4 V1 4 1 2009 05 EN 301 489 7 V1 3 1 2005 11 EN 301 489 9 V1 4 1 2007 11 EN 301 489 17 V2 2 1 2012 09 EN 301 489 24 V1 5 1 2010 10 EN 302 326 2 V1...

Страница 164: ...13 10 EN 301 908 13 V6 2 1 2013 10 EN 300 330 2 V1 5 1 2010 02 EN 300 330 1 V1 7 1 2010 02 EN 302 623 V1 1 1 2009 01 EN 50360 2001 EN 62479 2010 EN 62209 2 2010 EN 62311 2008 EN 301 489 1 V1 9 2 2011 09 EN 301 489 3 V1 6 1 2013 08 EN 301 489 4 V1 4 1 2009 05 EN 301 489 7 V1 3 1 2005 11 EN 301 489 9 V1 4 1 2007 11 EN 301 489 17 V2 2 1 2012 09 EN 301 489 24 V1 5 1 2010 10 EN 302 326 2 V1 2 2 2007 06...

Страница 165: ...N 301 908 2 V5 2 1 2011 07 EN 301 893 V1 7 1 2012 06 EN 302 544 2 V1 1 1 2009 01 EN 302 623 V1 1 1 2009 01 EN 50360 2001 EN 62479 2010 EN 50385 2002 EN 62311 2008 EN 301 489 1 V1 9 2 2011 09 EN 301 489 3 V1 6 1 2013 08 EN 301 489 4 V1 4 1 2009 05 EN 301 489 7 V1 3 1 2005 11 EN 301 489 9 V1 4 1 2007 11 EN 301 489 17 V2 2 1 2012 09 EN 301 489 24 V1 5 1 2010 09 EN 302 326 2 V1 2 2 2007 06 EN 302 326 ...

Страница 166: ...ufacturer ASUSTeK Computer Inc Address 4F No 150 LI TE Rd PEITOU TAIPEI 112 TAIWAN Authorised representative in Europe ASUS Computer GmbH Address HARKORT STR 21 23 40880 RATINGEN GERMANY Model name P023 P021 P01T DA01 ...

Отзывы: