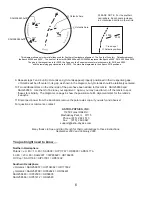
INITIAL ADJUSTMENTS
Adjusting the Focus
1. Reticle focus: Turn the diopter eyepiece until the reticle is in focus. This should always be done first.
2. Focusing stars: This is easiest to check in the daytime by focusing on a distant object. It is
unlikely that you will have to make any adjustment. If you do, simply loosen the preset
locking screw and remove the Astro-Physics adapter. Then, loosen the focusing
adjustment locking ring which is now visible. Turn the objective tube until distant objects
are sharply focused. Tighten the focusing-adjustment locking ring.
Installing the Polar Alignment Scope
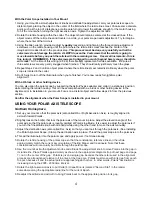
1. Remove the polar axis rear cap and Dec axis sight
hole cover.
2. Loosen the declination axis clutch knobs.
3. Turn the declination axis until the hole in the axis
is aligned with the polar axis holes. You will be able to look
through the mount as shown in the diagram.
4 .Tighten the declination axis clutch knobs.
5. Carefully screw your polar alignment telescope into the rear of your mount's polar axis. If
you find that the threaded hole in the base of your mount is too large, you are missing a
piece of your mount. Call Astro-Physics to order part # M4037 (polar axis shaft plug).
Optically Centering the Reticle
To properly align the telescope's polar axis with the north celestial pole, the reticle in the polar alignment scope
must be precisely centered within the polar axis. A mis-centered reticle will result in excessive tracking error.
Since the polar scope was prealigned at the factory, it is unlikely that you will have to make any adjustments.
However, you should check to be sure that it is properly aligned. These steps only need to be performed before
your first use. We suggest that you follow this procedure during the daytime. The following is a diagram of the
markings of the reticle. For this procedure, note the intersection of the lines at the center.
3


