


28
Setting Keypad to UTC (aka GMT)
Running everything on UTC is a great way to do things if the laptop is completely dedicated to astronomy endeavors.
Professional astronomers all generally set everything including their lives to UTC.
The main thing to remember is that
EVERYTHING needs to be set to UTC.
Normal commercial software intended for amateurs will often want to default you
to a time zone. Once you have everything set up though, it’s awesome.
1. Go to the Date & Time entry window (Main menu > Setup > 1=Locations & Time > 2=Date & Time > +/-=Edit). An infor-
mation screen will display regarding time zones and Daylight Saving abbreviations. Press ENT to proceed.
2. Set the time to the current UTC time and Time Zone = 00. Daylight Savings must also be set to W=Winter and it will
stay W all year round. If you do not know the UTC time, simply search the internet: UTC time.
3. Press ENT to save. The keypad will beep when the values are saved and you will return to the Setup Menu.
4. Press Menu/ESC to go back to the Main Menu
5. Press 4=Time/LST and verify that Local time = UTC
6. DONE!! Don’t forget to set your astronomy computer to UTC.
Get Location From Mount
If you are using an external computer to control your telescope, the mount and the keypad could be using different location
settings. This command will update the keypad with the last location that was sent to the mount from your computer. This
feature is extremely handy for computers synced with GPS units.
When this feature is selected, a display will appear with the information the keypad has obtained from the mount. If you
are using a computer, compare this screen to your computer’s settings to be sure they match. If they do not match closely
you may need to initialize the mount again from the computer.
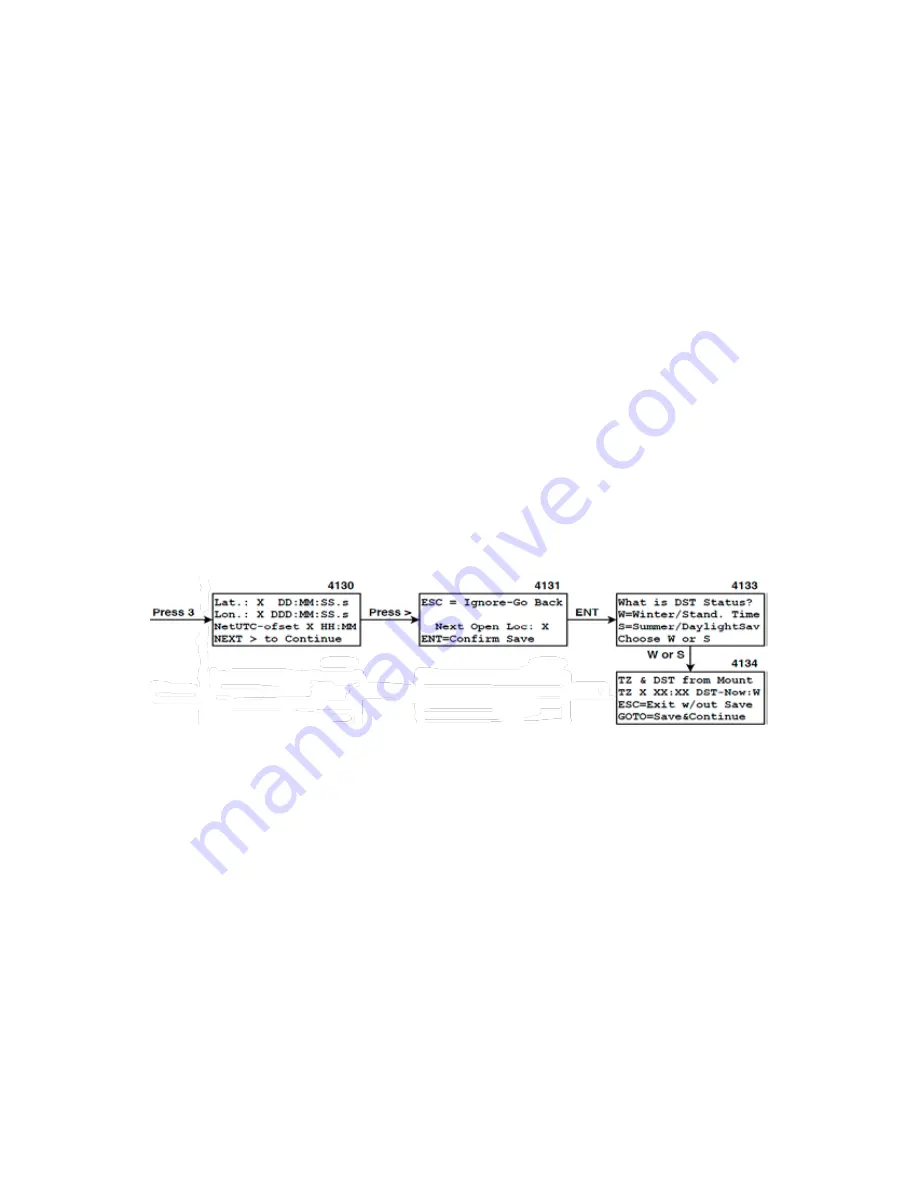
1. Go to the Date & Time entry window (Main menu > 2=Setup > 1=Locations & Time > 3=Get Loc. frm Mount). The key-
pad will query the mount and display the current location data in the CP4/CP5 memory.
2. Review the data and press NEXT> to continue.
3. The next open location slot will display. If you already have location data in 9 slots, the new data will overwrite the data
in the 9th slot.
a) Press ESC to cancel out of the routine
b)
Press ENT to confirm saving in the next open slot and proceed to the DST status screen.
4. Enter Your Daylight Saving (DST) status using either the W or S button.
5. Review the Time Zone (TZ) and Daylight Saving (DST) data from the mount to be sure that they are accurate for your
present location.
a) Press ESC to ignore and cancel out of the change and go back to the Setup Menu.
b) Press GOTO to save the location to memory in the designated slot.
6. If you use 3=Get Loc. frm Mount, it is strongly advised that you then use 4=Get Time frm Mnt.