background image

2 9

2 9

2 9

2 9

2 9

ASRock  PV530  Motherboard

FranFranFranFranFran

çaisçaisçaisçaisçais

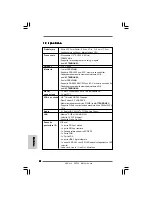
 Connecteurs

- 2 x connecteurs SATAII, prennent en charge un taux de

  transfert de données pouvant aller jusqu’à 3.0Go/s

(voir 

ATTENTION 4

)

- Connecteur pour ventilateur de CPU/Châssis/Ventilateur

- br. 24 connecteur d’alimentation ATX

- Connecteur audio panneau avant

- 2 x en-tête USB 2.0 (accepte 4 ports USB 2.0)

 BIOS

- 4Mb BIOS AMI

- BIOS AMI

- Support du “Plug and Play”

- Compatible pour événements de réveil ACPI 1.1

- Gestion jumperless

- Support SMBIOS 2.3.1

 CD d’assistance

- Pilotes, utilitaires, logiciel anti-virus (Version d’essai), Suite

  logicielle ASRock (CyberLink DVD Suite et Creative Sound

  Blaster X-Fi MB) (Version OEM et d’essai)

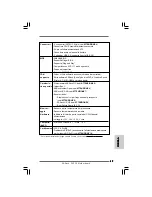
 Caractéristique

- Tuner ASRock OC


(voir 

ATTENTION 5

)

 unique

- l'Instant Boot

- ASRock Instant Flash (voir 

ATTENTION 6

)

- ASRock OC DNA (voir 

ATTENTION 7

)

- L’accélérateur hybride:

- Contrôle direct de la fréquence CPU

  (voir 

ATTENTION 8

)

- ASRock U-COP (voir 

ATTENTION 9

)

- Garde d’échec au démarrage (B.F.G.)

 Surveillance

- Contrôle de la température CPU


système

- Mesure de température de la carte mère

- Tachéomètre ventilateur CPU/Châssis/Ventilateur

- Monitoring de la tension: +12V, +5V, +3.3V, Vcore


OS

- Microsoft

®

 Windows

®

 7 / Vista

TM

 / XP


Certifications

- FCC, CE, WHQL

- Prêt pour ErP/EuP (alimentation Prêt pour ErP/EuP requise)

  (voir 

ATTENTION 10

)

 * Pour de plus amples informations sur les produits, s’il vous plaît visitez notre site web:

   http://www.asrock.com

Содержание PV530

Страница 1: ...ressed or implied including but not limited to the implied warranties or conditions of merchantability or fitness for a particular purpose In no event shall ASRock its directors officers employees or agents be liable for any indirect special incidental or consequential damages including damages for loss of profits loss of business loss of data interruption of business and the like even if ASRock h...

Страница 2: ... PCI Slot PCI1 4 CPU Fan 16 PCI Express 2 0 x16 Slot PCIE1 5 CPU Heatsink 17 USB_PWR3 Jumper 6 2 x 240 pin DDR2 DIMM Slots 18 Front Panel Audio Header DDRII_1 DDRII_2 Yellow HD_AUDIO1 White 7 1 x 240 pin DDR3 DIMM Slot DDR3_1 Blue 19 Primary SATAII Connector SATAII_1 Blue 8 USB 2 0 Header USB6_7 Blue 20 Secondary SATAII Connector SATAII_2 Blue 9 USB 2 0 Header USB4_5 Blue 21 VIA VX900 Chipset 10 B...

Страница 3: ...ption Status Description Off No Activity Off 10Mbps connection Blinking Data Activity Green 100Mbps connection To enable Multi Streaming function you need to connect a front panel audio cable to the front panel audio header After restarting your computer you will find VIA HD Audio Deck tool on your system Please follow below instructions according to the OS you install For Windows XP OS Please cli...

Страница 4: ...ications and the BIOS software might be updated the content of this manual will be subject to change without notice In case any modifications of this manual occur the updated version will be available on ASRock website without further notice You may find the latest VGA cards and CPU support lists on ASRock website as well ASRock website http www asrock com If you require technical support related ...

Страница 5: ...see CAUTION 2 Expansion Slot 1 x PCI Express 2 0 x16 slot blue x8 mode 1 x PCI slot Graphics VIA Chrome9 HD DX9 Graphics Pixel Shader 2 0 DirectX 9 0 Max shared memory 512MB see CAUTION 3 Supports D Sub with max resolution up to 2048x1536 75Hz Audio 5 1 CH HD Audio VIA VT1705 Audio Codec LAN Atheros PCIEx1 LAN AR8132L Speed 10 100 Ethernet Supports Wake On LAN Rear Panel I O I O Panel 1 x PS 2 Mou...

Страница 6: ...rd B F G Hardware CPU Temperature Sensing Monitor Chassis Temperature Sensing CPU Chassis Power Fan Tachometer Voltage Monitoring 12V 5V 3 3V Vcore OS Microsoft Windows 7 VistaTM XP compliant Certifications FCC CE WHQL ErP EuP Ready ErP EuP ready power supply is required see CAUTION 10 For detailed product information please visit our website http www asrock com WARNING Please realize that there i...

Страница 7: ...up menu to access ASRock Instant Flash Just launch this tool and save the new BIOS file to your USB flash drive floppy disk or hard drive then you can update your BIOS only in a few clicks without prepar ing an additional floppy diskette or other complicated flash utility Please be noted that the USB flash drive or hard drive must use FAT32 16 12 file system 7 The software name itself OC DNA liter...

Страница 8: ...AC power of the completed system shall be under 1 00W in off mode condition To meet EuP standard an EuP ready motherboard and an EuP ready power supply are required According to Intel s suggestion the EuP ready power supply must meet the standard of 5v standby power efficiency is higher than 50 under 100 mA current consumption For EuP ready power supply selection we recommend you checking with the...

Страница 9: ...autions 2 2 Pre installation Precautions 2 2 Pre installation Precautions 2 2 Pre installation Precautions 2 2 Pre installation Precautions Take note of the following precautions before you install motherboard components or change any motherboard settings 1 Unplug the power cord from the wall socket before touching any component 2 To avoid damaging the motherboard components due to static electric...

Страница 10: ... do not use the DDR2 slots and DDR3 slot at the same time You can choose to install either DDR2 or DDR3 memory module Installing a DIMM Installing a DIMM Installing a DIMM Installing a DIMM Installing a DIMM Please make sure to disconnect power supply before adding or removing DIMMs or the system components Step 1 Unlock a DIMM slot by pressing the retaining clips outward Step 2 Align a DIMM on th...

Страница 11: ...ansion card Installing an expansion card Installing an expansion card Installing an expansion card Installing an expansion card Step 1 Before installing the expansion card please make sure that the power supply is switched off or the power cord is unplugged Please read the documentation of the expansion card and make necessary hardware settings for the card before you start the installation Step 2...

Страница 12: ...nt provided by power supply When you select 5V_DUAL USB devices can wake up the system under S3 Suspend to RAM state USB_PWR3 Short pin2 pin3 to enable see p 2 No 17 5VSB standby for USB4_5 6_7 wake up events Note To select 5VSB it requires 2 Amp and higher standby current provided by power supply Clear CMOS Jumper CLRCMOS1 see p 2 No 14 Note CLRCMOS1 allows you to clear the data in CMOS The data ...

Страница 13: ...e NOT jumpers Do NOT place jumper caps over these headers and connectors Placing jumper caps over the headers and connectors will cause permanent damage of the motherboard Serial ATAII Connectors These Serial ATAII SATAII SATAII_1 see p 2 No 20 connectors support SATAII SATAII_2 see p 2 No 19 or SATA hard disk for internal storage devices The current SATAII interface allows up to 3 0 Gb s data tra...

Страница 14: ...t a CPU fan cable 3 pin CPU_FAN1 to this connector and match see p 2 No 23 the black wire to the ground pin ATX Power Connector Please connect an ATX power 24 pinATXPWR1 supply to this connector see p 2 No 3 A Connect Mic_IN MIC to MIC2_L B Connect Audio_R RIN to OUT2_R and Audio_L LIN to OUT2_L C Connect Ground GND to Ground GND D MIC_RET and OUT_RET are for HD audio panel only You don t need to ...

Страница 15: ...efore CPU FSB is untied during overclocking but PCI buse is in the fixed mode so that FSB can operate under a more stable overclocking environment Please refer to the warning on page 6 for the possible overclocking risk before you apply Untied Overclocking Technology 2 7 2 7 2 7 2 7 2 7 Driver Installation Guide Driver Installation Guide Driver Installation Guide Driver Installation Guide Driver I...

Страница 16: ...predetermined choices For the detailed information about BIOS Setup please refer to the User Manual PDF file contained in the Support CD 4 Sof 4 Sof 4 Sof 4 Sof 4 Software Suppor tware Suppor tware Suppor tware Suppor tware Support CD information t CD information t CD information t CD information t CD information This motherboard supports various Microsoft Windows operating systems 7 VistaTM XP Th...

Страница 17: ...D Da sich Motherboard Spezifikationen und BIOS Software verändern können kann der Inhalt dieses Handbuches ebenfalls jederzeit geändert werden Für den Fall dass sich Änderungen an diesem Handbuch ergeben wird eine neue Version auf der ASRock Website ohne weitere Ankündigung verfügbar sein Die neuesten Grafikkarten und unterstützten CPUs sind auch auf der ASRock Website aufgelistet ASRock Website h...

Страница 18: ...mspeichers 4GB siehe VORSICHT 2 Erweiterungs 1 x PCI Express 2 0 x16 Steckplätze blau für x8 Modus steckplätze 1 x PCI Steckplätze Onboard VGA VIA Chrome9 HD DX9 Grafikkarte Pixel Shader 2 0 DX9 0 VGA Maximal gemeinsam genutzter Speicher 512MB siehe VORSICHT 3 Unterstützt D Sub mit einer maximalen Auflösung von 2048 x 1536 bei 75 Hz Audio 5 1 CH HD Audio VIA VT1705 Audio Codec LAN Atheros PCIEx1 L...

Страница 19: ...rdware Monitor Überwachung der CPU Temperatur Motherboardtemperaturerkennung Drehzahlmessung für CPU Gehäuse Stromlüfter Spannungsüberwachung 12V 5V 3 3V Vcore Betriebssysteme Unterstützt Microsoft Windows 7 VistaTM XP Zertifizierungen FCC CE WHQL Gemäß Ökodesign Richtlinie ErP EuP Stromversorgung gemäß Ökodesign Richtlinie ErP EuP erforderlich siehe VORSICHT 10 Für die ausführliche Produktinforma...

Страница 20: ...m durch den Hardware Monitor Funktion zu überblicken und Ihre Hardware Geräte übertakten um die beste Systemleistung unter der Windows Umgebung zu erreichen Besuchen Sie bitte unsere Website für die Operationsverfahren von ASRock OC Tuner ASRock Website http www asrock com 6 ASRock Instant Flash ist ein im Flash ROM eingebettetes BIOS Flash Programm Mithilfe dieses praktischen BIOS Aktualisierungs...

Страница 21: ...am genutzt und funktionsfähig gemacht werden kann 8 Obwohl dieses Motherboard stufenlose Steuerung bietet wird Overclocking nicht empfohlen Frequenzen die von den empfohlenen CPU Busfrequenzen abweichen können Instabilität des Systems verursachen oder die CPU beschädigen 9 Wird eine Überhitzung der CPU registriert führt das System einen automatischen Shutdown durch Bevor Sie das System neu starten...

Страница 22: ... Überbrücken Sie Pin2 Pin3 um siehe S 2 No 2 5VSB Standby zu setzen und die PS 2 oder USB23 Weckfunktionen zu aktivieren Hinweis Um 5VSB nutzen zu können muss das Netzteil auf dieser Leitung 2A oder mehr leisten können Gebrückt Offen USB_PWR2 Überbrücken Sie Pin2 Pin3 um siehe S 2 No 22 5V_DUAL zu setzen und die USB01 Weckfunktionen zu aktivieren Hinweis Um 5V_DUAL nutzen zu können muss das Netzte...

Страница 23: ...müssen Sie zuerst das System starten und dann wieder ausschalten bevor Sie den CMOS Inhalt löschen CMOS löschen Default Einstellung 1 4 Integrierte Header und Anschlüsse 1 4 Integrierte Header und Anschlüsse 1 4 Integrierte Header und Anschlüsse 1 4 Integrierte Header und Anschlüsse 1 4 Integrierte Header und Anschlüsse Integrierte Header und Anschlüsse sind KEINE Jumper Setzen Sie KEINE Jumperkap...

Страница 24: ...chlossener Geräte wobei jedoch die Bildschirmverdrahtung am Gehäuse HDA unterstützen muss um richtig zu funktionieren Beachten Sie bei der Installation im System die Anweisungen in unserem Handbuch und im Gehäusehandbuch 2 Wenn Sie die AC 97 Audioleiste verwenden installieren Sie diese wie nachstehend beschrieben an der Front Audioanschlussleiste A Schließen Sie Mic_IN MIC an MIC2_L an B Schließen...

Страница 25: ...fteranschlüssen siehe S 2 No 11 wobei der schwarze Draht an den Schutzleiterstift 3 pin PWR_FAN1 angeschlossenwird siehe S 2 No 1 ATX Netz Header Verbinden Sie die ATX 24 pin ATXPWR1 Stromversorgung mit diesem siehe S 2 No 3 Header Installation eines 20 pol ATX Netzteils Obwohl dieses Motherboard einen 24 pol ATX Stromanschluss bietet kann es auch mit einem modifizierten traditionellen 20 pol ATX ...

Страница 26: ...detaillierte Informationen zum BIOS Setup siehe bitte das Benutzerhandbuch PDF Datei auf der Support CD 3 Software Support CD information 3 Software Support CD information 3 Software Support CD information 3 Software Support CD information 3 Software Support CD information Dieses Motherboard unterstützt eine Reiche von Microsoft Windows Betriebssystemen 7 VistaTM XP Die Ihrem Motherboard beigefügt...

Страница 27: ...e et le BIOS ayant pu être mis à jour le contenu de ce manuel est sujet à des changements sans notification Au cas où n importe qu elle modification intervenait sur ce manuel la version mise à jour serait disponible sur le site web ASRock sans nouvel avis Vous trouverez les listes de prise en charge des cartes VGA et CPU également sur le site Web ASRock Site web ASRock http www asrock com Si vous ...

Страница 28: ...e DDR2 800 667 533 non ECC sans amortissement mémoire Capacité maxi de mémoire système 4GB voir ATTENTION 2 Slot d extension 1 x slot PCI Express 2 0 x16 bleu mode x8 1 x slot PCI VGA sur carte Moteur graphique intégré VIA Chrome9 HD DX9 nuanceur de pixels 2 0 VGA DX9 0 mémoire partagée max 512MB voir ATTENTION 3 Prend en charge le D Sub avec une résolution maximale jusqu à 2048x1536 75Hz Audio 5 ...

Страница 29: ...uite logicielle ASRock CyberLink DVD Suite et Creative Sound Blaster X Fi MB Version OEM et d essai Caractéristique Tuner ASRock OC voir ATTENTION 5 unique l Instant Boot ASRock Instant Flash voir ATTENTION 6 ASRock OC DNA voir ATTENTION 7 L accélérateur hybride Contrôle direct de la fréquence CPU voir ATTENTION 8 ASRock U COP voir ATTENTION 9 Garde d échec au démarrage B F G Surveillance Contrôle...

Страница 30: ... web pour le fonctionnement des procédures de Tuner ASRock OC ASRock website http www asrock com 6 O ASRock Instant Flash é um utilitário de flash do BIOS incorporado na memória Flash ROM Esta prática ferramenta de actualização do BIOS permite lhe actualizar o BIOS do sistema sem necessitar de entrar nos sistemas operativos como o MS DOS ou o Windows Com este utilitário poderá premir a tecla F6 du...

Страница 31: ...dées risquent de rendre le système instable ou d endommager le CPU et la carte mère 9 Lorsqu une surchauffe du CPU est détectée le système s arrête automatiquement Avant de redémarrer le système veuillez vérifier que le ventilateur d UC sur la carte mère fonctionne correctement et débranchez le cordon d alimentation puis rebranchez le Pour améliorer la dissipation de la chaleur n oubliez pas de me...

Страница 32: ...by et permettre aux périphériques PS 2 ou USB23 de réveiller le système Note Pour sélectionner 5VSB il faut obligatoirement 2 Amp et un courant standby supérieur fourni par l alimentation Ferme Ouvert USB_PWR3 Court circuitez les broches 2 voir p 2 fig 17 et 3 pour choisir 5VSB standby et permettre aux périphériques USB4_5 6_7 de réveiller le système Note Pour sélectionner 5VSB il faut obligatoire...

Страница 33: ...r Toutefois veuillez ne pas effacer la CMOS tout de suite après avoir mis le BIOS à jour Si vous avez besoin d effacer la CMOS lorsque vous avez fini de mettre le BIOS à jour vous devez d abord initialiser le système puis le mettre hors tension avant de procéder à l opération d effacement de la CMOS 1 4 En têtes et Connecteurs sur Carte 1 4 En têtes et Connecteurs sur Carte 1 4 En têtes et Connect...

Страница 34: ...ontrôle voir p 2 No 18 commodes de périphériques audio 1 L audio à haute définition HDA prend en charge la détection de fiche mais le fil de panneau sur le châssis doit prendre en charge le HDA pour fonctionner correctement Veuillez suivre les instructions dans notre manuel et le manuel de châssis afin installer votre système 2 Si vous utilisez le panneau audio AC 97 installez le sur l adaptateur ...

Страница 35: ...nchez à l alimentation électrique ainsi qu aux broches 1 et 13 Fran Fran Fran Fran Français çais çais çais çais En tête du haut parleur Veuillez connecter le de châssis haut parleur de châssis sur SPEAKER1 br 4 cet en tête voir p 2 No 13 Connecteur du ventilateur Veuillez connecter le câble de de l UC ventilateur d UC sur ce CPU_FAN1 br 3 connecteur et brancher le fil voir p 2 No 23 24 13 12 1 24 ...

Страница 36: ...oix prédéterminés Pour des informations détaillées sur le BIOS veuillez consulter le Guide de l utilisateur fichier PDF dans le CD technique 3 Informations sur le CD de support 3 Informations sur le CD de support 3 Informations sur le CD de support 3 Informations sur le CD de support 3 Informations sur le CD de support Cette carte mère supporte divers systèmes d exploitation Microsoft Windows 7 Vi...

Страница 37: ...e può subire variazioni senza preavviso Nel caso in cui questo manuale sia modificato la versione aggiornata sarà disponibile sul sito di ASRock senza altro avviso Sul sito ASRock si possono anche trovare le più recenti schede VGA e gli elenchi di CPU supportate ASRock website http www asrock com Se si necessita dell assistenza tecnica per questa scheda madre visitare il nostro sito per informazio...

Страница 38: ...R2 800 667 533 non ECC momoria senza buffer Capacità massima della memoria di sistema 4GB vedi ATTENZIONE 2 Slot di 1 x slot PCI Express 2 0 x16 blu a modalità x8 espansione 1 x slot PCI VGA su scheda VIA Chrome9 HDDX9 Graphics Pixel Shader 2 0 VGA DX9 0 Memoria massima condivisa 512MB vedi ATTENZIONE 3 Supporta D Sub con risoluzione massima fino a 2048x1536 75Hz Audio 5 1 Audio HD CH VIA VT1705 A...

Страница 39: ...teris Sintonizzatore ASRock OC vedi ATTENZIONE 5 tica speciale Instant Boot ASRock Instant Flash vedi ATTENZIONE 6 ASRock OC DNA vedi ATTENZIONE 7 Booster ibrido Stepless control per frequenza del processore vedi ATTENZIONE 8 ASRock U COP vedi ATTENZIONE 9 Boot Failure Guard B F G Monitor Sensore per la temperatura del processore aggio Sensore temperatura scheda madre Hardware Indicatore di veloci...

Страница 40: ...e in Windows Prego visitare il nostro sito Internet per ulteriori dettagli circa l uso del Sintonizzatore ASRock OC ASRock website http www asrock com 6 ASRock Instant Flash è una utilità Flash BIOS integrata nella Flash ROM Questo comodo strumento d aggiornamento del BIOS permette di aggiornare il sistema BIOS senza accedere a sistemi operativi come MS DOS or Windows Con questa utilità si può pre...

Страница 41: ...e instabilità al sistema o danni al processore e alla scheda madre 9 Se il processore si surriscalda il sistema si chiude automaticamente Prima di riavviare il sistema assicurarsi che la ventolina CPU della scheda madre funzioni correttamente scollegare e ricollegare il cavo d alimentazione Per migliorare la dissipazione del calore ricordare di applicare l apposita pasta siliconica tra il processo...

Страница 42: ...p 2 item 17 settare a 5VSB standby e abilitare USB4_5 6_7 wake up events Nota Per selezionare 5VSB si richiedono almeno 2 Ampere e il consumo di corrente in standby sarà maggiore USB_PWR2 Cortocircuitare pin2 pin3 per vedi p 2 item 22 settare a 5V_DUAL e abilitare USB01 wake up events Nota Per selezionare 5V_DUAL si richiedono almeno 2 Ampere e il consumo di corrente in standby sarà maggiore Quand...

Страница 43: ...a ATAII SATAII suppo rtano cavi SATAII per dispositivi di memoria interni L interfaccia SATAII attuale permette velocità di trasferimento dati fino a 3 0 Gb s Cavi dati Serial ATA SATA Entrambe le estremità del cavo Opzionale dati SATA possono collegarsi all hard disk SATA SATAII o al connettore SATAII sulla scheda madre Collettore USB 2 0 Oltre alle quattro porte USB 2 0 9 pin USB6_7 predefinite ...

Страница 44: ... manuale del telaio per installare il sistema 2 Se si utilizza un pannello audio AC 97 installarlo nell intestazione audio del pannello anteriore come indicato di seguito A Collegare Mic_IN MIC a MIC2_L B Collegare Audio_R RIN a OUT2_R e Audio_L LIN ad OUT2_L C Collegare Ground GND a Ground GND D MIC_RET e OUT_RET sono solo per il pannello audio HD Non è necessario collegarli per il pannello audio...

Страница 45: ... d alimentazione ATX a questo vedi p 2 Nr 3 connettore Con questa scheda madre c è in dotazione un connettore elettrico ATX a 24 pin ma può funzionare lo stesso se si adotta un alimentatore ATX a 20 pin Per usare l alimentatore ATX a 20 pin collegare l alimentatore con il Pin 1 e il Pin 13 Installazione dell alimentatoreATX a 20 pin 24 13 12 1 24 13 12 1 ...

Страница 46: ...PDF file contenuto nel cd di supporto 3 Software di supporto e informazioni 3 Software di supporto e informazioni 3 Software di supporto e informazioni 3 Software di supporto e informazioni 3 Software di supporto e informazioni su CD su CD su CD su CD su CD Questa scheda madre supporta vari sistemi operativi Microsoft Windows 7 VistaTM XP Il CD di supporto a corredo della scheda madre contiene i d...

Страница 47: ...r actualizados el contenido de este manual puede ser cambiado sin aviso En caso de cualquier modificación de este manual la versión actualizada estará disponible en el website de ASRock sin previo aviso También encontrará las listas de las últimas tarjetas VGA y CPU soportadas en la página web de ASRock Website de ASRock http www asrock com Si necesita asistencia técnica en relación con esta placa...

Страница 48: ...ranuras PCI Express 2 0 x16 azul modo x8 Expansión 1 x ranuras PCI VGA OnBoard Tarjeta gráfica integrada VIA Chrome9 HD DX9 Sombreador de Píxeles 2 0 VGA DX9 0 512MB de Memoria máxima compartida vea ATENCIÓN 3 Admite D Sub con una resolución máxima de 2048x1536 a 75 Hz Audio Sonido HD de 5 1 Canales Códec de sonido VIA VT1705 LAN Atheros PCIEx1 LAN AR8132L Velocidad 10 100 Ethernet Soporta Wake On...

Страница 49: ...lash vea ATENCIÓN 6 ASRock OC DNA vea ATENCIÓN 7 Amplificador Híbrido Stepless control de frecuencia de CPU vea ATENCIÓN 8 ASRock U COP vea ATENCIÓN 9 Protección de Falla de Inicio B F G Monitor Hardware Sensibilidad a la temperatura del procesador Sensibilidad a la temperatura de la placa madre Taquimetros de los ventiladores del procesador y del CPU chasis alimentacion Monitor de Voltaje 12V 5V ...

Страница 50: ...n de discos duros SATAII en la página 18 del Manual de usuario que se incluye en el CD de soporte para configurar su disco duro SATAII en modo SATAII También puede conectar un disco duro SATA directamente al conector SATAII 5 Es una herramienta de overclocking de ASRock de usuario fácil que le permite a supervisar su sistema por la función de monitor de hardware y overclock sus dispositivos de har...

Страница 51: ...temperatura de CPU está sobre elevada el sistema va a apagarse automaticamente Antes de reanudar el sistema compruebe si el ventilador de la CPU de la placa base funciona apropiadamente y desconecte el cable de alimentación a continuación vuelva a conectarlo Para mejorar la disipación de calor acuérdese de aplicar thermal grease entre el procesador y el disipador de calor cuando usted instala el s...

Страница 52: ...e mas que 2 Amp proveida por la fuente de electricidad USB_PWR2 Ponga en cortocircuito pin 2 vea p 2 No 22 pin 3 para habilitar 5V_DUAL para USB01 wake up events Atención Para elegir 5V_DUAL se necesita corriente mas que 2 Amp proveida por la fuente de electricidad Si selecciona 5V_DUAL los dispositivos USB podran reactivar el sistema siempre que se encuentre en el estado S3 Suspension a RAM Valor...

Страница 53: ...ctual permite una velocidad de transferencia de 3 0 Gb s Cable de datos de Ambos extremos del cable serie ATA SATA pueden conectarse al disco Opcional duro SATA SATAII o la conexión de la placa base Cabezal USB 2 0 Además de cuatro puertos 9 pin USB6_7 USB 2 0 predeterminados en el ver p 2 No 8 panel de E S hay dos bases de conexiones USB 2 0 en esta placa base Cada una de 9 pin USB4_5 estas bases...

Страница 54: ...round GND D MIC_RET y OUT_RET son sólo para el panel de sonido HD No necesitará conectarlos al panel de sonido AC 97 Cabezal de panel de sistema Este cabezar acomoda varias 9 pin PANEL1 dunciones de panel frontal de vea p 2 N 12 sistema Cabezal del altavoz del chasis Conecte el altavoz del chasis a 4 pin SPEAKER1 su cabezal vea p 2 N 13 Conector del ventilador Conecte el cable del ventilador de la...

Страница 55: ...ea p 2 N 3 Instalación de una Fuente deAlimentaciónATX de 20 Pins A pesar de que esta placa base incluye in conector de alimentación ATX de 24 pins ésta puede funcionar incluso si utiliza una fuente de alimentación ATX de 20 pins tradicional Para usar una fuente de alimentación ATX de 20 pins por favor conecte su fuente de alimentación usando los Pins 1 y 13 24 13 12 1 24 13 12 1 ...

Страница 56: ...la Utilidad de configuración de la BIOS consulte el Manual del usuario archivo PDF que se encuentra en el CD de soporte 3 Información de Software Support CD 3 Información de Software Support CD 3 Información de Software Support CD 3 Información de Software Support CD 3 Información de Software Support CD Esta placa base soporta diversos tipos de sistema operativo Windows 7 VistaTM XP El CDde instal...

Страница 57: ...5 7 5 7 5 7 5 7 5 7 ASRock PV530 Motherboard ASRock ASRock Mi c r o ATX 8 5 x 6 7 2 1 6 x 1 7 0 ASRock ASRock S e r ia l ATA SATA I O ...

Страница 58: ...5 8 5 8 5 8 5 8 5 8 ASRock PV530 Motherboard Mi c r o ATX 8 5 x 6 7 2 1 6 x 1 7 0 ...

Страница 59: ...5 9 5 9 5 9 5 9 5 9 ASRock PV530 Motherboard ...

Страница 60: ...6 0 6 0 6 0 6 0 6 0 ASRock PV530 Motherboard ...

Страница 61: ...6 1 6 1 6 1 6 1 6 1 ASRock PV530 Motherboard ...

Страница 62: ...6 2 6 2 6 2 6 2 6 2 ASRock PV530 Motherboard Short Open CMOS CMOS ...

Страница 63: ...6 3 6 3 6 3 6 3 6 3 ASRock PV530 Motherboard SATAII_2 SATAII_1 ...

Страница 64: ...6 4 6 4 6 4 6 4 6 4 ASRock PV530 Motherboard 9 PANEL1 ...

Страница 65: ...6 5 6 5 6 5 6 5 6 5 ASRock PV530 Motherboard ATX ATX 24 13 12 1 24 13 12 1 ...

Страница 66: ...6 6 6 6 6 6 6 6 6 6 ASRock PV530 Motherboard BIOS Setup F Power On Self Test POST POST BIOS Setup POST Ctrl Alt Delete BIOS Setup PDF 3 ...

Страница 67: ...l pode ser cambiado sem aviso Em caso de qualquer modificação deste manual a versão atualizada estará disponível no website de ASRock sem prévio aviso Pode também encontrar as listas das mais recentes placas VGA e das CPUs suportadas no site da web da ASRock Website de ASRock http www asrock com Se precisar de apoio técnico em relação a este placa mãe por favor visite o nosso sítio da internet par...

Страница 68: ...ermédia DDR2 800 667 533 não ECC Capacidade máxima de memória do sistema 4GB veja o AVISO 2 Slots de Expansão 1 x slot de PCI Express 2 0 x16 modo azul x8 1 x slot de PCI VGA integrado Placa gráfica incorporada VIA Chrome9 HD DX9 Pixel Shader 2 0 DX9 0 VGA Memória partilhada máxima 512MB veja o AVISO 3 Suporta D Sub com resolução máxima até 2048x1536 75Hz Áudio Áudio de alta definição de canal 5 1...

Страница 69: ... Creative Sound Blaster X Fi MB OEM e versão de demonstração Funcionalidade Sintonizador ASRock OC veja o AVISO 5 Única Instant Boot ASRock Instant Flash veja o AVISO 6 ASRock OC DNA veja o AVISO 7 Booster híbrido Frequência da CPU com controle contínuo veja o AVISO 8 ASRock U COP veja o AVISO 9 B F G Boot Failure Guard Monitor do HW Sensores de temperature do procesador Medição de temperatura da ...

Страница 70: ...r ASRock OC Sítio Web da ASRock http www asrock com 6 ASRock Instant Flash est un utilitaire de flash du BIOS flash intégré dans la ROM Flash Cet outil pratique de mise à jour du BIOS vous permet de mettre à jour le BIOS du système sans entrer d abord dans un système d exploitation tel que MS DOS ou Windows Avec cet utilitaire vous pouvez appuyer sur la touche F6 pendant le POST ou sur la touche F...

Страница 71: ...ta um superaquecimento na CPU o sistema se desliga automaticamente e o botão de energia do chassis fica inativo Cheque o ventilador da CPU na placa mãe para verificar se está funcionando corretamente antes de religar o sistema Para melhorar a dissipação de calor lembre se de aplicar o material de interface térmica entre o processador e o dissipador de calor 10 EuP que significa Energy Using Produc...

Страница 72: ...curtos para veja a folha 2 No 22 habilitar 5V_DUAL para eventos de wake up na USB01 Nota Para seleccionar 5V_DUPLO são necessários 2 Amp e uma corrente de repouso mais elevada fornecida pela fonte de alimentação Quando seleccionar 5V_DUPLO os dispositivos USB podem activar o sistema quando este se encontra no estado S3 Suspender para RAM USB_PWR3 Pin2 Pin3 curtos para veja a folha 2 No 17 habilita...

Страница 73: ...es dois conectores Serial SATAII_1 veja a folha 2 No 20 ATA SATAII suportam SATAII_2 veja a folha 2 No 19 unidades de disco rígido SATA ou SATAII como dispositivos de armazenamento internos A atual interface SATAII permite uma taxa de transferência de dados de até 3 0 Gb s Cabo de dados Tanto a saída do cabo de Serial ATA SATA dados SATA pode ser opcional conectado ao disco rígido SATA SATAII quan...

Страница 74: ...ssis tem de suportar HDA para funcionar correctamente Siga s instruções que aparecem no manual e no manual do chassis para instalar o sistema 2 Se utilizar o painel de áudio AC 97 instale o no cabeçalho de áudio do painel frontal como a figura abaixo mostra A Ligue o Mic_IN MIC ao MIC2_L B Ligue o Audio_R RIN ao OUT2_R e o Audio_L LIN ao OUT2_L C Ligue o Ground GND ao Ground GND D MIC_RET e OUT_RE...

Страница 75: ...Português Português Português Embora esta placa mãe providencie um conector de energia ATX de 24 pinos pode apesar disso funcionar com a adapta ção de uma fonte de energia tradicional de 20 pinos Para usar a fonte de alimentação de 29 pinos por favor ligue a sua fonte de alimentação com o Pino 1 e o Pino 13 Instalação da Fonte de alimentaçãoATX de 20 Pinos 24 13 12 1 24 13 12 1 ...

Страница 76: ...ões detalhadas sobre o Utilitário de Configuração do BIOS consulte o Manual do Usuário arquivo PDF no CD de suporte 3 Informações do CD de Suporte 3 Informações do CD de Suporte 3 Informações do CD de Suporte 3 Informações do CD de Suporte 3 Informações do CD de Suporte Esta placa Mãe suporta vários sistemas operacionais Microsoft Windows 7 VistaTM XP O CD de instalação que acompanha a placa Mãe c...

Страница 77: ...7 7 7 7 7 7 7 7 7 7 ASRock PV530 Motherboard Türkçe Türkçe Türkçe Türkçe Türkçe ...

Страница 78: ...7 8 7 8 7 8 7 8 7 8 ASRock PV530 Motherboard Türkçe Türkçe Türkçe Türkçe Türkçe ...

Страница 79: ...7 9 7 9 7 9 7 9 7 9 ASRock PV530 Motherboard Türkçe Türkçe Türkçe Türkçe Türkçe ...

Страница 80: ...8 0 8 0 8 0 8 0 8 0 ASRock PV530 Motherboard Türkçe Türkçe Türkçe Türkçe Türkçe ...

Страница 81: ...8 1 8 1 8 1 8 1 8 1 ASRock PV530 Motherboard Türkçe Türkçe Türkçe Türkçe Türkçe ...

Страница 82: ...8 2 8 2 8 2 8 2 8 2 ASRock PV530 Motherboard Open Short Clear CMOS Default Türkçe Türkçe Türkçe Türkçe Türkçe ...

Страница 83: ...8 3 8 3 8 3 8 3 8 3 ASRock PV530 Motherboard S ATAII_2 S ATAII_1 Türkçe Türkçe Türkçe Türkçe Türkçe ...

Страница 84: ...8 4 8 4 8 4 8 4 8 4 ASRock PV530 Motherboard 24 13 12 1 24 13 12 1 Türkçe Türkçe Türkçe Türkçe Türkçe ...

Страница 85: ...8 5 8 5 8 5 8 5 8 5 ASRock PV530 Motherboard Türkçe Türkçe Türkçe Türkçe Türkçe ...

Страница 86: ...8 6 8 6 8 6 8 6 8 6 ASRock PV530 Motherboard ...

Страница 87: ...8 7 8 7 8 7 8 7 8 7 ASRock PV530 Motherboard ...

Страница 88: ...8 8 8 8 8 8 8 8 8 8 ASRock PV530 Motherboard ...

Страница 89: ...8 9 8 9 8 9 8 9 8 9 ASRock PV530 Motherboard ...

Страница 90: ...9 0 9 0 9 0 9 0 9 0 ASRock PV530 Motherboard ...

Страница 91: ...9 1 9 1 9 1 9 1 9 1 ASRock PV530 Motherboard ...

Страница 92: ...9 2 9 2 9 2 9 2 9 2 ASRock PV530 Motherboard S ATAII_2 S ATAII_1 ...

Страница 93: ...9 3 9 3 9 3 9 3 9 3 ASRock PV530 Motherboard 24 13 12 1 24 13 12 1 ...

Страница 94: ...9 4 9 4 9 4 9 4 9 4 ASRock PV530 Motherboard ...

Отзывы: