background image

309884

23 

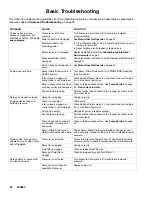
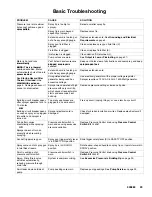
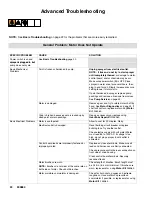
Basic Troubleshooting

PROBLEM

CAUSE

SOLUTION

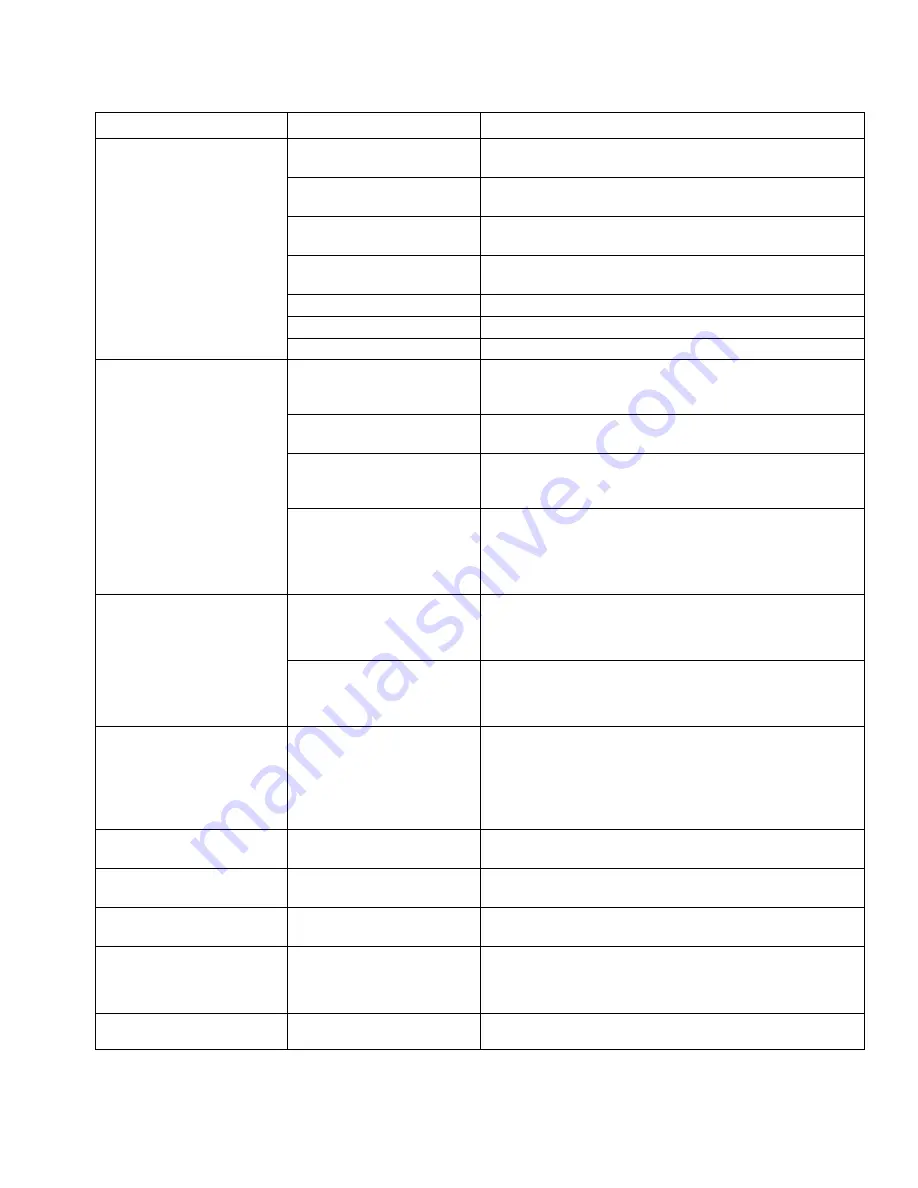
Pressure is set at maximum,
but cannot achieve a good
spray pattern

Spray tip is too big for
sprayer.

Select a smaller spray tip.

spray pattern.

Spray tip is worn beyond
capability of sprayer.

Replace spray tip.

Extension cord is too long or
not a heavy enough gauge.

Replace extension cord. See 

Grounding and Electrical

Requirements

 on page 4.

Spray gun fluid filter is
clogged.

Clean or replace spray gun fluid filter (V).

Fluid filter is clogged.

Clean or replace fluid filter (E).

Inlet screen is clogged.

Clean debris off inlet screen (L).

Pump valves are worn.

See 

Output is Low or Fluctuating 

on page 27

.

Motor is hot and runs
intermittently

Vent holes in enclosures are
plugged or sprayer is

Keep vent holes clear of obstructions and overspray, and keep
sprayer open to air

intermittently.

NOTE:

 This is a thermal

plugged, or sprayer is
covered.

sprayer open to air.

NOTE:

 This is a thermal

overload condition. Motor
automatically shuts off due to
excessive heat

Extension cord is too long or
not a heavy enough gauge.

Replace extension cord.

excessive heat.

See 

Startup Hazard After

Thermal Overload

 in the

WARNINGS section on

Unregulated electrical
generator being used has
excessive voltage.

Use electrical generator with a proper voltage regulator.
Sprayer requires a 120V AC, 60 Hz, 1500-Watt generator.

WARNINGS section on
page 4. Damage can occur if
cause is not corrected.

Sprayer was operated at high
pressure with very small tip,
which causes frequent motor
starts and excessive heat
build up.

Decrease pressure setting or increase tip size.

Building circuit breaker opens
after sprayer operates for 5 to
10 minutes.

OR

Too many appliances are
plugged in on same circuit.

Free up circuit (unplug things), or use a less busy circuit.

OR

Building circuit breaker opens
as soon as sprayer is plugged
into outlet, and sprayer is
turned on.

Sprayer electrical cord is
damaged.

Check for broken insulation or wires. Replace electrical cord if
damaged.

Fan pattern varies
dramatically while spraying

OR

Sprayer does not turn on
promptly when resuming
spraying.

Pressure control switch is
worn and causing excessive
pressure variation.

Replace Pressure Control knob using 

Pressure Control

Switch Kit 

 244267.

Cannot trigger spray gun.

Spray gun trigger safety lever
is in SAFETY ON position.

Slide trigger safety lever (S) to SAFETY OFF position.

Spray comes out of spray gun
in two thick streams.

Spray tip is in UNCLOG
position.

Rotate arrow-shaped handle on spray tip so it points forward in
SPRAY position.

Paint is coming out of
pressure control switch.

Pressure control switch is
worn.

Replace Pressure Control knob using 

Pressure Control

Switch Kit 

244267.

Spray–Prime/Drain valve
actuates automatically,
relieving pressure through
drain tube.

System is overpressurizing.

See 

Excessive Pressure is Building Up

 on page 30.

Paint leaks down outside of
pump.

Pump packings are worn.

Replace pump packings. See 

Pump Service

 on page 33.

Содержание 246792

Страница 1: ...n this manual Save these instructions Table of Contents Warnings 2 Grounding and Electrical Requirements 4 Pressure Relief Procedure 5 Component Function and Identification 6 Setup 8 Priming 9 Tip Selection 14 Spraying Techniques 16 Shutdown and Cleaning 18 General Repair Instructions 21 Basic Troubleshooting 22 Advanced Troubleshooting 24 List of Kits 31 Motor Diagnostics 32 Control Board Diagnos...

Страница 2: ... arc D Sprayer generates sparks When flammable liquid is used in or near sprayer or for flushing or cleaning keep sprayer at least 20 ft 6 m away from explosive vapors D Keep work area free of debris including solvent rags and gasoline D Do not plug or unplug power cords or turn lights on or off when flammable fumes are present D Ground equipment and conductive objects in work area Read Grounding ...

Страница 3: ...replace worn or damaged parts immediately with genuine ASM replacement parts only D Do not alter or modify equipment D Use equipment only for its intended purpose Call your ASM distributor for information D Route hoses and cables away from traffic areas sharp edges moving parts and hot surfaces D Do not kink or overbend hoses or use hoses to pull equipment D Keep children and animals away from wor...

Страница 4: ...ance D Ground sprayer gun through connection to a properly grounded fluid hose and pump D Ground fluid supply container Follow local code D Ground solvent pails used when flushing Follow local code Use only conductive metal pails placed on a grounded surface such as concrete Do not place the pail on a non conductive surface such as paper or cardboard which interrupts the grounding continuity Fig 3...

Страница 5: ...owest setting Hold metal part of gun firmly to a grounded metal pail Trigger gun to relieve pressure Fig 8 ti6912a 4 Engage trigger lock Fig 9 ti6763b D Leave Spray Prime Drain valve in PRIME DRAIN position until you are ready to spray again D If you suspect the spray tip is clogged or that pressure has not been fully relieved after following the above steps VERY SLOWLY loosen tip guard retaining ...

Страница 6: ...C H F X D A W B M L J P K G E Mustang 3 Spray Gun Q R S T V U ti5453b ti6911a 6 309884 Component Identification and Function ...

Страница 7: ...paint hose in SPRAY position pointing forward D Directs fluid to drain tube in PRIME DRAIN position pointing down D Automatically relieves system pressure in overpressure situations K Fluid inlet connection and inlet valve Where suction tube connects to pump and inlet valve L Inlet screen Prevents debris from entering pump M Paint hose Transports high pressure fluid from pump to spray gun P Airles...

Страница 8: ...un 3 Connect other end of hose to sprayer NOTE If hose is already connected make sure connections are tight 4 Turn OFF power switch 5 Turn Pressure Control Knob all the way left counterclockwise to minimum pressure NOTE To select function align symbol on Pressure Control Knob label with arrow on sprayer Fig 10 Fig 10 ...

Страница 9: ... 13 4 If spraying oil based materials submerge suction tube in mineral spirits or compatible oil based cleaning solution If spraying water based materials submerge suction tube in water Fig 14 Mineral Spirits WATER OR 5 Plug sprayer into grounded outlet 6 Point gun into waste pail Fig 15 WASTE ti6913a 7 Turn power switch ON Fig 16 8 Turn up pressure control knob until pump starts Fig 17 ti6906a 9 ...

Страница 10: ...the pump s two check valves to malfunction If the pump does not prime after 30 seconds try to jar the check balls loose by tapping the inlet valve with a small wrench as the sprayer is on and running CAUTION Excessive shock will fracture or cause other damage to the pump Fig 21 Tap here ti6915a HINT To determine if the inlet valve ball is sticking unscrew inlet valve from pump and check it Inlet v...

Страница 11: ... smaller from suction tube larger Fig 23 prime tube suction tube 3 Place prime tube in waste pail Fig 24 4 Place suction tube in bucket of mineral spirits Fig 25 Mineral Spirits 5 Plug sprayer into grounded outlet 6 Point gun into waste pail Fig 26 WASTE ti6913a 7 Turn power switch ON Fig 27 8 Turn up Pressure Control knob until pump starts Fig 28 ti6906a 9 Flush until mineral spirits flow out of ...

Страница 12: ...igger and turn Spray Prime valve to SPRAY When paint comes out of gun release trigger Fig 32 WASTE SPRAY pull and hold trigger paint ti6914a NOTE Motor stopping indicates pump and hose are primed with paint 14 Attach drain tube to suction tube NOTE If pump does not prime after 30 seconds see Pump Check Valves page 10 ...

Страница 13: ... and base assembly onto gun and tighten retaining nut by hand Fig 34 ti6772a NOTE Point the arrow shaped handle on the Uni tip forward to SPRAY and backward to UNCLOG obstructions Fig 35 UNCLOG arrow points backward SPRAY arrow points forward ti6774a ti6775a NOTE D Tip must be pushed all the way into base D Never pull gun trigger when arrow shaped handle is between SPRAY and UNCLOG positions ...

Страница 14: ...o 10 in 203 to 254 mm fan width and a 0 013 in 0 33 mm hole size order Part No 59 413 Using the Right Tip for the Job Consider the coating and the surface to be sprayed Make sure you use the best tip hole size for that coating and the best fan width for that surface Tip Hole Size Tip hole size controls the flow rate the amount of paint that comes out of the gun HINTS D Generally use larger tip hol...

Страница 15: ...ontain information about the hole size and about the fan width on the surface when the gun is held 12 in 30 5 cm from the surface being sprayed First digit when doubled approximate fan width Last two digits tip hole size in thousands of an inch 413 tip has a 0 013 in hole size 413 tip has 8 to 10 in fan width ...

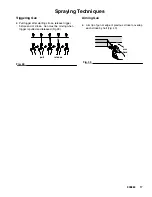
Страница 16: ...uld be atomized evenly distributed no gaps at edges Fig 36 Start at low pressure setting increase pressure a little at a time until paint is atomized Fig 36 A good spray pattern pressure too low gaps at edges D To prevent excessive tip wear spray at lowest pressure that atomizes paint D If maximum pressure of sprayer is not enough for good spray pattern tip is too large or too worn Getting Started...

Страница 17: ...igger after starting stroke release trigger before end of stroke Gun must be moving when trigger is pulled and released Fig 39 Fig 39 pull release Aiming Gun D Aim tip of gun at edge of previous stroke to overlap each stroke by half Fig 40 Fig 40 aim here ...

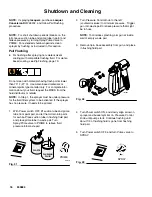
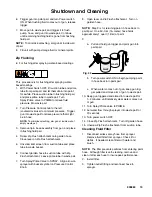
Страница 18: ... under pressure for the fluid filter system to be activated If the sprayer has no pressure it needs to be primed 1 With Power switch OFF lift suction tube and prime tube from paint pail and let them drain into paint for awhile Place suction tube in flushing fluid pail and place prime tube in waste pail Turn Spray Prime valve to PRIME to relieve fluid pressure into waste pail WASTE FLUSHING FLUID 9...

Страница 19: ...m suction tube and place tube in waste bucket 6 Connect garden hose to suction tube with Zip Flush attachment Leave prime tube in waste pail 7 Turn Spray Prime Valve to SPRAY Align arrow on sprayer with bucket symbol on Pressure Control Knob 8 Open lever on Zip Flush attachment Turn on garden hose NOTE Step 9 is for returning paint in hose back to paint pail One 50 foot 15 meter hose holds approxi...

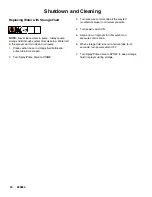
Страница 20: ...hose in storage fluid bottle and prime tube in waste pail 2 Turn Spray Prime Valve to PRIME 3 Turn pressure control knob all the way left counterclockwise to minimum pressure 4 Turn power switch ON 5 Align arrow on sprayer to roller symbol on pressure control knob 6 When storage fluid runs out of prime tube 5 10 seconds turn power switch OFF 7 Turn Spray Prime Valve to SPRAY to keep storage fluid ...

Страница 21: ...enclosure Replace if damaged Enclosures direct cooling air around the motor to prevent overheating They also reduce the risk of burns fire or explosion Read the following WARNING CAUTION Do not run sprayer dry for more than 30 seconds Doing so could damage pump packings Protect the internal drive parts of this sprayer from water Openings in the enclosures allow for air cooling of the mechanical pa...

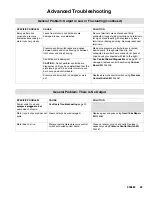
Страница 22: ... replace check valves See Pump Service on page 33 Do not store in water Suction tube is leaking Tighten suction tube connection K Inspect for other cracks or vacuum leaks Spray gun stopped spraying Spray tip is plugged Unplug spray tip Pump cycles but does not b ild Pump is not primed Prime pump p y build up pressure Inlet screen is clogged or suction tube is not immersed Clean debris off inlet sc...

Страница 23: ...mage can occur if cause is not corrected Sprayer was operated at high pressure with very small tip which causes frequent motor starts and excessive heat build up Decrease pressure setting or increase tip size Building circuit breaker opens after sprayer operates for 5 to 10 minutes OR Too many appliances are plugged in on same circuit Free up circuit unplug things or use a less busy circuit OR Bui...

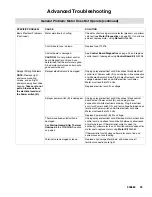
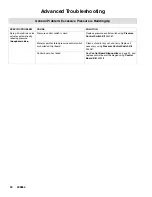
Страница 24: ...ng Motor Kit 245063 Yoke is broken because pump is locked up by dried paint or worn packings Repair as necessary or replace using Gear Yoke Repair Kit 245063 Basic Electrical Problems Motor is overheated Allow to cool for 30 minutes Retry Electrical outlet is damaged Reset building circuit breaker or replace building fuse Try another outlet Check electric supply with volt meter Meter must read 85 ...

Страница 25: ...switch B and unplug in line connection of white electrical cord wire Plug in electrical cord and test voltage between black and white electrical cord wires Meter must read 85 to130 Vac Replace electrical cord if no voltage Sprayer power switch B is damaged Unplug sprayer electrical cord Disconnect black control board wire at Power switch B and unplug in line connection of white electrical cord wir...

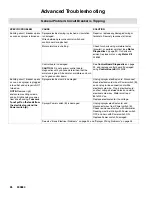
Страница 26: ...ard if damaged using Control Board Kit 243228 Building circuit breaker opens as soon as sprayer is plugged into outlet and sprayer is NOT turned on NOTE Remove right enclosure mounting screws and pull right enclosure away from drive housing Take care t t ll th l d f Sprayer electrical cord is damaged Unplug sprayer electrical cord Disconnect black electrical cord wire at Power switch B and unplug ...

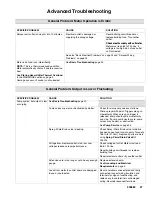
Страница 27: ...leshooting page 22 Pump valves are worn or obstructed by debris Check for worn pump valves as follows Prime sprayer with paint Trigger spray gun momentarily When spray gun trigger is released pump should cycle momentarily and stop If pump continues to cycle pump valves may be worn or obstructed See Pump Service on page 33 Spray Prime Drain valve is leaking Check Spray Prime Drain valve for debris ...

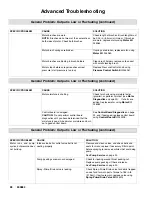
Страница 28: ... on page 32 If shorts are evident replace motor using Motor Kit 245063 Control board is damaged CAUTION Do not perform control board diagnostics until you have determined that the armature is good A bad motor armature can burn out a good control board See Control Board Diagnostics on page 32 and if damaged replace control board using Control Board Kit 243228 General Problem Output is Low or Fluctu...

Страница 29: ...ected with tab to the right Control board is damaged CAUTION Do not perform control board diagnostics until you have determined that the armature is good A bad motor armature can burn out a good control board See Control Board Diagnostics on page 32 If damaged replace control board using Control Board Kit 243228 Pressure control switch is damaged or worn out Replace pressure control switch using P...

Страница 30: ...ntrol switch is worn Replace pressure control switch using Pressure Control Switch Kit 244267 through drain tube Water or paint entered pressure control switch or shorted control board Clean out and or dry out and retry Replace if necessary using Pressure Control Switch Kit 244267 Control board has failed See Control Board Diagnostics on page 32 and replace control board if damaged using Control B...

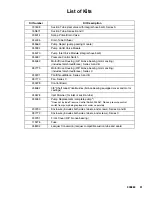
Страница 31: ... 8 bronze bearing motor casting includes fan shroud brace Series C 243231 Fan Shroud Brace Series A and B 287770 Fan Series C 243228 Control Board 245062 3 8 Shaft Gear Yoke Guides bronze bearing equipped cover and motor castings 245578 Inlet Strainer for inlet of suction tube 245053 Pump Replacement complete pump Does not include Pressure Control Switch 244267 Re use pressure control switch from ...

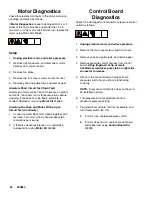
Страница 32: ...1 Connect red and black motor leads together with test lead Turn motor fan by hand at about two revolutions per second 2 If there is uneven resistance or no resistance replace motor using Motor Kit 245063 Control Board Diagnostics Check for a damaged control board or pressure control switch as follows 1 Unplug electrical cord and relieve pressure 2 Remove the four cover screws and front cover 3 Re...

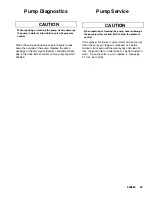
Страница 33: ...ional dam age to the drive train could occur Use pump repair kit 245569 Pump Service CAUTION When repairing or cleaning the pump never submerge the pump in water or allow fluid to enter the pressure control If the sprayer continues to cycle motor and pump run when the spray gun trigger is released or if perfor mance is poor even with new spray tips and clean fil ters the pump inlet or outlet valve...

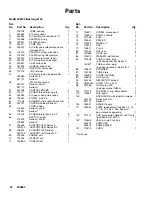
Страница 34: ...s A and B 118899 Series C 67 195433 SUPPORT right Series A 1 15D923 SUPPORT right Series B C 1 68 195434 SUPPORT left Series A 1 15D924 SUPPORT left Series B C 1 69 195436 FRAME cart 1 70 195435 HANDLE cart 1 71 15D650 HOSE RACK 1 Ref No Part No Description Qty 72 115097 SCREW curved head 2 73 115480 KNOB t handle 2 74 197285 AXLE 1 75 195367 SPACER 2 76 115095 WHEEL 9 2 77 112612 CAP 2 79 105521 ...

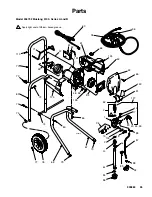
Страница 35: ...and B 63 66 61 62 79 67 68 79 77 76 75 74 80 72 65 72 47 51 73 113 70 1 65 13 54 58 46 71 86 87 88 89 52 69 36 52 81 43 44 45 19 18 52 84 102 48 125 125 25 17 94 88 2 127 95 96 149 126 1 Apply light coat of lithium based grease 1 40 151 ti5451b 85 20 26 ...

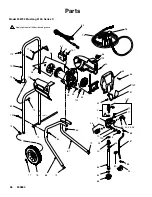
Страница 36: ...s C 63 62 79 67 68 79 77 76 75 74 80 72 65 72 73 113 70 1 65 13 71 86 85 20 87 88 89 69 36 52 81 43 44 45 19 18 84 102 25 17 26 94 88 2 127 95 96 149 1 Apply light coat of lithium based grease 1 40 66 47 51 54 58 46 52 52 48 125 125 123 ti6917a 151 ...

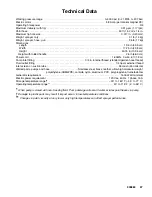
Страница 37: ...se thread Fluid outlet fitting 1 4 npsm external thread Inlet screen on suction tube 35 mesh 450 micron Wetted parts pumps and hose Stainless steel brass leather ultra high molecular weight polyethylene UHMWPE carbide nylon aluminum PVC polypropylene fluroelastomer Generator requirement 1500 Watt minimum Electric power requirement 120 Vac 60 Hz 1 phase 15 A Storage temperature range 30_ to 160_F 3...

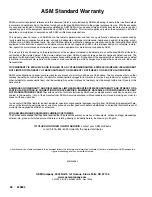
Страница 38: ... EXPRESS OR IMPLIED INCLUDING BUT NOT LIMITED TO WARRANTY OF MERCHANTABILITY OR WARRANTY OF FITNESS FOR A PARTICULAR PURPOSE ASM s sole obligation and buyer s sole remedy for any breach of warranty shall be as set forth above The buyer agrees that no other remedy including but not limited to incidental or consequential damages for lost profits lost sales injury to person or property or any other i...

Отзывы: