


4 Install the Access Point
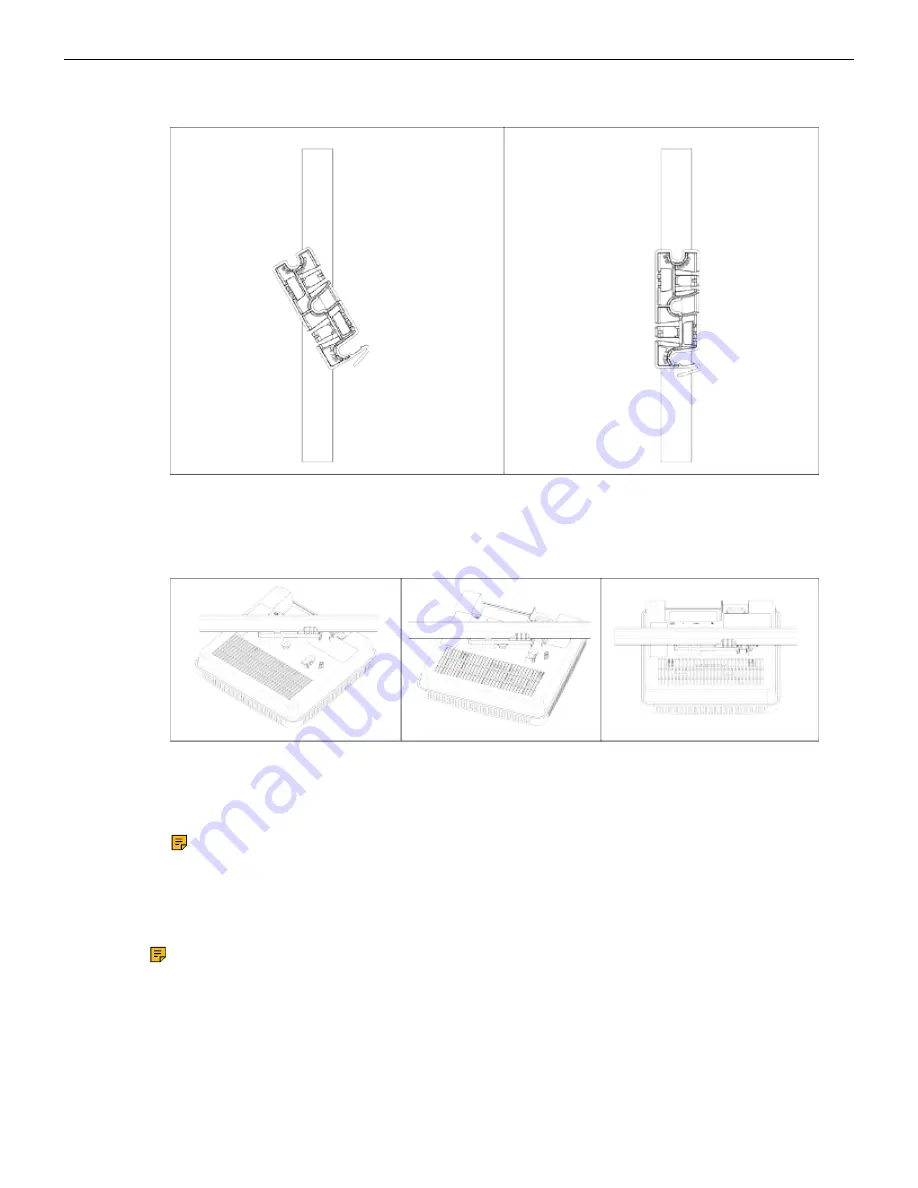
parallel to an arm of the T-grid. Ensure that the bracket is properly snapped to the T-grid, as shown
below.
2. Mounting the AP on the bracket: Place the first mounting post on the rear-side of the AP on to
the lower notch of the bracket. Rotate the AP such that the center mounting post fits in to the center
notch on the bracket. Ensure that all the mounting posts on the rear-side of the AP are snapped
in to the respective notches on the bracket. The mounting posts now properly fit in the respective
notches of the bracket and the AP is mounted properly.
Mounting Instructions using the Silhouette/Interlude Bracket Mount: The Silhouette/Interlude
mounting bracket is not a part of the standard package and must be procured separately. The
mounting instructions for the Silhouette/Interlude Bracket Mount are similar to the Standard
Package Content's mounting instructions.
Note: You should label the APs using MAC addresses or your own convention. For
example, use serial numbers, so that you can easily identify the APs.
4.2
Wall Mount the Access Point
Note: The wall mounting accessory SKU (MNT-AP-FLAT-14CM) can be ordered and
purchased separately.
Mounting the access point (AP) on a wall consists of the following steps:
7
Содержание C-200
Страница 1: ...Quick Start Guide C 200 Access Point Arista Networks www arista com DOC 04358 02 ...
Страница 4: ...iv ...
Страница 16: ...5 Once attached push in the release key to lock the hooks and make sure all the hooks are locked in place 12 ...
Страница 22: ...7 Appendix B Product Compliance Singapore IMDA Registration Mark 18 ...


