


Assembly Instructions -
Please keep for future reference
Ruler -
Use this ruler to help correctly identify the screws
0
10
20
30
40
50
60
70
80
90 100 110 120 130 140 150 160 170
MADE IN
BRITAIN
If you need help or have damaged or missing parts, call the
Customer Helpline: 0870 112 1928
or
email: [email protected]
(quoting your original order number)
Important -
Please read these instructions fully before starting assembly
Dimensions
Width - 66cm
Depth - 33cm
Height - 58cm
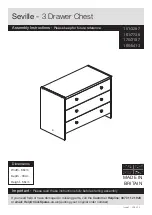
Seville -
3 Drawer Chest
Issue 2 - 25/03/14
ALR2907
151/3297
170/2187
166/5413
161/7739
Issue 2 - 25/03/14 - Changed Drawer Base to “White : TSAV (T608-299)”


