background image

User’s manual –

 A

REBO

S Multifunction tool 5in1 (Premium) 


1.2 Safety rules   


Read the instruction manual carefully before using the unit. This applies in particular to the 

safety instructions. Otherwise you may injure yourself or damage the device.  


Keep the instructions for use for future reference. If you pass the device on to third parties 

for use, be sure to also hand over these instructions for use. 


Only use the device as described in this manual. Any other use is considered improper and 

may result in property damage or even personal injury. 


This device may not be used by persons who are not familiar with the operating instructions, 

children under the age of 16 or persons who are under the influence of alcohol, drugs or 
medication, tired or ill.  


All persons with limited physical, mental or sensory abilities may only use the machine under 

supervision.   


The warranty for this device expires with:  

-


improper handling 

-


Non-observance of the operating instructions  

-


Repairs by third parties, unauthorized specialists 

-


Installation and replacement of non-original spare parts 

-


improper use 

-


Failure of the electrical system to comply with electrical regulations and VDE regulations 


Only persons who have been instructed in the use of the tool and are therefore aware of the 

dangers involved may work on the tool.  


Clean the machine completely, especially the fuel tank and the air filter. After using the 

machine, all fuels must be removed.  


Never touch the drill while the machine is running. If it is necessary to replace the protection 

or the drilling tool, be sure that the machine and the drilling tool have come to a standstill. 


The machine must be switched off before changing the working area of the machine. 


If the machine is defective, do not allow it to continue running.  


When starting or operating the machine, never touch hot parts such as the exhaust, the 

ignition cables or the spark plug.  


After the machine is stopped, the exhaust is still hot.  


Never place the machine near flammable materials (dry grass, flammable gases or flammable 

liquids, etc.). 


Pay particular attention to the fact that the ground may be slippery when operating in the 

rain or immediately after the rain. 


If you fall to the ground, release the throttle immediately. 


Take care not to drop the machine or hit it against obstacles. 


Before adjusting or repairing the machine, be sure that the machine is stopped and the spark 

plug connector is disconnected. 


If the machine is to be stored for an extended period of time, drain fuel from the fuel tank 

and carburetor, clean the parts, place the machine in a safe place and ensure that the 
machine has cooled down completely.  


Perform continuous checks to ensure safe and efficient operation of the machine. For a 

Please note the sound power level. 

Содержание AR-HE-MT51PT

Страница 1: ...s manual AREBOS Multifunction tool 5in1 Premium 1 Multifunction tool 5 in 1 Premium AR HE MT51PT Please follow all security measures in this user s manual to ensure a secure use Thank you for trusting AREBOS ...

Страница 2: ...g tools 14 6 1 Petrol engine brushes 14 6 2 Mowing with grass trimmer 15 6 3 Hedge shears 15 6 4 Raised pushbutton 15 7 Maintenance 16 7 1 Regular inspections 16 7 2 Replace and clean spark plug 16 7 3 Cleaning the air filter 17 7 4 Cleaning replacing the fuel filter 17 7 5 Adjusting the carburettor idle speed 17 8 Troubleshooting 18 9 Technical data 19 10 Disposal instruction 20 10 1 Disposal of ...

Страница 3: ...y means of a CE marking it can be recognized that a product complies with the legal requirements of European legal standards and therefore may be traded within the European Community Wear a head protection Warning Wear ear protection Warning Read the safety instructions carefully Failure to follow the safety precautions could result in serious injury or damage Keep the operating instructions in a ...

Страница 4: ...on tool 5in1 Premium 4 Warning Wear protective gloves Warning Wear protective gloves Warning Wear protective clothing Warning Flammable material Pay attention to flying stones Pay attention to pedestrians Do not touch the utility pole ...

Страница 5: ...s involved may work on the tool Clean the machine completely especially the fuel tank and the air filter After using the machine all fuels must be removed Never touch the drill while the machine is running If it is necessary to replace the protection or the drilling tool be sure that the machine and the drilling tool have come to a standstill The machine must be switched off before changing the wo...

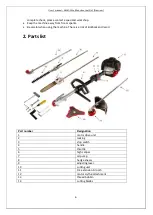
Страница 6: ...r sparks Be careful when using the machine There is a risk of kickback and recoil 2 Parts list Part number Designation 1 motor drive unit 2 locking 3 stop switch 4 handle 5 throttle 6 high caliper 7 oil pump 8 hedge shears 9 adjusting lever 10 cutting unit 11 1m extension 9 tooth 12 motor scythe attachment 13 thread bobbin 14 cutting blades ...

Страница 7: ...heck the scope of delivery for completeness Check the device and accessories for transport damage If possible keep the packaging until the warranty period expires Before use familiarize yourself with the device using the operating instructions Attention The device and packaging material are not children s toys Children must not play with plastic bags foils or small parts There is a danger of swall...

Страница 8: ...og the carburettor or affect engine operation Put any remaining fuel in an airtight container and keep it in a dark cool room Caution Do not use a 2 stroke oil that recommends a mixing ratio of 100 1 Mix the fuel mixture according to the fuel mixing table Mixing process 40 parts petrol to 1 part oil Example 1 l petrol 0 025 l 2 stroke oil 5 l of petrol 0 125 l of 2 stroke oil Mixing procedures 40 ...

Страница 9: ... Assembly Mount the handle to the machine loosen the screws at first until you have made a comfortable adjustment of the risers Place the lower half of the handle on the rubber holder provided and hold it tight Insert the upper half of the handle to fit and tighten the screws and nuts Place the cut off wheel with the serrations pointing downwards into the attachment and hold it in place with a hex...

Страница 10: ...ll on the rotor blade Attention Left hand thread Turn the nut to the left to tighten Tighten the left hand thread as shown using the supplied Allen key Fix the protective shield facing downwards with screws and a hexagon key Attach serrated cut off wheel golden to the rod head and fix with hexagon key This can then be removed ...

Страница 11: ...vers with thumb and index finger each with pulled fixing bolt to couple the snap device of the gear wheel Adjust the attachment rod by turning it Keep both levers pressed to bring the attachment rod into the desired starting position Then remove the red plastic protection on both sides to use the unit Remove the protective cap at the end of the rod before coupling to the motor Loosen the adjustmen...

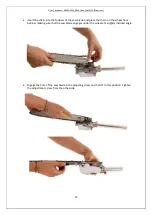
Страница 12: ...rrows of the saw blade and place the chain on the wheel from behind making sure that the saw blade engages under the wheel at a slightly inclined angle Engage the hole of the saw blade in the adjusting screw and hold it in this position Tighten the adjustment screw from the other side ...

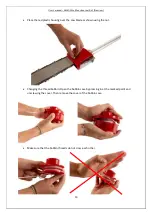
Страница 13: ...red plastic housing over the saw blade as shown using the nut Changing the thread bobbin Open the bobbin case by pressing in at the marked point and unscrewing the cover Then remove the cover of the bobbin case Make sure that the bobbin threads do not cross each other ...

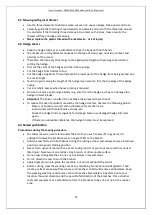
Страница 14: ...n with an even curved movement Then cut the next path Attention Always return the machine to its starting position before cutting the next web When working knock against a stone or tree turn off the engine and pull out the spark plug connector before inspecting the petrol engine brush for damage Attention Be particularly careful when working in difficult terrain and on slopes Cut gradually on tall...

Страница 15: ... To reduce the risk of accidents caused by the hedge trimmer observe the following points Never cut bushes or woods with a diameter of more than 2 cm Avoid contact with metal bodies stones etc Check the hedge trimmer regularly for damage Never use damaged hedge trimmers again If there is a noticeable imbalance the hedge trimmer must be replaced 6 4 Raised pushbutton Precautions during the sawing p...

Страница 16: ... filling the tank after impact or dropping Check cutting tools for tight fit general visual inspection for cracks and damage Replace damaged or blunt cutting tools immediately even if there are minor hairline cracks Weekly inspection gear lubrication also as required If necessary tighten accessible fastening screws You will avoid excessive wear and damage to the unit if you follow the instructions...

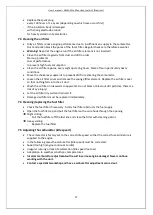
Страница 17: ...at nothing falls into the air duct Wash the air filter in lukewarm soapy water Do not blow or blow out dirt particles there is a risk of eye injury Let the air filter dry well and reinsert it Damaged air filters must be replaced immediately 7 4 Cleaning replacing the fuel filter Check the fuel filter if necessary A dirty fuel filter obstructs the fuel supply Open the fuel filler cap and pull the f...

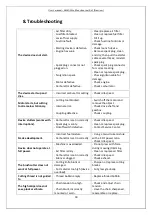
Страница 18: ... motor and remove the object Check drive shaft and gearbox Check coupling Device stutters works with interruptions Carburettor is set incorrectly Spark plug is sooty On off switch defective Check idle speed Clean or replace spark plug Contact Service Center Smoke development Incorrect fuel mixture Carburettor is set incorrectly Using a two stroke mixture with a 40 1 power ratio Check idle speed De...

Страница 19: ...Tank capacity 900 ml Weight 27 lbs 12 4 kg Fuel Petrol Oil mixture 40 1 with 2 stroke oil Drive shaft 9 tooth shaft Engine type 2 Stroke Power 2 2 kW Chainsaw sword 11 81 in 30 cm Cubic capacity 52 ccm Rotations per minute 9000 Petrol oil mixture 1 40 Total length string trimmer 70 9 in 180 cm Total length with hedge trimmer attachment 90 6 in 230 cm Total length with branch saw 84 7 in 215 cm Mea...

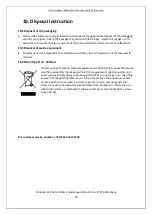
Страница 20: ...ocal waste disposal 10 3 Meaning of the dustbin Protect our environment electrical appliances do not belong in household waste Use the provided for the disposal of electrical equipment collection points and enter your electrical and electronic equipment that you no longer use They help ensure that the potential effects of incorrect disposal on the environment and human health to be avoided So do y...

Страница 21: ...d by us this declaration loses ist validity Tested acc to EU guidelines 2006 42 EG 2014 30 EU 2000 14 EG Harmonized standards EN ISO 11806 1 2011 EN ISO 14982 2009 EN ISO 22868 2011 EN ISO 22867 2011 Sound power level EN ISO 3744 Date Manufacturer Signature Location Würzburg 05 12 2019 Identification of the signatory Korhan Canbolat head of the company Authorised representative for the technical d...

Отзывы: