23
INSPECTING (Utility)
The LCD gauge is not a serviceable component. To
inspect the LCD gauge, see Electrical System.
INSTALLING (DVX)
1. Connect the indicator lamp connectors; then connect
the main harness connector to the ignition switch.
2. Place the steering post cover onto the mounting
bracket; then secure with the reinstallable rivets.
INSTALLING (Utility)
1. Connect the main harness connector to the LCD
gauge; then connect the ignition harness to the igni-
tion connectors.
2. Place the instrument pod onto the mounting bracket; then
secure with the reinstallable rivet and two cap screws.
Steering Post/Tie Rods
KM598E
REMOVING
1. On the Utility, remove the front rack and front center
panel. On the DVX, proceed to step 2.
2. Remove the steering post cover (DVX) or the instru-
ment pod (Utility); then remove the cap screws
securing the handlebar to the steering post. Account
for two handlebar holders.
KM189A
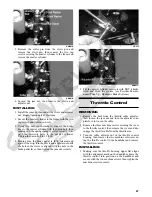
3. Lift the handlebar out of the lower handlebar holders
and lay the handlebar forward.
4. Remove the cotter pins and slotted nuts securing the
tie rod ends to the steering post arm; then disconnect
the tie rods from the arm.
KM590
5. Remove the cotter pin and slotted nut from the lower
end of the steering post; then remove the upper steer-
ing shaft support block. Account for a cable guide,
two steering support blocks, and the upper steering
post bushing.
.
KM588
KM589
6. Remove the steering post from the ATV.
CLEANING AND INSPECTING
1. Wash the tie rod ends in parts-cleaning solvent. Dry
with compressed air. Inspect the pivot area for wear.
Apply a low-temperature grease to the ends.
! WARNING
Always wear safety glasses when using compressed air.
Содержание 300 Utility
Страница 1: ...300 UTILITY DVX 300 ATV SERVICE MANUAL 2014 ...
Страница 3: ......
Страница 118: ...Printed in U S A Trademarks of Arctic Cat Inc Thief River Falls MN 56701 p n 2259 825 ...


