3.4 Option 08, 10 to 60 Vdc Power
15
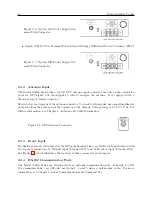
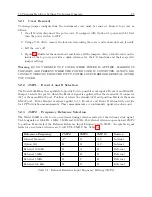
Figure 3.2: Option 07 Power Supply Inlet
Connector
as “+” and “
−
.” After connecting a ground wire, connect the positive and negative leads from the
station batteries to the corresponding Option 07 terminals.
3.4
Option 08, 10 to 60 Vdc Power
This option replaces the standard power supply with one accepting 10 to 60 Vdc (
DC only
),
<
20 Watts typical. Replaces the standard IEC-320 inlet with a 3-pole terminal strip. Option 08
operates from common low-voltage battery systems, including 12, 24, and 48 Vdc.
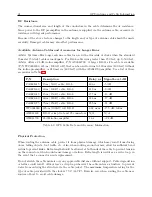
Figure 3.3: Option 08 Power Supply Inlet
Connector
3.4.1
Option 08, Connecting Inlet Power
When wiring station batteries to this power supply, make sure to first connect an earth ground
wire to the terminal strip connector labeled ”G” (for ground). After connecting a ground wire,
connect the positive and negative leads from the station batteries to the corresponding Option 08
terminals. Be sure to observe the correct polarity, as the power supply used with the Option 08
will not accept reverse input polarity.
CAUTION: DO NOT connect Option 08 module to any ac
voltage source
.
3.5
Option 15A, 110 to 170 Vdc Terminal Power Strip
Option 15A for the Model 1088A/B is designed to provide power inlet surge withstand capability
in compliance with ANSI C37.90-1 and IEC 801-4. Option 15A also incorporates Option 07, which
is a three-pole barrier strip inlet for 125 volt DC substation power.
3.5.1
Option 15A, Connecting Inlet Power
When wiring this power supply, make sure to first connect an earth ground wire to the terminal strip
connector labeled ”G” (for ground). Positive and negative terminals are marked on the terminals
as “+” and “
−
.” After connecting a ground wire, connect the positive and negative leads from the
station batteries to the corresponding Option 07 terminals.
Содержание 1088A
Страница 4: ...iv ...
Страница 6: ...vi ...
Страница 18: ...xviii LIST OF FIGURES ...
Страница 23: ...1 4 Attaching Rack Mount Ears to 1088A B Series Clocks 3 Figure 1 2 Attaching Rack Mount Ears ...
Страница 24: ...4 Unpacking the Clock ...
Страница 32: ...12 Front and Rear Panels ...
Страница 38: ...18 Connecting Inlet Power Input and Output Signals ...
Страница 41: ...4 1 GPS Antenna Installation 21 Figure 4 2 Antenna Mounting Bracket Figure 4 3 Antenna Mounting with AS0044600 ...
Страница 46: ...26 GPS Antenna and Cable Information ...
Страница 48: ...28 Setting Internal Jumpers Figure 5 1 Model 1088B Main Board ...
Страница 76: ...56 The Setup Menus ...
Страница 112: ...92 Serial Communication and Command Set ...
Страница 127: ...B 4 Physical Dimensions 107 Figure B 1 Suggested Mounting of the AS0094500 Surge Arrester ...
Страница 128: ...108 Using Surge Arresters ...
Страница 137: ...C 5 Option 04 Parallel BCD Output 117 C 5 2 Option 04 Firmware Setup Figure C 2 Option 04 Firmware Setup ...
Страница 145: ...C 5 Option 04 Parallel BCD Output 125 Figure C 4 Option 04 Output Jumper Settings ...
Страница 146: ...126 Options List Figure C 5 Option 04 Board Layout and Jumper Locations ...
Страница 165: ...C 12 Option 17 Parallel BCD Output and Second RS 232 Port 145 Figure C 11 Option 17 Output Jumper Settings ...
Страница 166: ...146 Options List Figure C 12 Option 17 Board Layout and Jumper Locations ...
Страница 176: ...156 Options List C 14 5 Typical Network Configuration Figure C 15 Option 18 Network Configuration ...
Страница 187: ...C 16 Option 20A Four Fiber Optic Outputs 167 Figure C 22 Option 20A Jumper Locations ...
Страница 194: ...174 Options List Figure C 24 Option 23 Internal Jumper Setup ...
Страница 196: ...176 Options List Figure C 25 Option 27 Jumper Locations ...
Страница 214: ...194 Options List Figure C 28 Option 29 Connector Signal Locations ...
Страница 270: ...250 Options List ...


