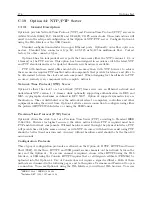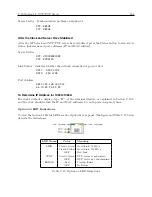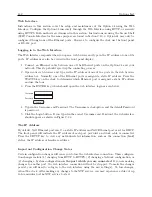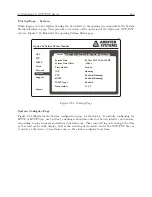
C.19 Option 34: NTP/PTP Server
179
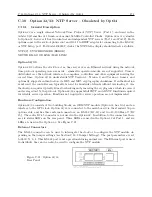
Option 34 using the Console, you will need an SSH client. These instructions use an SSH client
called PuTTY when describing the Console Interface. Option 34 comes by default configured for
an HTTP connection, and may be configured to use HTTPS.
C.19.2
Option 34 Setup
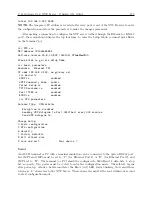
This section covers initial setup of the Option 34, NTP/PTP server. Before the Option 34 can serve
time accurately, the clock must be locked to the GPS and stable. Once meeting these conditions,
the Option 34 can provide reliable time to a network. The three subsections below will guide you
through this initial phase of starting up the clock and configuring Option 34.
Option 34 can be ordered with either static IP addresses, DHCP assigned IP addresses, or both
static and DHCP. This information should help you decide how to configure the Option 34.
Note: If your Option 34 has fiber optic connectors installed, do not disconnect cable while clock
is operating or the ntp/ptp service may not recover. If fiber optic cables are disconnected while
clock is operating and service stops, power cycle the clock.
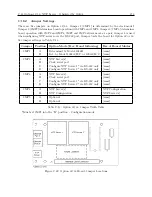
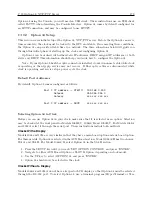
Default Port Addresses
By default, Option 34 comes configured as follows:
Port 1 IP address -- STATIC:
192.168.0.232
Netmask
255.255.255.0
Gateway
xxx.xxx.xxx.xxx
Port 2 IP address -- DHCP:
xxx.xxx.xxx.xxx
Selecting Option 34 in Clock
Before you can use Option 34 in your clock, make sure that it is selected as an option. Selection
may be checked at the front panel for Models 1084B/C, 1088A/B and 1093B/C. For Models 1084A
and 1093A, select it through the serial port. These instructions include both methods.
Clocks With a Display
Models 1084 and 1093 are very similar in that they have a main board option and aux board option.
For these models, Option 34 is selected in the AUX Board section. Model 1088A/B has two choices:
Slot A and Slot B. For Model 1088A/B, select Option 34 in the Slot B section.
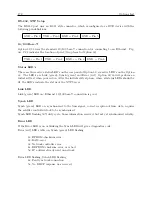
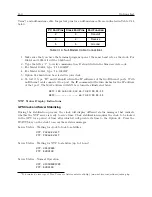
1. Press the SETUP key until you reach “SET OPTION CONTROL” and press “ENTER”.
2. Navigate to either AUX Board Option or SLOT B Option, depending on clock model.
3. Use the UP key to select (OPTION) 34 and press “ENTER.”
4. Option 34 should now be selected in the clock.
Clocks Without a Display
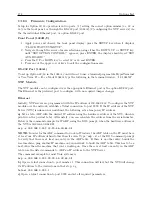
Models 1084A and 1093A do not have a keypad or LCD display, so that Option 34 must be selected
through the RS-232 port. To select Option 34, use a terminal program (HyperTerminal or Tera
Содержание 1084A
Страница 4: ...iv ...
Страница 6: ...vi ...
Страница 18: ...xviii LIST OF FIGURES ...
Страница 23: ...1 4 Attaching Rack Mount Ears to 1084A B C Series Clocks 3 Figure 1 2 Attaching Rack Mount Ears ...
Страница 24: ...4 Unpacking the Clock ...
Страница 36: ...16 Connecting Inlet Power Input and Output Signals ...
Страница 39: ...4 1 GPS Antenna Installation 19 Figure 4 2 Antenna Mounting Bracket Figure 4 3 Antenna Mounting with AS0044600 ...
Страница 44: ...24 GPS Antenna and Cable Information ...
Страница 114: ...94 Startup and Basic Operation ...
Страница 123: ...B 4 Physical Dimensions 103 Figure B 1 Suggested Mounting of the AS0094500 Surge Arrester ...
Страница 124: ...104 Using Surge Arresters ...
Страница 134: ...114 Options List C 6 2 Option 06 Firmware Setup Figure C 3 Option 06 Firmware Setup ...
Страница 142: ...122 Options List Figure C 5 Option 06 Output Jumper Settings ...
Страница 143: ...C 6 Option 06 Parallel BCD Output 1 millisecond Resolution 123 Figure C 6 Option 06 Board Layout and Jumper Locations ...
Страница 157: ...C 10 Option 17 Parallel BCD Output and Second RS 232C Port 137 Figure C 12 Option 17 Output Jumper Settings ...
Страница 158: ...138 Options List Figure C 13 Option 17 Board Layout and Jumper Locations ...
Страница 163: ...C 13 Option 20A Four Fiber Optic Outputs 143 Figure C 14 Option 20A Jumper Locations ...
Страница 170: ...150 Options List Figure C 16 Option 23 Internal Jumper Setup ...
Страница 172: ...152 Options List Figure C 17 Option 27 Jumper Locations ...
Страница 190: ...170 Options List Figure C 20 Option 29 Connector Signal Locations ...
Страница 246: ...226 Options List ...


