


Version: 20210708
26
CONFIGURING DETECTION ZONES
To further optimize the detection or to avoid false triggering of alarms, e.g., due to very dynamic or badly illuminated
zones in the field of view, the detection can be restricted to certain zones in the field of view. These zones can be
drawn in the app configuration screen in the browser itself.
By default, the detection area is the whole field of view. If detection zones are defined, this will override the default
and detection will only occur only in the defined zones.
To define detection zones, perform following steps:
1.
Connect to your camera, using your internet browser software and login to the camera webpage.
Refer to the camera user manual on how to do this.
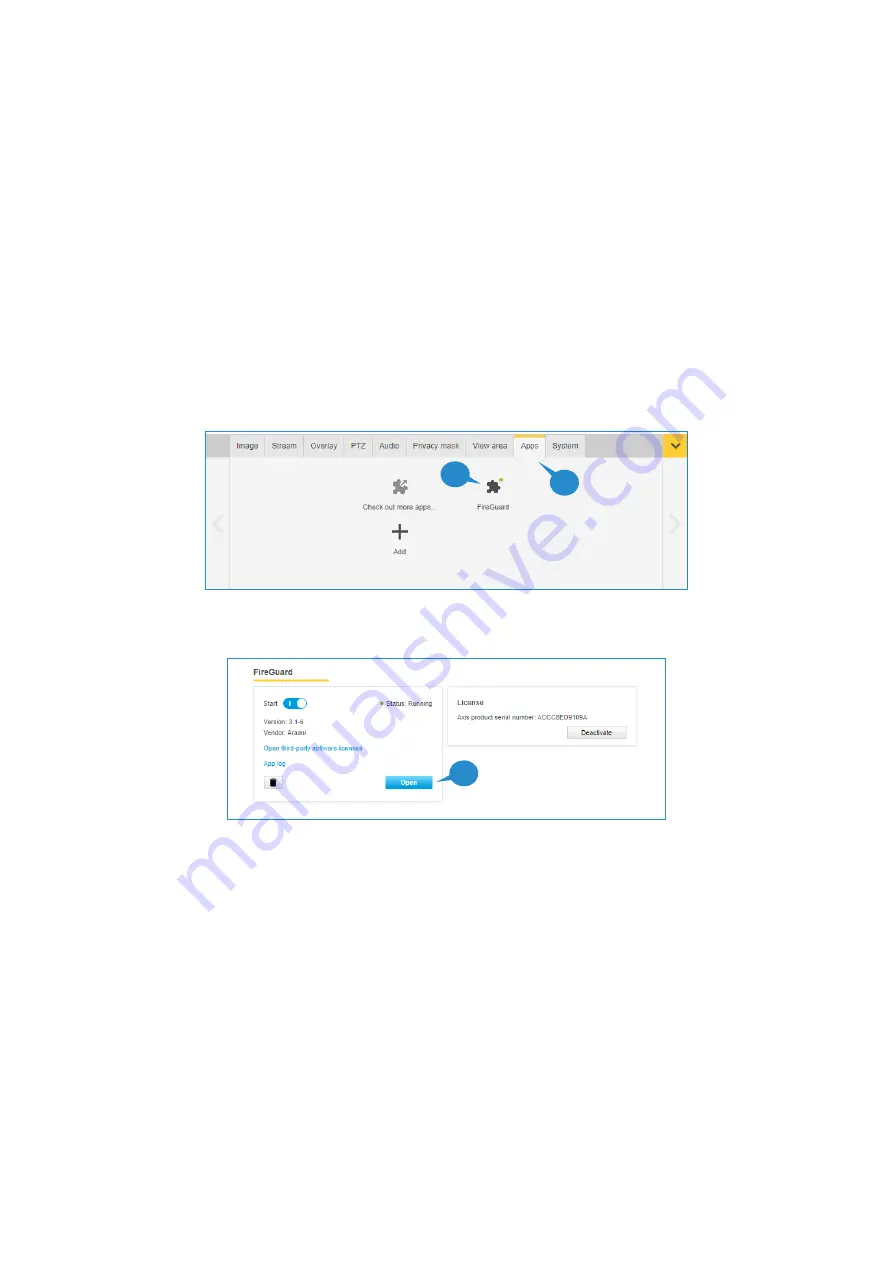
2.
Open the settings window by clicking th
e “settings” button in the bottom right of the camera webpage.
3.
Select the “Apps” tab in the control panel.
4.
Select the Araani Fire Guard app.
5.
Make sure the application is running, otherwise start Araani Fire Guard.
Select “Open”
6.
A new browser window will appear that contains all available settings to configure Araani Fire Guard.
Select the
“
DetectionZone
”
tab.
7.
To draw a polygon detection zone on the visual image:
a.
Left click in the image to add a point.
b.
Right click to close the polygon (you need at least 3 points).
c.
Select “Undo” to undo
the last action. Multiple actions can be undone.
d.
Select “Clear” to clear all drawn zones
.
e.
Select “
Refresh
” to refresh the picture with the current live camera image
.
3
4
5


