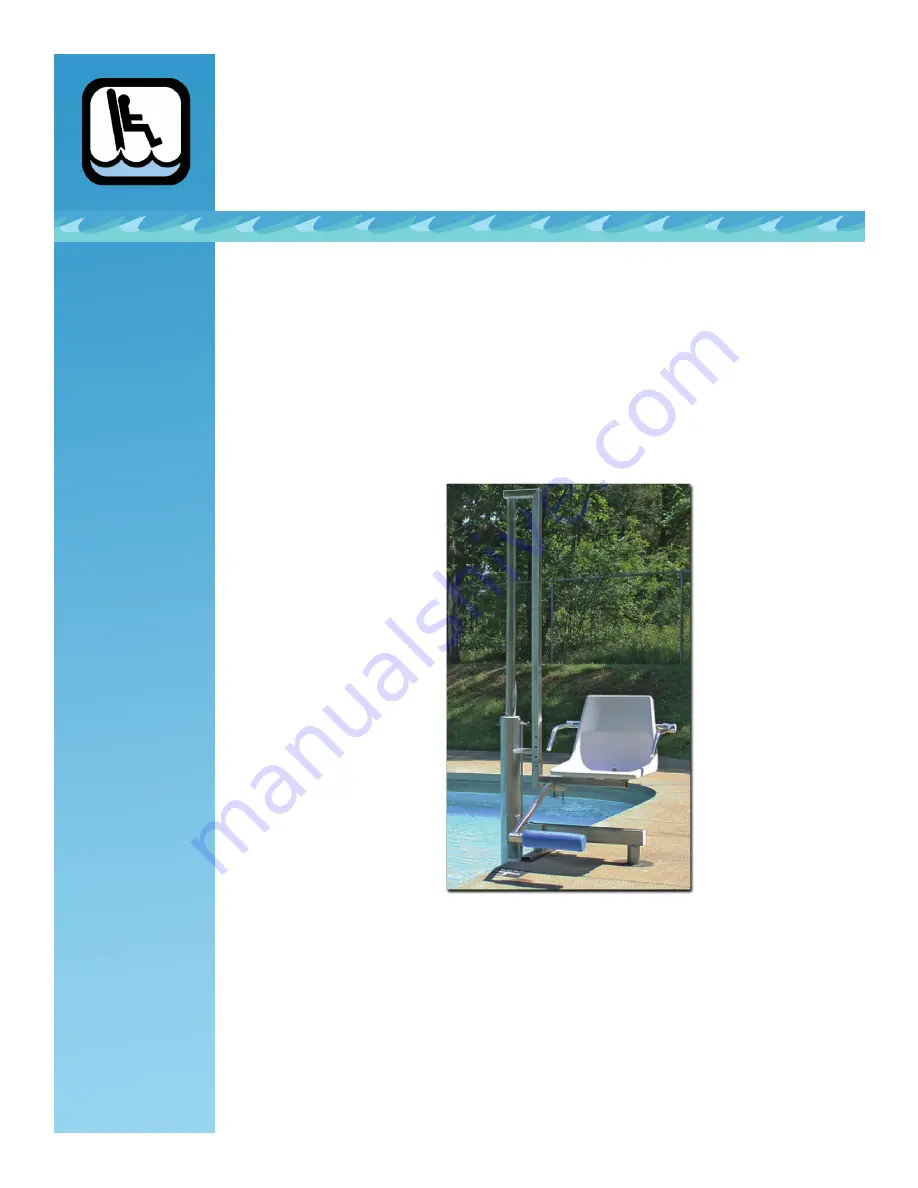
Aquatic Access Inc.
Pool Lift Model IGAT-180
Installation Guide
Instruction Manual
®
AquaticAccess.com
1921 Production Drive, Louisville, Kentucky 40299-2110 USA
800.325.5438 502.425.5817 Fax: 502.425.9607
Страница 1: ...Aquatic Access Inc Pool Lift Model IGAT 180 Installation Guide Instruction Manual AquaticAccess com 1921 Production Drive Louisville Kentucky 40299 2110 USA 800 325 5438 502 425 5817 Fax 502 425 9607...
Страница 2: ......
Страница 3: ...ring to Install Lift Lift Assembly Safety Procedures Service and Maintenance Inspection of Lift Disassembly of Lift Replacement of Piston Seal Replacement of Piston Replacement of Top Guide Replacemen...
Страница 4: ......
Страница 5: ...t The pool lift should normally be located where there is at least 36 of straight vertical pool wall The depth would need to be greater if there is a curve instead of a right angle at the pool bottom...
Страница 6: ...ned in the hole with the notch facing the water use a level to be certain the socket is plumb and straight and pour the anchor cement around the socket Place a combination square with level full depth...
Страница 7: ...pacity was tested at lift connection on a baseline unit with operating water pressure while lifting open flow pressure and under ideal mounting conditions pursuant to installation instructions Static...
Страница 8: ...nder the seat assembly Attach it to the ends of wheelbase mounting plate with the bolts and nuts supplied with the vinyl liner wall pad When properly adjusted the pad should be flush against the pool...
Страница 9: ...eadrest has been ordered follow the same procedure as footrest to install the headrest in the headrest bracket on the seat back Optional seat belts are installed by sliding the belts through the upper...
Страница 10: ...is to be left unused for eight hours or longer Always run the seat up and down through several cycles after turning the water supply on This bleeds air out of the cylinder which could cause unexpecte...
Страница 11: ...from chlorine and other chemicals in the pool clean the lift only with a soft cloth or Scotchbrite pad After cleaning and rinsing apply car wax and buff to help maintain a bright appearance Never use...
Страница 12: ...amp with either Formula 409 or water Never use any oil or petroleum based product inside the cylinder as it will damage the piston and seal 7 Carefully slide piston rod assembly back into cylinder Tak...
Страница 13: ...tration Install spacer on piston rod Clean spacer if it is dirty 3 Install piston on end of piston rod using a rubber or plastic mallet Hit bottom of piston until piston is firmly seated Piston should...
Страница 14: ...and remove shell 3 Attach seat frame to seat shell and tighten bolts 4 Attach seat to lift and install footrest and head rest REPLACEMENT OF VALVE ASSEMBLY 1 Disconnect water supply 2 Remove hoses fr...
Страница 15: ...of the new valve stem and replace stem in valve assembly matching alignment of the protrusion Make certain that the square shaft is completely seated in the square hole Reinsert the valve assembly in...
Страница 16: ...eal White gray or brown chalky deposit High pH high total alkalinity high calcium content hard water Clean unit with soft cloth or Scotchbrite pad apply car wax to protect finish Corrosion of Metal Pa...
Страница 17: ...sing on or around the lift 6 Do not jump or dive from lift 7 Turn water supply OFF and secure lift with push pin when the lift is to be left unused for eight hours or longer 8 Always run the seat up a...
Страница 18: ...ive gallons US per minute at 40 PSI 2 8 Bar to 70 PSI 4 8 Bar maximum pressure ROTATION Automatic 180 Turn MATERIALS 304 316L Stainless UHMW plastic Brass and Rubber OVERALL SIZE HEIGHT 6 2 5 1892 mm...