background image

STEP 4

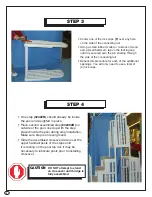
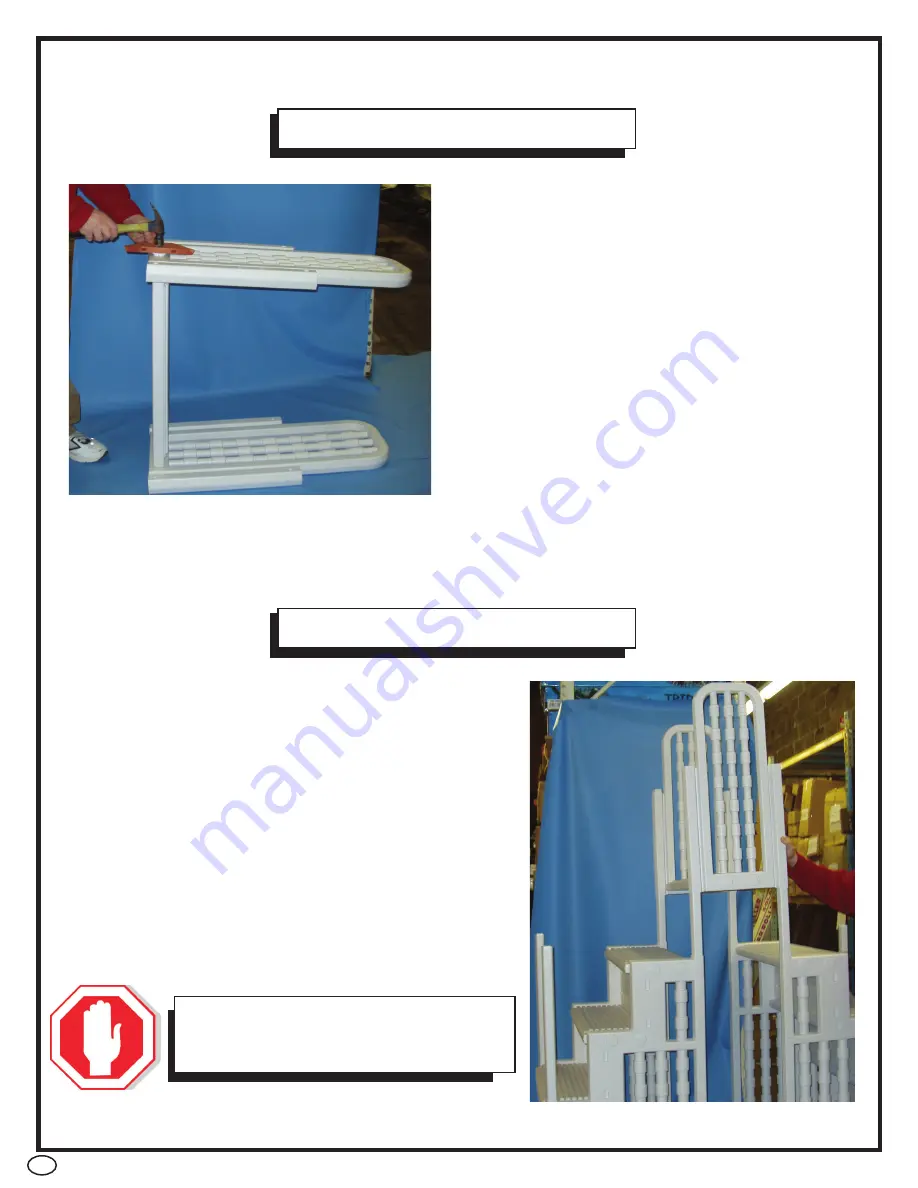
 One step (32402B) should already be


inside

the pool and weighted in place.

 Place second assembled step (832402B)


on

outside of the pool, lined up with the step

placed inside the pool during step


installation.

Make sure step is on level ground.

 Slide the assembled crossover down over the

upper handrail posts of the steps until

it is resting on the pool top rail. It may be

necessary to lubricate posts prior to installing

crossover.

CAUTION

DO NOT attempt to stand 

on crossover until bridge is 

fully assembled.

5

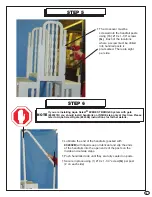
STEP 3


Center one of the lock caps (

F

) over


any hole


on the side of the connecting rail.


Using a small rubber mallet or (a block of wood


and a small hammer), tap on the locking cap


until it is secured over the pin sticking through


the side of the connecting rail.


Repeat this procedure for each of the additional


openings. You will only need to use a total of

(4)

lock caps.

Содержание 832405B

Страница 1: ...structions provided in the STEP BOX model 832402B Refer to these directions once you have assembled both steps If you are installing the Aqua Select Everest Bridge System please check the carton label...

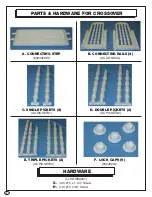
Страница 2: ...NECTING STEP 832402WS B CONNECTING RAILS 2 AC CONRAIL C SINGLE PICKETS 2 AC PICKETS1 D DOUBLE PICKETS 2 AC PICKETS2 E TRIPLE PICKETS 2 AC PICKETS3 F LOCK CAPS 5 832402LC 2 G 40 10 x 1 1 4 Screw H 12 1...

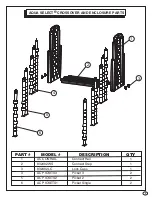
Страница 3: ...ION QTY 1 AC CONRAIL Connect Rail 1 2 832402WS Connect Step 1 3 832402LC Lock Caps 1 4 AC PICKITS3 Picket 3 2 5 AC PICKITS2 Picket 2 2 6 AC PICKETS1 Picket Single 2 AQUA SELECT CROSSOVER AND ENCLOSURE...

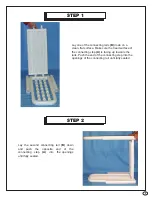
Страница 4: ...surface of the connecting step A is facing up towards the rails Push the end of the connecting step into the openings of the connecting rail until fully seated STEP 2 Lay the second connecting rail B...

Страница 5: ...ing on the pool top rail It may be necessary to lubricate posts prior to installing crossover CAUTION DO NOT attempt to stand on crossover until bridge is fully assembled 5 STEP 3 Center one of the lo...

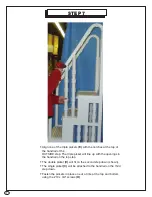
Страница 6: ...ith liquid soap or lubricant and slip the ends of the handrails into the open ends of the posts on the inside and outside steps Push handrails down until they are fully seated on posts Secure in place...

Страница 7: ...The triple picket will line up with the openings in the handrail on the top step The double picket D will fit on the second step down shown The single picket C will be attached to the handrail on the...

Страница 8: ...ther than that for which it is intended Maximum weight on steps should NOT exceed 350 lbs WARNING Exceeding the recommended weight limit may cause the step to fail and may result in injury MAINTENANCE...

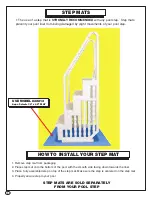
Страница 9: ...of the step mat Make sure the step is centered on the step mat 4 Properly secure step to your pool STEP MATS ARE SOLD SEPARATELY FROM YOUR POOL STEP HOW TO INSTALL YOUR STEP MAT The use of a step mat...

Отзывы: