3
- 9
MOTOR
ENGINE
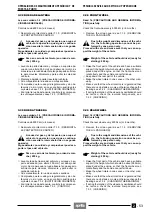
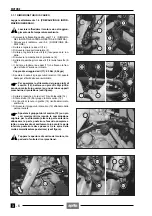
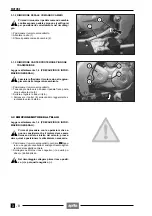
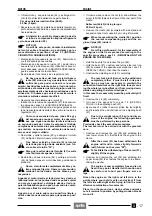
3.1.2 DESMONTAJE PEDAL MANDO CAMBIO
Antes de desmontar el pedal del mando del
cambio marque el pedal y el piñón (véase fi-
gura) para colocarlo correctamente durante
su instalación.
◆
Coloque el vehículo sobre el caballete.
◆
Afloje el tornillo (1).
◆
Extraiga el pedal del mando del cambio (2).
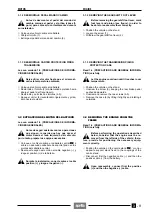
3.1.3 DESMONTAJE CARTER PROTECCION PIÑON
TRANSMISION
Lea con cuidado 1.4 (PRECAUCIONES E INFORMA-
CIONES GENERALES).
Deje enfriar el motor hasta que el mismo al-
cance la temperatura ambiente.
◆
Coloque el vehículo sobre el caballete.
◆
Destornille el tornillo (3) manteniendo apretado hacia
abajo el pedal del freno trasero.
◆
Destornille y quite los dos tornillos (4-5).
◆
Saque el cárter (6) levantándolo ligeramente y girán-
dolo hacia el exterior.
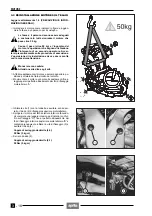
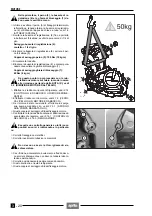
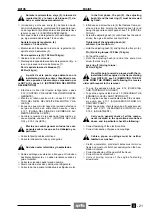
3.2 EXTRACCION DEL MOTOR DEL BASTIDOR
Lea con cuidado 1.4 (PRECAUCIONES E INFORMA-
CIONES GENERALES).
Antes de seguir adelante con las operaciones
que siguen, recuerde que hay que sacar el
motor desde el lado izquierdo del vehículo;
por lo tanto prepare los equipos necesarios.
◆
Coloque el vehículo sobre el caballete central
&
o
sobre un adecuado caballete de soporte fijado en los
pivotes del caballete central.
◆
Desconecte según este orden el cable negativo (–) y
luego el positivo (+) de la batería.
Durante la instalación, conecte antes el cable
positivo (+) y luego el negativo (–).
a
a
a
a
3.1.2 REMOVING THE GEARSHIFT FOOT LEVER
Before removing the gearshift foot lever, mark
foot lever and pinion (see figure), in order to
be able to reassemble them correctly.
◆
Position the vehicle on the stand.
◆
Loosen the screw (1).
◆
Withdraw the gearshift foot lever (2).
3.1.3 REMOVING THE TRANSMISSION PINION
PROTECTION CASE
Read 1.4 (PRECAUTIONS AND GENERAL INFORMA-
TION) carefully.
Let the engine cool down until it reaches room
temperature.
◆
Position the vehicle on the stand.
◆
Unscrew the screw (3), keeping the rear brake pedal
pushed downwards.
◆
Unscrew and remove the two screws (4-5).
◆
Remove the case (6) by lifting it slightly and rotating it
outwards.
3.2 REMOVING THE ENGINE FROM THE
FRAME
Read 1.4 (PRECAUTIONS AND GENERAL INFORMA-
TION) carefully.
Before performing the operations described
below, consider that the engine must be re-
moved from the left side of the vehicle; there-
fore, provide for positioning the necessary equip-
ment correctly.
◆
Position the vehicle on the centre stand
&
, or on an
apposite support stand fixed to the couplings of the
centre stand.
◆
Disconnect first the negative cable (–) and then the
positive cable (+) from the battery.
Upon reassembly, connect first the positive
(+) and then the negative (–) cable.
a
a
a
a
Содержание Pegaso 650
Страница 1: ......
Страница 3: ...0 4 NOTE NOTES ANMERKUNGEN ...
Страница 4: ...1 1 1 2 3 4 5 6 7 8 INFORMAZIONI GENERALI INFORMACIONES GENERALES GENERAL INFORMATION ...
Страница 42: ......
Страница 69: ...3 1 1 2 3 4 5 6 7 8 MOTORE MOTOR ENGINE ...
Страница 90: ...3 22 MOTORE NOTE NOTAS NOTES ...
Страница 91: ...4 1 1 2 3 4 5 SISTEMA DI ALIMENTAZIONE SISTEMA DE ALIMENTACIÓN FUEL SYSTEM ...
Страница 116: ...4 26 SISTEMA DI ALIMENTAZIONE NOTE NOTAS NOTES ...
Страница 117: ...5 1 1 2 3 4 5 6 7 8 IMPIANTO DI RAFFREDDAMENTO SISTEMA DE REFRIGERACIÓN COOLING SYSTEM ...
Страница 130: ...5 14 IMPIANTO DI RAFFREDDAMENTO SISTEMA DE REFRIGERACIÓN COOLING SYSTEM NOTE NOTAS NOTES ...
Страница 131: ...6 1 6 1 2 3 4 5 6 7 8 IMPIANTO ELETTRICO INSTALACIÓN ELÉCTRICA ELECTRICAL SYSTEM ...
Страница 176: ...IMPIANTO ELETTRICO INSTALACIÓN ELÉCTRICA ELECTRICAL SYSTEM 6 46 NOTE NOTAS NOTES ...
Страница 177: ...7 1 1 2 3 4 5 6 7 8 CICLISTICA PARTE CICLO CHASSIS PARTS ...
Страница 226: ... 67 3 57 2 66 6 3 576 7 50 5827 3267 5 25 58 75 6 5 5 5 ...
Страница 242: ... 67 3 57 2 66 6 3 576 7 66 5 12 17 5 25 5 12 17 52 5217 5 ...
Страница 246: ... 67 3 57 2 66 6 3 576 7 70 5 12 3267 5 25 5 12 75 6 52 5 5 5 ...
Страница 272: ... 67 3 57 2 66 6 3 576 7 96 NOTE NOTAS NOTES ...
Страница 273: ...8 1 1 2 3 4 5 6 7 8 INFORMAZIONI PER LE RIPARAZIONI INFORMACIONES PARA LAS REPARACIONES REPAIRS ...
Страница 301: ...INFORMAZIONI PER LE RIPARAZIONI INFORMACIONES PARA LAS REPARACIONES REPAIRS 8 29 E F E F G H G H ...
Страница 302: ...INFORMAZIONI PER LE RIPARAZIONI INFORMACIONES PARA LAS REPARACIONES REPAIRS 8 30 I L I M L N M N ...
Страница 303: ...INFORMAZIONI PER LE RIPARAZIONI INFORMACIONES PARA LAS REPARACIONES REPAIRS 8 31 O P Q P O R Q R ...
Страница 310: ...INFORMAZIONI PER LE RIPARAZIONI INFORMACIONES PARA LAS REPARACIONES REPAIRS 8 38 NOTE NOTAS NOTES ...
Страница 311: ...INFORMAZIONI PER LE RIPARAZIONI INFORMACIONES PARA LAS REPARACIONES REPAIRS 8 39 ...


