2
- 15
OPERACIONES DE MANTENIMIENTO PERIÓDICO Y DE
PUESTA A PUNTO
PERIODIC SERVICE AND SETTING UP OPERATIONS
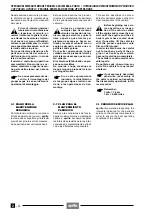
2.6 BUJÍA
Lea con mucha atención 1.4 (PRECAUCIONES E IN-
FORMACIONES GENERALES).
Controle cada 6000 km y substituya cada 12000 km.
Para el desmontaje y la limpieza:
Deje enfriar el motor hasta que el mismo al-
cance la temperatura ambiente.
◆
Desmonte el deposito del combustible, véase 7.1.1
(DESMONTAJE DEPOSITO COMBUSTIBLE).
No desconecte nunca la pipeta de la bujía con
el motor en marcha, porque podría recibir una
fuerte descarga eléctrica del sistema de en-
cendido.
◆
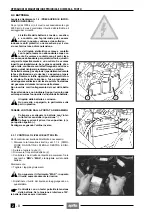
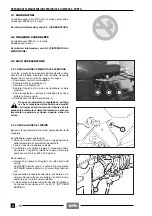
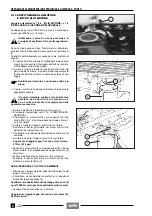
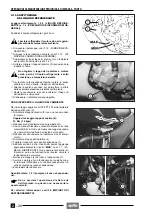
Quite la pipa de la bujía (1).
◆
Limpie muy bien la base de la bujía.
◆
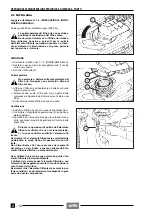
Desenrósque la bujía (con la llave suministrada con el
set de herramientas) y extráigala del alojamiento, te-
niendo cuidado de que no entre polvo u otras substan-
cias en el interior del cilindro.
◆
Controle que sobre el electrodo y sobre la porcelana
central de la bujía no haya costras de carbonilla o sig-
nos de corrosión. Eventualmente, limpie con un lim-
piador adecuado para bujías, con un alambre y/o con
un cepillo metálico. Sople muy fuerte con un chorro de
aire comprimido para evitar que los residuos que se
han quitado puedan entrar en el motor.
Substituya la bujía si tiene hendiduras en el aislador,
electrodos oxidados o incrustaciones excesivas.
◆
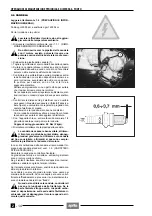
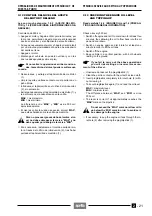
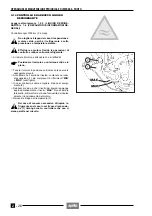
Controle la distancia entre los electrodos por medio de
un calibre de espesor. Esta debe ser de 0,6 ÷ 0,7 mm
(véase figura); eventualmente ajústela curvando con
cuidado el electrodo de masa.
◆
Cerciórese que la arandela esté en buenas condicio-
nes. Con la arandela montada, enrosque la bujía con la
mano hasta el fondo para evitar que se dañe la rosca.
◆
Apriete con la llave, haciéndole dar 1/2 vuelta a la
bujía para comprimir la arandela.
Par de apriete bujía: 20 Nm (2 kgm).
◆
Monte nuevamente la pipa de la bujía.
La bujía debe estar bien apretada, de otro
modo el motor podría sobrecalentarse dañán-
dose gravemente. Utilice sólo bujías del tipo
aconsejado, para no comprometer el rendimiento y la
duración del motor.
Si debe substituir la bujía, aconsejamos utilizar las bujías
estándar, véase 1.6 (FICHA TECNICA).
Desmonte la bujía y controle el aislante.
La graduación térmica es correcta, si ambos aislantes
son de color marrón claro. Si los aislantes están ennegre-
cidos por las incrustaciones de carbonilla, utilice bujías
con un grado térmico inferior.
Si el aislante está blanco, substituya la bujía por otra con
un grado térmico inferior.
Las bujías con un alto grado térmico se utilizan para mar-
chas a altas velocidades. Están fabricadas para que se
enfríen rápidamente y prevenir el sobrecalentamiento, y
son llamadas bujías de tipo “frío”.
Cuando substituya la bujía, controle el paso y
la longitud de la rosca. Si la parte roscada es
demasiado corta, las incrustaciones de carbo-
nilla se depositarán en el alojamiento de la rosca, con
el riesgo de dañar el motor quando se reinstale la co-
rrecta.
a
a
a
a
2.6 SPARK PLUG
Read 1.4 carefully (PRECAUTIONS AND GENERAL
INFORMATION).
Check every 6000 km and replace every 12000 km.
For removing and cleaning:
Allow the engine to cool down until it reaches
room temperature.
◆
Remuove the fuel tank, see 7.1.1 (REMOVING THE
FUEL TANK).
Never disconnect the spark plug cap with the
engine running, since you may get an electric
shock from the ignition system.
◆
Take off the spark plug cap (1).
◆
Remove every trace of dirt from the base of the spark
plug.
◆
Unscrew the spark plug (spanner to be found in tool
kit) and extract it from its seat, taking care that no dust
or other substances enter the cylinder.
◆
Make sure there are no carbon deposits or corrosion
marks on the electrode or the central porcelain part.
If necessary, clean them with the special spark plug
cleaner, with an iron wire and/or metal brush.
Blow a jet of air into the spark plug to prevent any re-
sidual material from entering the engine.
The spark plug must be replaced if it shows cracks on
the insulating material, corroded electrodes or exces-
sive deposits.
◆
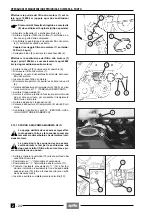
Check the spark plug gap with a thickness gauge; it
should be 0.6 ÷ 0.7 mm (see figure). Adjust it, if nec-
essary, carefully bending the earth electrode.
Make sure the washer is in good condition.
◆
With the washer in place, screw the spark plug com-
pletely by hand so as not to damage the thread.
◆
Tighten the spark plug with the special spanner, giving
it half a turn to compress the washer.
Spark plug driving torque: 20 Nm (2 kgm).
◆
Put back the spark plug cap.
The spark plug must be tightened well other-
wise the engine could overheat and be seri-
ously damaged. Use the recommended type
of spark plug only so as not to endanger the perform-
ance and life of the engine.
When changing the spark plug we recommend using the
standard type, see 1.6 (TECHNICAL SPECIFICATIONS).
Remove the spark plug and check the insulator.
The heat rating is correct if both the insulators are col-
oured light brown. If the insulators are seen to be black-
ened from carbon deposits, use spark plugs with a hotter
heat rating.
If the insulator is white, replace the spark plug with one
with a colder heat rating.
Spark plugs with a cold heat rating are used for high
speed driving.
They are designed to cool sufficiently and to prevent
overheating and are called “cold” spark plugs.
When replacing a spark plug, check the pitch
and length of the thread. If the threaded part is
too short, carbon deposits will settle on the
thread seat and may result in damage to the engine
when the correct one is positioned back in place.
a
a
a
a
Содержание Pegaso 650
Страница 1: ......
Страница 3: ...0 4 NOTE NOTES ANMERKUNGEN ...
Страница 4: ...1 1 1 2 3 4 5 6 7 8 INFORMAZIONI GENERALI INFORMACIONES GENERALES GENERAL INFORMATION ...
Страница 42: ......
Страница 69: ...3 1 1 2 3 4 5 6 7 8 MOTORE MOTOR ENGINE ...
Страница 90: ...3 22 MOTORE NOTE NOTAS NOTES ...
Страница 91: ...4 1 1 2 3 4 5 SISTEMA DI ALIMENTAZIONE SISTEMA DE ALIMENTACIÓN FUEL SYSTEM ...
Страница 116: ...4 26 SISTEMA DI ALIMENTAZIONE NOTE NOTAS NOTES ...
Страница 117: ...5 1 1 2 3 4 5 6 7 8 IMPIANTO DI RAFFREDDAMENTO SISTEMA DE REFRIGERACIÓN COOLING SYSTEM ...
Страница 130: ...5 14 IMPIANTO DI RAFFREDDAMENTO SISTEMA DE REFRIGERACIÓN COOLING SYSTEM NOTE NOTAS NOTES ...
Страница 131: ...6 1 6 1 2 3 4 5 6 7 8 IMPIANTO ELETTRICO INSTALACIÓN ELÉCTRICA ELECTRICAL SYSTEM ...
Страница 176: ...IMPIANTO ELETTRICO INSTALACIÓN ELÉCTRICA ELECTRICAL SYSTEM 6 46 NOTE NOTAS NOTES ...
Страница 177: ...7 1 1 2 3 4 5 6 7 8 CICLISTICA PARTE CICLO CHASSIS PARTS ...
Страница 226: ... 67 3 57 2 66 6 3 576 7 50 5827 3267 5 25 58 75 6 5 5 5 ...
Страница 242: ... 67 3 57 2 66 6 3 576 7 66 5 12 17 5 25 5 12 17 52 5217 5 ...
Страница 246: ... 67 3 57 2 66 6 3 576 7 70 5 12 3267 5 25 5 12 75 6 52 5 5 5 ...
Страница 272: ... 67 3 57 2 66 6 3 576 7 96 NOTE NOTAS NOTES ...
Страница 273: ...8 1 1 2 3 4 5 6 7 8 INFORMAZIONI PER LE RIPARAZIONI INFORMACIONES PARA LAS REPARACIONES REPAIRS ...
Страница 301: ...INFORMAZIONI PER LE RIPARAZIONI INFORMACIONES PARA LAS REPARACIONES REPAIRS 8 29 E F E F G H G H ...
Страница 302: ...INFORMAZIONI PER LE RIPARAZIONI INFORMACIONES PARA LAS REPARACIONES REPAIRS 8 30 I L I M L N M N ...
Страница 303: ...INFORMAZIONI PER LE RIPARAZIONI INFORMACIONES PARA LAS REPARACIONES REPAIRS 8 31 O P Q P O R Q R ...
Страница 310: ...INFORMAZIONI PER LE RIPARAZIONI INFORMACIONES PARA LAS REPARACIONES REPAIRS 8 38 NOTE NOTAS NOTES ...
Страница 311: ...INFORMAZIONI PER LE RIPARAZIONI INFORMACIONES PARA LAS REPARACIONES REPAIRS 8 39 ...


