2
- 11
OPERACIONES DE MANTENIMIENTO PERIÓDICO Y DE
PUESTA A PUNTO
PERIODIC SERVICE AND SETTING UP OPERATIONS
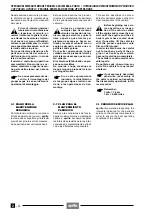
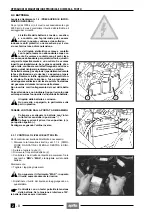
2.3.2 RECARGA BATERIA
Controle y si acaso restaure el nivel del electrolito, luego:
◆
Controle que el interruptor de encendido esté en posi-
ción "
m
".
◆
Desconecte según el orden el cable negativo (–) y el
positivo (+).
Durante la instalación conecte antes el cable
positivo (+) y luego el negativo (–).
◆
Extraiga el tubo respiradero batería.
Durante la instalación, conecte siempre el
tubo respiradero de la batería para evitar que
los vapores del ácido sulfúrico, al salir del res-
piradero, puedan corroer la instalación eléctrica, las
partes barnizadas, las piezas de goma o las juntas.
◆
Saque la batería de su alojamiento y colóquela en un
lugar fresco y seco.
◆
Quite los tapones de los elementos.
◆
Conecte la batería a un carga-baterías.
◆
Se aconseja una recarga utilizando un amperaje de
1/10 de la capacidad de la misma batería.
◆
Tras haber realizado la recarga, vuelva a controlar el
nivel del electrolito y de resultar necesario rellene con
agua destilada.
2.3.3 LARGA INACTIVIDAD
Si el vehículo queda inactivo por un largo período, quite
la batería y recárguela completamente, utilizando una re-
carga lenta.
Guarde la batería en un lugar fresco y seco y si queda
montada en el vehículo, desconecte los cables de los
bornes.
Durante el invierno o cuando el vehículo queda parado,
es importante controlar la carga (una vez al mes aproxi-
madamente) para evitar que se degrade.
Para el mantenimiento de la batería refiérase al capí-
tulo 6.11.2 (MANTENIMIENTO).
2.4 TUERCAS DE LOS TUBOS DE ESCAPE
Lea con mucha atención 1.4 (PRECAUCIONES E IN-
FORMACIONES GENERALES).
Apriete tras los primeros 1000 km (ó 4 meses) y sucesi-
vamente, cada 6000 km (o 8 meses).
Deje enfriar el motor hasta que el mismo al-
cance la temperatura ambiente.
◆
Desmonte el carenado delantero, véase 7.1.14
(DESMONTAJE CARENADO DELANTERO).
◆
★
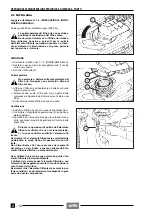
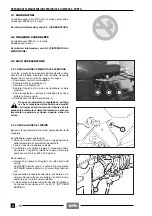
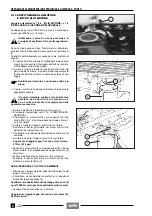
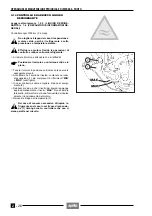
Apriete las tuercas del tubo de escape (véase figu-
ra) con el par indicado.
Par de apriete tuercas: 25 Nm (2,5 kgm)
a
a
a
2.3.2 RECHARGING THE BATTERY
Check the electrolyte level, if necessary top up, then:
◆
Make sure that the ignition switch is in position "
m
".
◆
Disconnect, in order, the negative (–) and positive (+)
cable.
Upon reassembly, connect first the positive
cable (+) and then the negative cable (–).
◆
Remove the battery breather pipe.
Upon reassembly, always connect the battery
breather pipe, to prevent the sulphuric acid
vapours from corroding the electric system,
painted parts, rubber elements or gaskets when they
exit the breather pipe itself.
◆
Extract the battery from its container and put it in a cool
and dry place.
◆
Remove the element plugs.
◆
Connect the battery with a battery charger.
◆
A recharge with an amperage equal to 1/10th of the
battery capacity is recommended.
◆
After the recharging operation, check the electrolyte
level again and if necessary top up with distilled water.
2.3.3 LONG INACTIVITY OF THE BATTERY
If the vehicle remains unused for long periods, remove
the battery and recharge it completely, using a trickle
charge.
Keep the battery in a cool, dry place. If the battery re-
mains on the vehicle, disconnect the cables from the ter-
minals.
During the winter months or whenever the vehicle is not
in use, it is important to check the charge (about once a
month) in order to prevent deterioration of the battery.
For maintenance of the battery refer to chapter
6.11.2 (MAINTENANCE).
2.4 EXHAUST MANIFOLD NUTS
Read 1.4 carefully (PRECAUTIONS AND GENERAL
INFORMATION).
Tighten nuts after the first 1000 km (or 4 months) and
then after every 6000 km (or 8 months).
Allow the engine to cool down until it reaches
room temperature.
◆
Remove the front fairing, see 7.1.14 (REMOVING
THE FRONT FAIRING).
◆
★
Tighten the exhaust manifold nuts (see figure) to the
prescribed torque.
Driving torque: 25 Nm (2.5 kgm)
a
a
a
Содержание Pegaso 650
Страница 1: ......
Страница 3: ...0 4 NOTE NOTES ANMERKUNGEN ...
Страница 4: ...1 1 1 2 3 4 5 6 7 8 INFORMAZIONI GENERALI INFORMACIONES GENERALES GENERAL INFORMATION ...
Страница 42: ......
Страница 69: ...3 1 1 2 3 4 5 6 7 8 MOTORE MOTOR ENGINE ...
Страница 90: ...3 22 MOTORE NOTE NOTAS NOTES ...
Страница 91: ...4 1 1 2 3 4 5 SISTEMA DI ALIMENTAZIONE SISTEMA DE ALIMENTACIÓN FUEL SYSTEM ...
Страница 116: ...4 26 SISTEMA DI ALIMENTAZIONE NOTE NOTAS NOTES ...
Страница 117: ...5 1 1 2 3 4 5 6 7 8 IMPIANTO DI RAFFREDDAMENTO SISTEMA DE REFRIGERACIÓN COOLING SYSTEM ...
Страница 130: ...5 14 IMPIANTO DI RAFFREDDAMENTO SISTEMA DE REFRIGERACIÓN COOLING SYSTEM NOTE NOTAS NOTES ...
Страница 131: ...6 1 6 1 2 3 4 5 6 7 8 IMPIANTO ELETTRICO INSTALACIÓN ELÉCTRICA ELECTRICAL SYSTEM ...
Страница 176: ...IMPIANTO ELETTRICO INSTALACIÓN ELÉCTRICA ELECTRICAL SYSTEM 6 46 NOTE NOTAS NOTES ...
Страница 177: ...7 1 1 2 3 4 5 6 7 8 CICLISTICA PARTE CICLO CHASSIS PARTS ...
Страница 226: ... 67 3 57 2 66 6 3 576 7 50 5827 3267 5 25 58 75 6 5 5 5 ...
Страница 242: ... 67 3 57 2 66 6 3 576 7 66 5 12 17 5 25 5 12 17 52 5217 5 ...
Страница 246: ... 67 3 57 2 66 6 3 576 7 70 5 12 3267 5 25 5 12 75 6 52 5 5 5 ...
Страница 272: ... 67 3 57 2 66 6 3 576 7 96 NOTE NOTAS NOTES ...
Страница 273: ...8 1 1 2 3 4 5 6 7 8 INFORMAZIONI PER LE RIPARAZIONI INFORMACIONES PARA LAS REPARACIONES REPAIRS ...
Страница 301: ...INFORMAZIONI PER LE RIPARAZIONI INFORMACIONES PARA LAS REPARACIONES REPAIRS 8 29 E F E F G H G H ...
Страница 302: ...INFORMAZIONI PER LE RIPARAZIONI INFORMACIONES PARA LAS REPARACIONES REPAIRS 8 30 I L I M L N M N ...
Страница 303: ...INFORMAZIONI PER LE RIPARAZIONI INFORMACIONES PARA LAS REPARACIONES REPAIRS 8 31 O P Q P O R Q R ...
Страница 310: ...INFORMAZIONI PER LE RIPARAZIONI INFORMACIONES PARA LAS REPARACIONES REPAIRS 8 38 NOTE NOTAS NOTES ...
Страница 311: ...INFORMAZIONI PER LE RIPARAZIONI INFORMACIONES PARA LAS REPARACIONES REPAIRS 8 39 ...


