2
- 9
OPERACIONES DE MANTENIMIENTO PERIÓDICO Y DE
PUESTA A PUNTO
PERIODIC SERVICE AND SETTING UP OPERATIONS
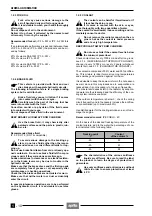
2.3 BATERÍA
Lea con mucha atención 1.4 (PRECAUCIONES E IN-
FORMACIONES GENERALES).
Controle tras los primeros 1000 km (o 4 meses) y sucesi-
vamente cada 6000 km (o 8 meses) el nivel del electrólito
y el apretamiento de los bornes.
El electrolito de la batería es tóxico, cáustico
y si toca la piel puede causar quemaduras ya
que contiene ácido sulfúrico. En el caso de
mantenimiento, colóquese ropa de protección, una
máscara para la cara y/o gafas.
Si el líquido electrolítico tocara la piel, lávese
abundantemente con agua corriente. Si entra en
contacto con los ojos, lave abundamente con
agua por quince minutos y luego diríjase inmediata-
mente a un oculista. Si se traga accidentalmente, beba
mucha agua o leche, siga con leche de magnesia o
aceite vegetal, luego diríjase inmediatamente a un mé-
dico. La batería emana gases explosivos (especialmen-
te durante la fase de activación y/o recarga), es conve-
niente mantener alejadas llamas, chispas, cigarrillos y
cualquier otra fuente de calor.
Durante la recarga o el uso, ventile adecuadamente el
local, evite inhalar los gases que emite durante la recar-
ga de la misma. Nunca invierta las conexiones de los
cables de la batería. Tenga cuidado en no inclinar de-
masiado el vehículo para evitar que el riesgo de que el
líquido salga de la batería.
El líquido de la batería es corrosivo.
No lo vierta o desparrame, en particular, sobre
las piezas de plástico.
MANTÉNGASE ALEJADO DEL ALCANCE DE LOS NI-
ÑOS.
Conecte y desconecte la batería con el inter-
ruptor de encendido en posición “
m
”.
Conecte antes el cable positivo (+) y luego el
negativo (–).
Desconecte siguiendo el orden contrario.
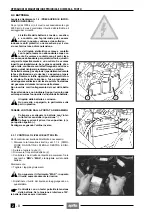
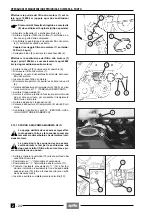
2.3.1 CONTROL DEL NIVEL DEL ELECTROLITO
Para controlar el nivel del electrolito es necesario:
◆
Quitar el panel izquierdo, véase 7.1.4 (DESMONTA-
JE PANELES LATERALES DERECHO E IZQUIER-
DO).
◆
Destornillar y quitar el tornillo (1).
◆
Quitar la tapa batería (2).
◆
Controlar que el nivel del líquido esté comprendido en-
tre las dos muescas "MIN" y "MAX" , impresas so-
bre el lado de la batería.
Eventualmente:
◆
Quite los tapones de los elementos.
No supere la referencia "MAX" , ya que el ni-
vel aumenta durante la recarga.
◆
Restaure el nivel del líquido añadiendo sólo agua des-
tilada.
Controle con un tester portátil, la tensión de la
batería. Si la tensión es inferior a 12V, hay que
recargar la batería.
a
a
a
a
a
c
2.3 BATTERY
Carefully read 1.4 (PRECAUTIONS AND GENERAL
INFORMATION).
Check the electrolyte level and the tightening of the termi-
nals after the first 1000 km (or 4 months) and then every
6000 km (or 8 months).
The electrolyte in the battery is toxic and
caustic and may cause burns on contact with
the skin as it contains sulphuric acid. Wear
protective clothing, a face mask and/or goggles dur-
ing service operations.
If electrolyte liquid comes in contact with the
skin, wash with large quantities of running
water. In case of contact with the eyes, wash
with large quantities of water for fifteen minutes and
consult an oculist without delay.
If the liquid is accidentally swallowed, drink large
amounts of water or milk, then continue drinking milk
of magnesia or vegetable oil and promptly call a doc-
tor. The battery gives off explosive gases, particular-
ly during the phase of starting and/or recharging;
keep it away from flames, sparks, cigarettes and any
other source of heat.
During recharging or using, make sure the room is
properly ventilated and avoid inhaling the gases re-
leased during recharging. Never invert the connec-
tion of the battery cables.
The battery fluid which is very corrosive.
Do not pour or spill it, especially on the plastic
parts.
KEEP AWAY FROM CHILDREN.
Connect and disconnect the battery with the
ignition switch in position “
m
”.
Connect first the positive cable (+) and then
the negative cable (–).
Disconnect following the reverse order.
2.3.1 CHECKING THE ELECTROLYTE LEVEL
To check the electrolyte level:
◆
Remove the left side, see 7.1.4 (REMOVING THE
RIGHT AND LEFT SIDES).
◆
Unscrew and remove the screw (1).
◆
Remove the battery cover (2).
◆
Make sure that the fluid level is included between the
two "MIN" and "MAX" notches stamped on the battery
side.
Otherwise:
◆
Remove the element plugs.
Never exceed the "MAX" notch, since the level
increases during the recharge.
◆
Top up by adding distilled water only.
Check battery voltage with a portable tester.
If voltage is less than 12V, the battery must be
recharged.
a
a
a
a
a
c
Содержание Pegaso 650
Страница 1: ......
Страница 3: ...0 4 NOTE NOTES ANMERKUNGEN ...
Страница 4: ...1 1 1 2 3 4 5 6 7 8 INFORMAZIONI GENERALI INFORMACIONES GENERALES GENERAL INFORMATION ...
Страница 42: ......
Страница 69: ...3 1 1 2 3 4 5 6 7 8 MOTORE MOTOR ENGINE ...
Страница 90: ...3 22 MOTORE NOTE NOTAS NOTES ...
Страница 91: ...4 1 1 2 3 4 5 SISTEMA DI ALIMENTAZIONE SISTEMA DE ALIMENTACIÓN FUEL SYSTEM ...
Страница 116: ...4 26 SISTEMA DI ALIMENTAZIONE NOTE NOTAS NOTES ...
Страница 117: ...5 1 1 2 3 4 5 6 7 8 IMPIANTO DI RAFFREDDAMENTO SISTEMA DE REFRIGERACIÓN COOLING SYSTEM ...
Страница 130: ...5 14 IMPIANTO DI RAFFREDDAMENTO SISTEMA DE REFRIGERACIÓN COOLING SYSTEM NOTE NOTAS NOTES ...
Страница 131: ...6 1 6 1 2 3 4 5 6 7 8 IMPIANTO ELETTRICO INSTALACIÓN ELÉCTRICA ELECTRICAL SYSTEM ...
Страница 176: ...IMPIANTO ELETTRICO INSTALACIÓN ELÉCTRICA ELECTRICAL SYSTEM 6 46 NOTE NOTAS NOTES ...
Страница 177: ...7 1 1 2 3 4 5 6 7 8 CICLISTICA PARTE CICLO CHASSIS PARTS ...
Страница 226: ... 67 3 57 2 66 6 3 576 7 50 5827 3267 5 25 58 75 6 5 5 5 ...
Страница 242: ... 67 3 57 2 66 6 3 576 7 66 5 12 17 5 25 5 12 17 52 5217 5 ...
Страница 246: ... 67 3 57 2 66 6 3 576 7 70 5 12 3267 5 25 5 12 75 6 52 5 5 5 ...
Страница 272: ... 67 3 57 2 66 6 3 576 7 96 NOTE NOTAS NOTES ...
Страница 273: ...8 1 1 2 3 4 5 6 7 8 INFORMAZIONI PER LE RIPARAZIONI INFORMACIONES PARA LAS REPARACIONES REPAIRS ...
Страница 301: ...INFORMAZIONI PER LE RIPARAZIONI INFORMACIONES PARA LAS REPARACIONES REPAIRS 8 29 E F E F G H G H ...
Страница 302: ...INFORMAZIONI PER LE RIPARAZIONI INFORMACIONES PARA LAS REPARACIONES REPAIRS 8 30 I L I M L N M N ...
Страница 303: ...INFORMAZIONI PER LE RIPARAZIONI INFORMACIONES PARA LAS REPARACIONES REPAIRS 8 31 O P Q P O R Q R ...
Страница 310: ...INFORMAZIONI PER LE RIPARAZIONI INFORMACIONES PARA LAS REPARACIONES REPAIRS 8 38 NOTE NOTAS NOTES ...
Страница 311: ...INFORMAZIONI PER LE RIPARAZIONI INFORMACIONES PARA LAS REPARACIONES REPAIRS 8 39 ...

