7
- 19
3$57(&,&/2
&+$66,63$576
X
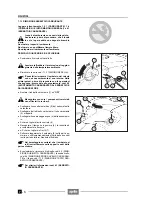
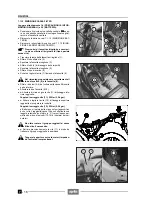
Destornille los dos tornillos (15) y guarde las arande-
las, el cablecito de enganche casco y, eventualmente,
los elementos de goma y los casquillos.
X
Destornille y quite los dos tornillos (16) y guarde las
correspondientes tuercas en la parte inferior.
X
Destornille y quite el tornillo (17) y guarde las arande-
las y, eventualmente, el elemento de goma.
X
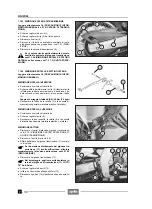
Empuje hacia abajo (véase figura) la caja del filtro (18)
y el vano portadocumentos/kit herramientas (19) divi-
diendo los dos componentes.
Durante el reensamblaje controle la perfecta
colocación de las sedes de acoplamiento so-
bre la caja del filtro (18) y el vano portadocu-
mentos/kit de herramientas (19).
X
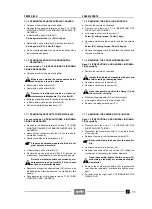
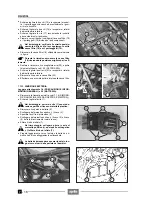
Quite la caja del filtro (18) extrayéndola según lo ilus-
trado en figura.
Durante el desmontaje desplace la caja del fil-
tro (18) buscando la posición mejor para ex-
traerla.
X
Gire y quite el encauzador de aire (20) y limpie el ele-
mento filtrante, véase 2.5 (FILTRO DEL AIRE).
X
Destornille y quite los siete tornillos (21) y guarde las
correspondientes tuercas en la parte inferior.
X
Quite la tapa de la caja del filtro (22).
X
Limpie con mucho cuidado el interior de la caja del fil-
tro.
7.1.13 DESMONTAJE BATERIA
Lea con cuidado 1.4 (PRECAUCIONES E INFORMA-
CIONES GENERALES) y 2.3 (BATERÍA).
X
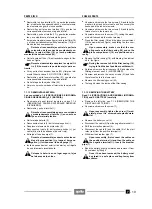
Desmonte el panel lateral izquierdo, véase 7.1.4
(DESMONTAJE PANELES LATERALES DERECHO
E IZQUIERDO).
X
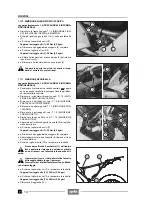
Destornille y quite el tornillo (1).
Durante el reensamblaje apriete con cuidado
y moderadamente el tornillo (1) en cuanto se
fija en el material plástico.
X
Quite la tapa batería (2).
X
Desconecte el cable (3) del terminal negativo (–).
X
Desplace el elemento de protección (4).
X
Desconecte el cable (5) del terminal positivo (+) y el
cable (6) del relé de arranque (de color rojo).
X
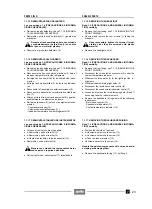
Extraiga el tubo de purga (7).
Durante el reensamblaje conecte antes los ca-
bles al borne positivo (+) y luego al borne ne-
gativo (–). Introduzca el tubo de purga (7).
X
Incline apenas hacia el exterior la batería y extráigala
de su alojamiento levantándola.
Coloque la batería en un lugar seguro, lejos
del alcance de los niños.
X
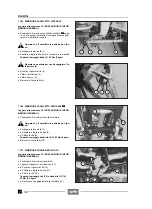
Unscrew and remove the two screws (15) and take the
washers, the crash helmet cable and if necessary the
bushes and the rubber elements.
X
Unscrew and remove the two screws (16) and take the
relevant nuts in the lower part.
X
Unscrew and remove the screw (17), taking the wash-
ers and if necessary the rubber element.
X
Press the filter casing (18) and the glove compartment
(19) downwards (see figure), separating the two com-
ponents.
Upon reassembly, make sure that the cou-
pling seats on the filter casing (18) and on the
glove compartment (19) are positioned cor-
rectly.
X
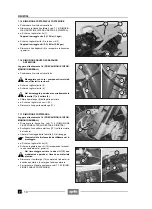
Remove the filter casing (18), withdrawing it as indicat-
ed in the figure.
During the removal, shift the filter casing (18),
trying to find the best position to withdraw it.
X
Rotate and remove the air conveyor (20) and clean the
filtering element, see 2.5 (AIR CLEANER).
X
Unscrew and remove the seven screws (21) and take
the relevant nuts in the lower part.
X
Remove the filter casing cover (22).
X
Thoroughly clean the inside of the filter casing.
7.1.13 REMOVING THE BATTERY
Read 1.4 (PRECAUTIONS AND GENERAL INFORMA-
TION) and 2.3 (BATTERY) carefully.
X
Remove the left side, see 7.1.4 (REMOVING THE
RIGHT AND LEFT SIDES).
X
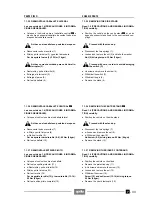
Unscrew and remove the screw (1).
Upon reassembly, tighten the screw (1) mod-
erately, since it is screwed onto plastic mate-
rial.
X
Remove the battery cover (2).
X
Disconnect the cable (3) from the negative terminal (–).
X
Shift the protection element (4).
X
Disconnect the cable (5) and the cable (6) of the start
relay (red) from the positive terminal (+).
X
Withdraw the breather pipe (7).
Upon reassembly, first connect the cables on
the positive terminal (+) and then the cable on
the negative terminal (–). Insert the breather
pipe (7).
X
Bend the battery slightly outwards and remove it from
its container by lifting it.
Once it has been removed, the battery must
be stored in a safe place and kept away from
children.
Содержание Pegaso 650
Страница 1: ......
Страница 3: ...0 4 NOTE NOTES ANMERKUNGEN ...
Страница 4: ...1 1 1 2 3 4 5 6 7 8 INFORMAZIONI GENERALI INFORMACIONES GENERALES GENERAL INFORMATION ...
Страница 42: ......
Страница 69: ...3 1 1 2 3 4 5 6 7 8 MOTORE MOTOR ENGINE ...
Страница 90: ...3 22 MOTORE NOTE NOTAS NOTES ...
Страница 91: ...4 1 1 2 3 4 5 SISTEMA DI ALIMENTAZIONE SISTEMA DE ALIMENTACIÓN FUEL SYSTEM ...
Страница 116: ...4 26 SISTEMA DI ALIMENTAZIONE NOTE NOTAS NOTES ...
Страница 117: ...5 1 1 2 3 4 5 6 7 8 IMPIANTO DI RAFFREDDAMENTO SISTEMA DE REFRIGERACIÓN COOLING SYSTEM ...
Страница 130: ...5 14 IMPIANTO DI RAFFREDDAMENTO SISTEMA DE REFRIGERACIÓN COOLING SYSTEM NOTE NOTAS NOTES ...
Страница 131: ...6 1 6 1 2 3 4 5 6 7 8 IMPIANTO ELETTRICO INSTALACIÓN ELÉCTRICA ELECTRICAL SYSTEM ...
Страница 176: ...IMPIANTO ELETTRICO INSTALACIÓN ELÉCTRICA ELECTRICAL SYSTEM 6 46 NOTE NOTAS NOTES ...
Страница 177: ...7 1 1 2 3 4 5 6 7 8 CICLISTICA PARTE CICLO CHASSIS PARTS ...
Страница 226: ... 67 3 57 2 66 6 3 576 7 50 5827 3267 5 25 58 75 6 5 5 5 ...
Страница 242: ... 67 3 57 2 66 6 3 576 7 66 5 12 17 5 25 5 12 17 52 5217 5 ...
Страница 246: ... 67 3 57 2 66 6 3 576 7 70 5 12 3267 5 25 5 12 75 6 52 5 5 5 ...
Страница 272: ... 67 3 57 2 66 6 3 576 7 96 NOTE NOTAS NOTES ...
Страница 273: ...8 1 1 2 3 4 5 6 7 8 INFORMAZIONI PER LE RIPARAZIONI INFORMACIONES PARA LAS REPARACIONES REPAIRS ...
Страница 301: ...INFORMAZIONI PER LE RIPARAZIONI INFORMACIONES PARA LAS REPARACIONES REPAIRS 8 29 E F E F G H G H ...
Страница 302: ...INFORMAZIONI PER LE RIPARAZIONI INFORMACIONES PARA LAS REPARACIONES REPAIRS 8 30 I L I M L N M N ...
Страница 303: ...INFORMAZIONI PER LE RIPARAZIONI INFORMACIONES PARA LAS REPARACIONES REPAIRS 8 31 O P Q P O R Q R ...
Страница 310: ...INFORMAZIONI PER LE RIPARAZIONI INFORMACIONES PARA LAS REPARACIONES REPAIRS 8 38 NOTE NOTAS NOTES ...
Страница 311: ...INFORMAZIONI PER LE RIPARAZIONI INFORMACIONES PARA LAS REPARACIONES REPAIRS 8 39 ...


