


Отзывы:
Нет отзывов
Похожие инструкции для 8870

Programmable Thermostat
Бренд: LATICRETE Страницы: 2
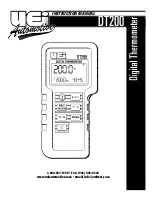
DT200
Бренд: UEi Страницы: 6

518
Бренд: Taylor Страницы: 20

MT 700
Бренд: Microlife Страницы: 2

VRD919102100
Бренд: MasterChef Страницы: 16

BP20
Бренд: Trotec Страницы: 142

HI 935005
Бренд: Hanna Instruments Страницы: 9

Digital Folding Probe Thermometer
Бренд: Taylor Страницы: 4

htd8808
Бренд: chinavasion Страницы: 8

Diagnostic T-01
Бренд: Diagnosis Страницы: 2

DMQC Series
Бренд: Applied Comfort Страницы: 4

Delta T
Бренд: Geyserwise Страницы: 32

ALFA 71 MODulation
Бренд: VDH Страницы: 4

ALFA D1-DP
Бренд: VDH Страницы: 7

TR16
Бренд: RCS Страницы: 21

Termo
Бренд: Konyks Страницы: 8

75299
Бренд: Hama Страницы: 46

943-109
Бренд: Menuett Страницы: 11


