

View the expanded manual:
http://aeotec.com/support
Smart Switch 6
Aeotec by Aeon Labs Smart Switch.
Aeotec Smart Switch is a low-cost Z-Wave Switch plug-
in module specifically used to enable Z-Wave command
and control (on/off) of any plug-in tool. It can report
immediate wattage consumption or kWh energy usage
over a period of time. In the event of power failure, non-
volatile memory retains all programmed information
relating to the unit’s operating status.
Its surface has a Smart RGB LED, which can be used
for indicating the output load status or strength of the
wireless signal. You can configure its indication colour
according to your favour.
The Smart Switch 6 is also a security Z-wave device and
supports Over The Air (OTA) feature for the products
firmware upgrade.
®
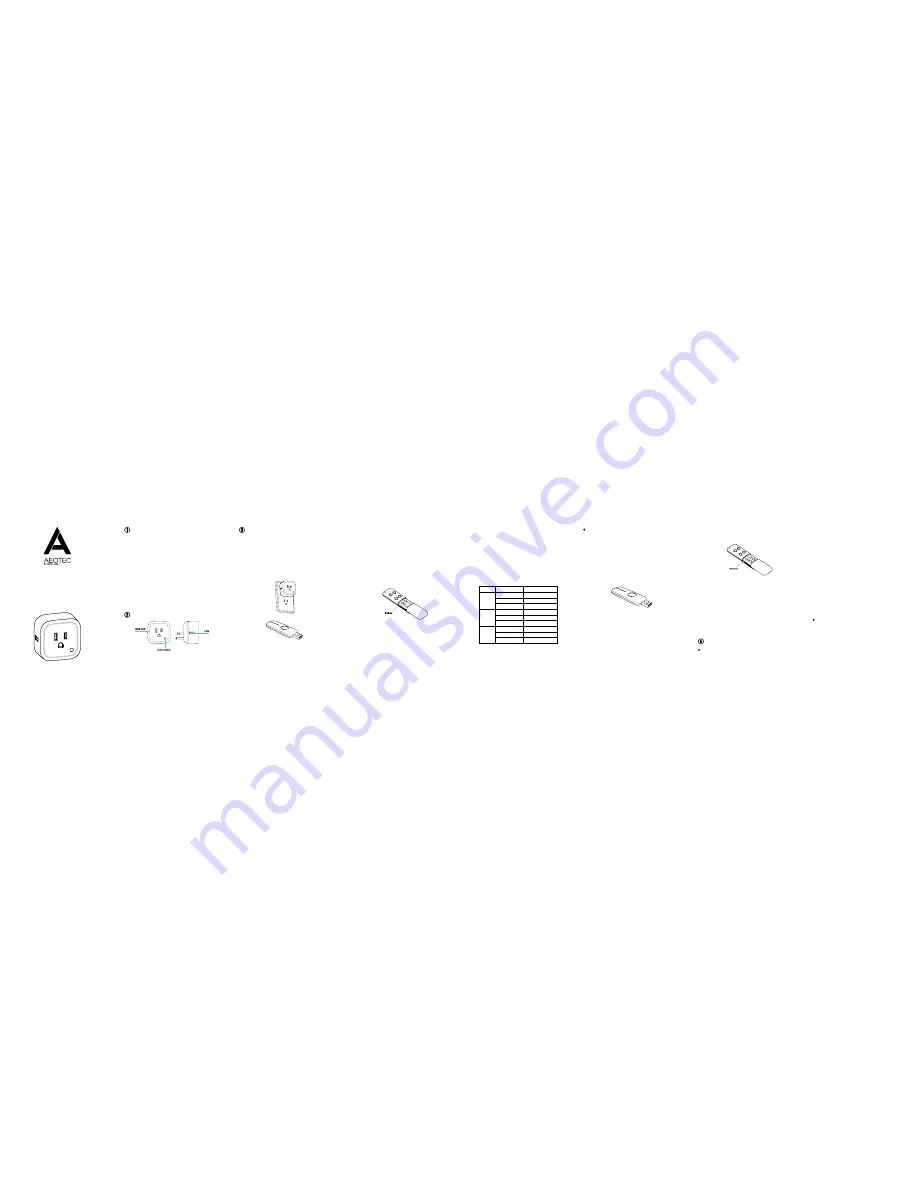
Familiarize yourself with your Smart Switch.
Getting your Smart Switch up and running is as simple
as plugging it into a wall socket and adding it to your
Z-Wave network. The following instructions tell you how
to add your Smart Switch to your Z-Wave network via
Aeotec by Aeon Labs’ Z-Stick or Minimote controller.
If you are using other products as your main Z-Wave
controller, such as a Z-Wave gateway, please refer to
the part of their respective manual that tells you how to
add new devices to your network.
(Note: this figure is a sample of USA version. For other
versions, the product appearance would be different).
If you’re using a Z-Stick:
Quick start.
3.
4.
5.
6.
7.
1.
2.
Decide on where you want your Smart Switch to be
placed and plug it into a wall outlet.
If your Z-Stick is plugged into a gateway or a
computer, unplug it.
If you’re using a Minimote:
1.
2.
3.
4.
5.
Decide on where you want your Smart Switch to be
placed and plug it into a wall socket.
Take your Minimote to your Smart Switch.
Press the Include button on your Minimote.
Press the Action Button on your Smart Switch.
If Smart Switch has been successfully added to your
Z-Wave network, its RGB LED will be solid. If the
adding was unsuccessful, the red LED will be on for
2 seconds and then remain colourful gradient status,
repeat the instructions from step 4.
Press any button on your Minimote to take it out of
inclusion mode.
With your Smart Switch now working as a part of your
smart home, you’ll be able to configure it from your
home control software. Please refer to your software’s
user guide for precise instructions on configuring Smart
Switch to your needs.
The colour of RGB LED will
change according to the
output load power level when it is in Energy mode:
Version
LED indication
Output (W)
US
Green
[0W, 900W)
Yellow
[900W, 1600W)
Red
[1600W, 2000W)
AU
Green
[0W, 1000W)
Yellow
[1000W, 2000W)
Red
[2000W, 2500W)
EU
Green
[0W, 1500W)
Yellow
[1500W, 2500W)
Red
[2500W, 3000W)
You can also configure the brightness of RGB LED
when the Smart Switch is in Energy mode, Momentary
Indicate mode, or Night Light mode.
Your Smart Switch can be removed from your Z-Wave
network at any time. You’ll need to use your Z-Wave
network’s main controller to do this and the following
instructions will tell you how to do this using a Aeotec
by Aeon Labs’ Z-Stick or Minimote controller. If you are
using other products as your main Z-Wave controller,
please refer to the part of their respective manuals that
tells you how to remove devices from your network.
Removing your Smart Switch from a Z-Wave
network.
If you’re using a Z-Stick:
1.
2.
3.
4.
5.
If your Z-Stick is plugged into a gateway or a
computer, unplug it.
Take your Z-Stick to your Smart Switch.
Press the Action Button on your Z-Stick.
Press the Action Button on your Smart Switch.
If your Smart Switch has been successfully removed
from your network, its RGB LED will remain colourful
gradient status. If the removal was unsuccessful, the
RGB LED will still be solid (Energy mode state when
the output is on or Night light mode state when the
output load is off), repeat the instructions from step 3.
If you’re using a Minimote:
1.
2.
3.
4.
5.
Take your Minimote to your Smart Switch.
Press the Remove Button on your Minimote.
Press the Action Button on your Smart Switch.
If your Smart Switch has been successfully removed
from your network, its RGB LED will remain
the colourful gradient status. If the removal was
unsuccessful, the RGB LED will still be solid (Energy
mode state when the output is on or Night light
mode state when the output load is off), repeat the
instructions from step 2.
Press any button on your Minimote to take it out of
removal mode.
Take your Z-Stick to your Smart Switch.
Press the Action Button on your Z-Stick.
Press the Action Button on your Smart Switch
If Smart Switch has been successfully added to your
Z-Wave network, its RGB LED will be solid. If the
adding was unsuccessful, the red LED will be on for
2 seconds and then remain colourful gradient status,
repeat the instructions from step 4.
Press the Action Button on the Z-Stick to take it out of
inclusion mode and then return it to your gateway or
computer.
6.
Changing LED mode.
You can change the mode of how the LED acts through
Advanced functions.
6.
Press the Action Button on the Z-Stick to take it out of
removal mode.
Security or Non-security feature of your Smart
Switch in Z-wave network.
Including Smart Switch as a non-secure device:
If you want your Smart Switch is a non-security device
in your Z-wave network, you need to press the Action
Button once on Smart Switch when you use a controller/
gateway to add/include your Smart Switch. If the
inclusion is successful, the green LED will be on for 2
configuring the Smart Switch. There are 3 different
modes: Energy mode, Momentary indicate mode, and
Night light mode.
Energy mode will allow the LED to follow the state of the
Smart Switch, when the switch is on, the LED will be on,
and while the switch is off, the current colour LED will be
off and then remain the purple colour of 10% brightness.
Momentary indicate mode will momentarily turn the LED
on for 5 seconds then turn off after every state change
in the switch. Night light mode will allow the LED to be
turned on and off during your selected time of day you
have configured for it.
Parameter 81 [1 byte dec] can be set to:
(0) Energy Mode
(1) Momentary Indicate Mode
(2) Night Light Mode