
To learn more about AOpen XC Cube, visit us at http://xc.aopen.com.tw; http://www.aopen.com
P/N:49.EZ102.213 Doc.no:EX915-EG-E0404A
To learn more about AOpen XC Cube, visit us at http://xc.aopen.com.tw; http://www.aopen.com
P/N:49.EZ102.213 Doc.no:EX915-EG-E0404A
1
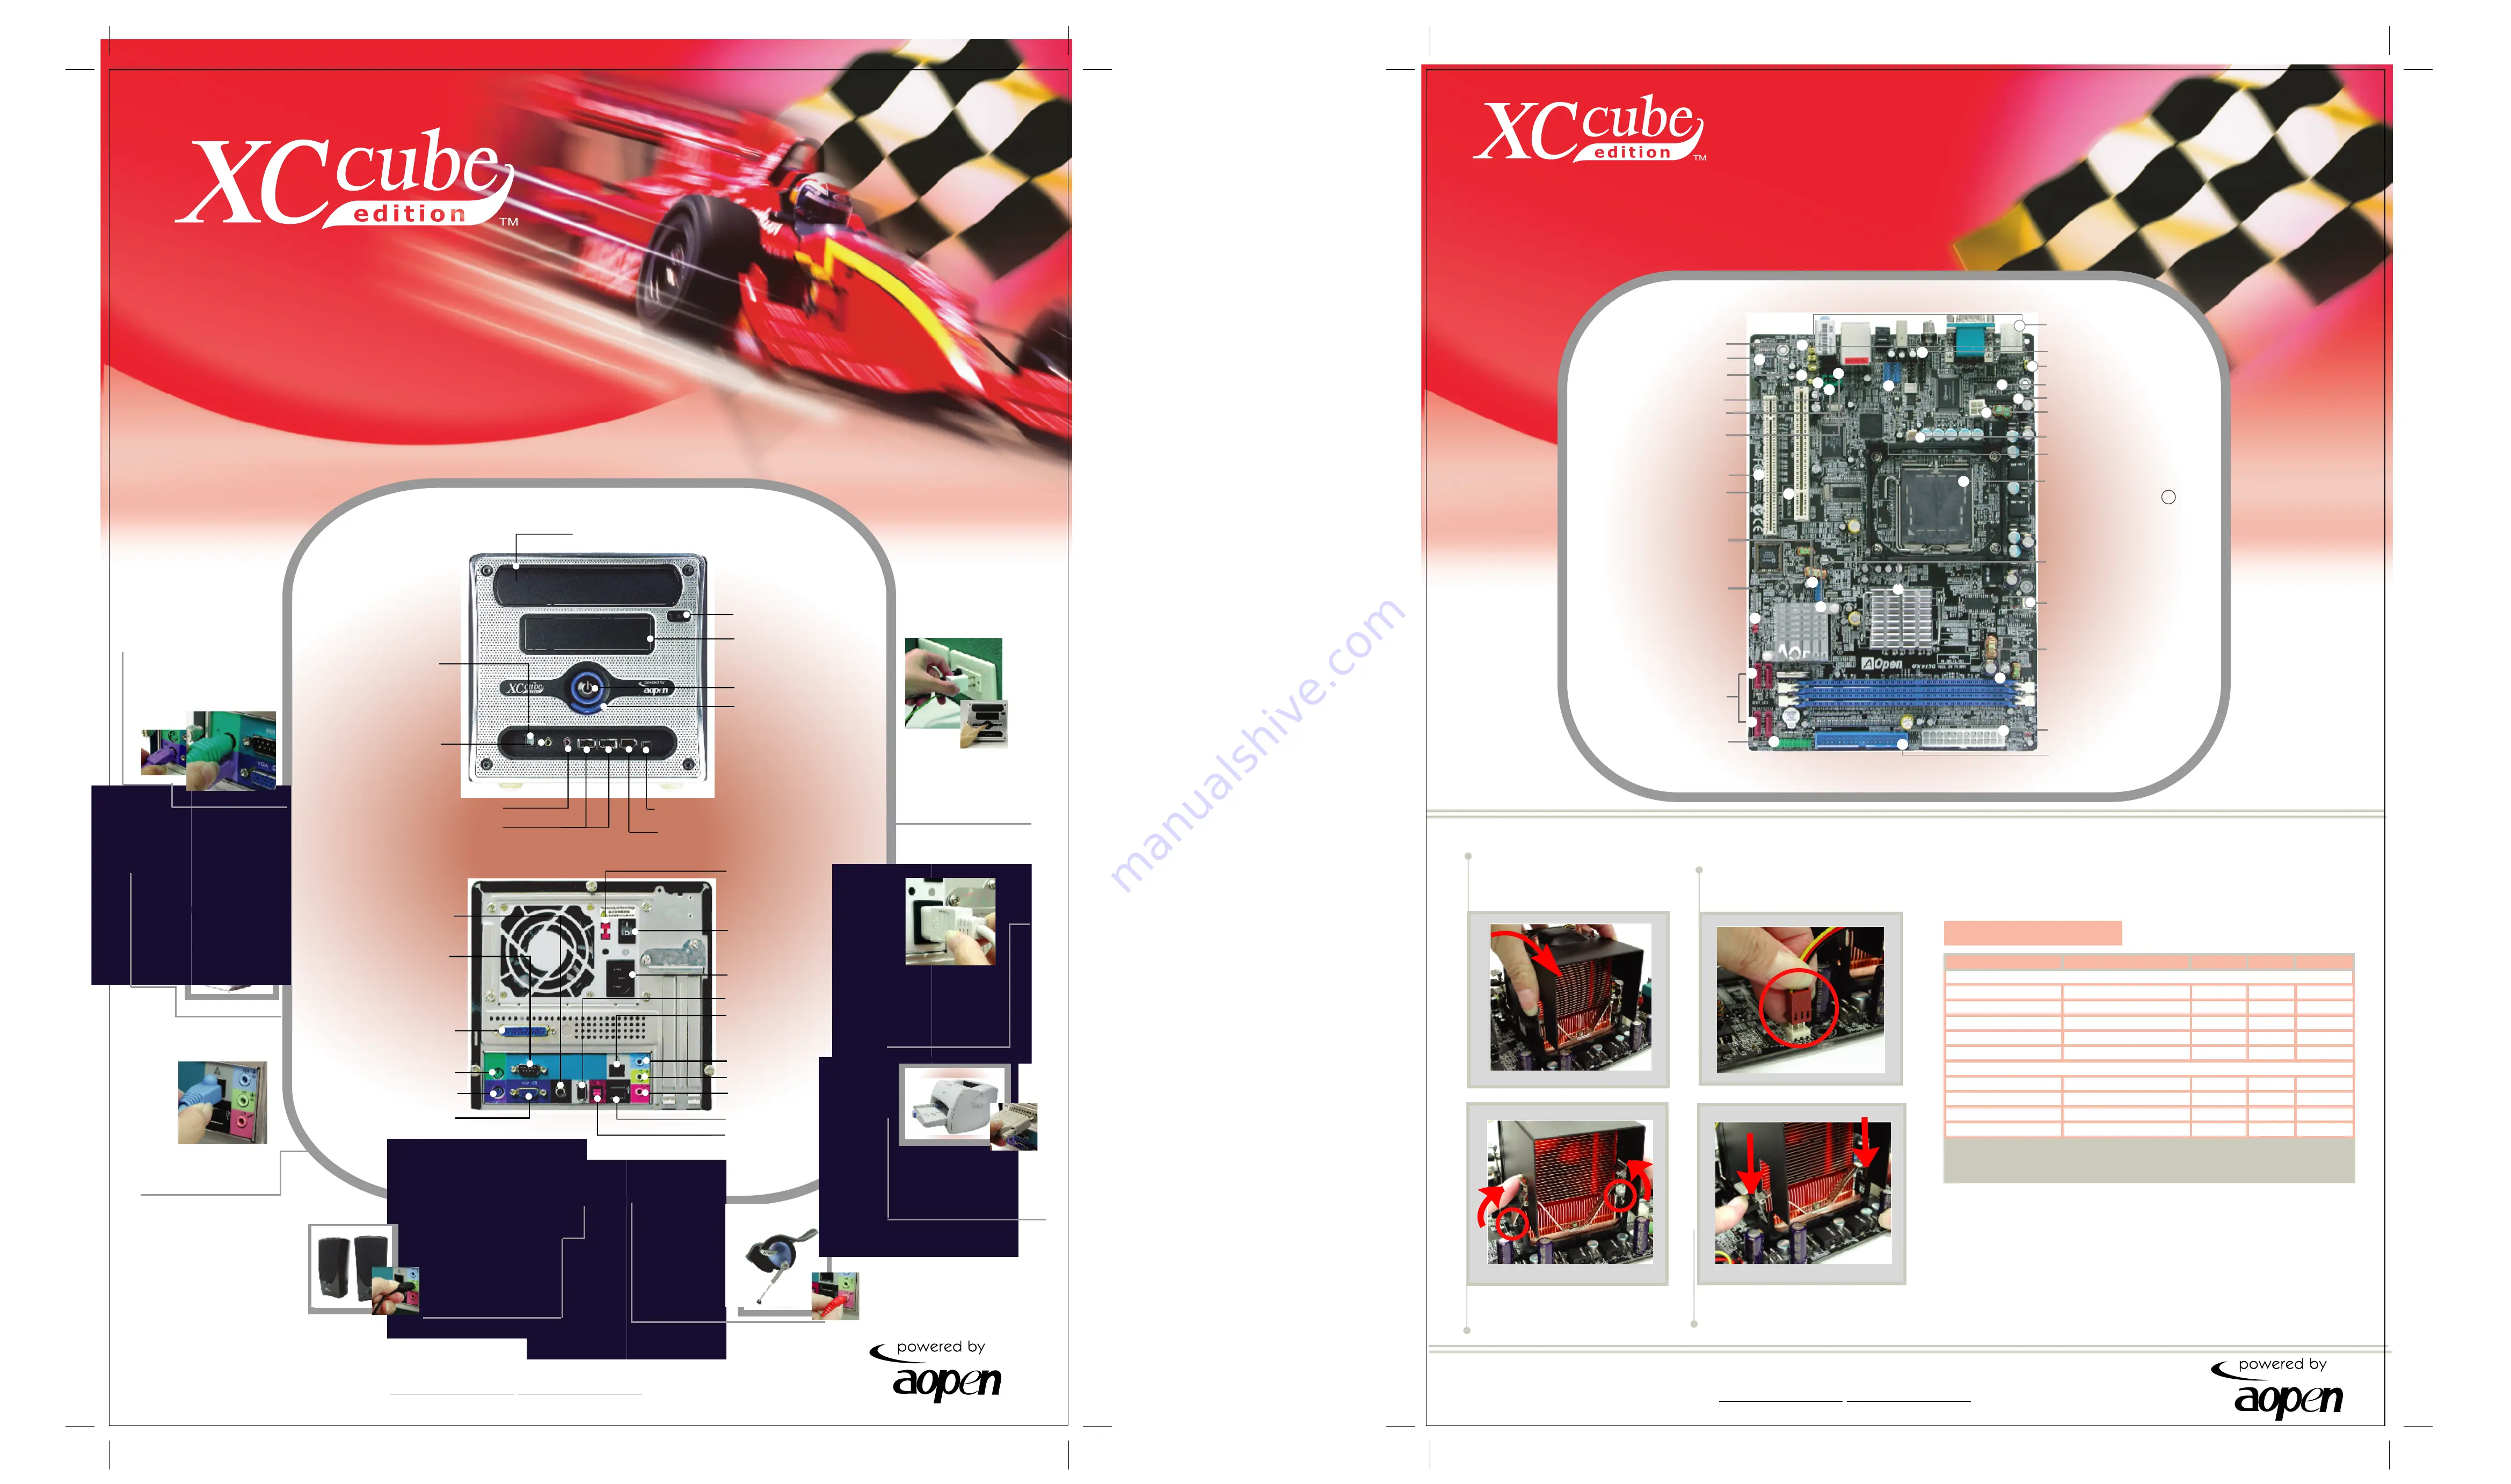
Put CPU cooler firmly onto
the CPU retention module.
2
Connect the Fan cable onto
the CPU FAN connector onboard.
3
Push the iron plate up a bit.
4
Press the black plastic plate
downward till you hear a "clip"
sound.
Cooler Installation
Cooler Installation
UX915G
EX915
S/PDIF IN Port
COM1 Port
PS/2 Mouse Connector
Parallel Port
PS/2 Keyboard Connector
Monitor Connector
Coaxial Out RCA Port
Power Connector
USB 2.0 Ports
Line-Out Jack (L/R)
Line-In Jack (SUR)
Ethernet Network
Connector (RJ45)
Microphone Jack (C/B)
IEEE1394 Port (6 pin)
Voltage selector switch
(115/230V)
Power Supply Switch
Optical Devices
Optical Devices
Eject Button
Power Button
Floppy Disk Drive
/ Card Reader
HDD Indicator
USB 2.0 Ports
IEEE1394 Port (6 pin)
IEEE1394 Port (4 pin)
Microphone Jack
S/PDIF OUT Port
Speaker Jack
3
Plug the RJ45 cable to
the Network jack marked
with three tiny computers.
4
Connect the audio
cable of the speakers to
the light blue speaker jack
in the back panel. And
insert the power plug of
the speakers into the wall
AC outlet.
5
Connect the
mic jack of the
microphone to the
pink microphone
jack on the back
panel.
6
Depending of the type of
printer that you have, connect
the printer cable to the Blue
color parallel port as shown.
7
Connect the
power cord to the
power connector and
adjust the voltage as
shown.
8
Connect the other end
of the power cord to the
wall AC outlet, and press
the power button to boot
up your system.
Easy Installation Guide
2
Connect the monitor
video cable to the blue
monitor connector located on
the back panel.
1
Connect purple connector
of the keyboard to the purple
plug in the back panel. Also
connect green connector of the
mouse to the green plug in the
back panel.
JP14
CMOS Jumper
Serial ATA
Ports X 4
Front Panel
Connector
Front USB
Front Audio
AC'97 CODEC
CD_IN
AUX_IN
S/PDIF OUT
JP4 & JP5
AUX_IN Jumper
PCI Express X 16
PCI Slot
Intel 915
C ICH6
USB 2.0 Ports
Dual Channel
DDR400/333
DIMM x 2
Max. 2 GB
4-pin
ATX Power
EPS ATX Power
IDE Connector
x 1 (ATA33/66
/100)
IEEE 1394 x 2
Back Panel
JP28 KB/MS
Wake_up Jumper
CPUFAN1
Printer Connector
FDD Connector
SYSFAN2
Socket T LGA775
supports Intel
R
Prescott & Tejas CPU
Processor Number
3.60GHz
3.40GHz
3.20GHz
3.20GHz
3.06GHz
2.93GHz
2.80GHz
3.00GHz
2.80GHz
5 Series
3 Series
560
550
540
530
520
350
345
340
335
Note:
With CPU changing rapidly, there might be fastest CPU on
the market by the you received this installation guide. This table
is kindly for your references only.
Processor Frequency
FSB
1MB L2
1MB L2
1MB L2
1MB L2
1MB L2
256K L2
256K L2
256K L2
256K L2
18 x
17 x
14 x
24 x
23 x
22 x
21 x
16 x
15 x
Ratio
CPU Frequency Table
CPU Frequency Table
Cache
800MHz
800MHz
800MHz
800MHz
800MHz
533MHz
533MHz
533MHz
533MHz


