To learn more about AOpen XC cube, visit us at http://xc.aopen.com.tw
P/N:49.EZ102.211 Doc.no:EZ65EZ18X-EG-E0311A
To learn more about AOpen XC cube, visit us at http://xc.aopen.com.tw
P/N:49.EZ102.211 Doc.no:EZ65EZ18X-EG-E0311A
Welcome and Thank you for purchasing AOpen XC Cube. You are now the owner
of a versatile and powerful personal computer that provides you the ability of
creating personal documents and pilots you to the Internet. Please make sure you
read this Easy Installation Guide carefully for proper installation before you
getting started, and keep this user's guide in good condition for future reference.
Before You Start
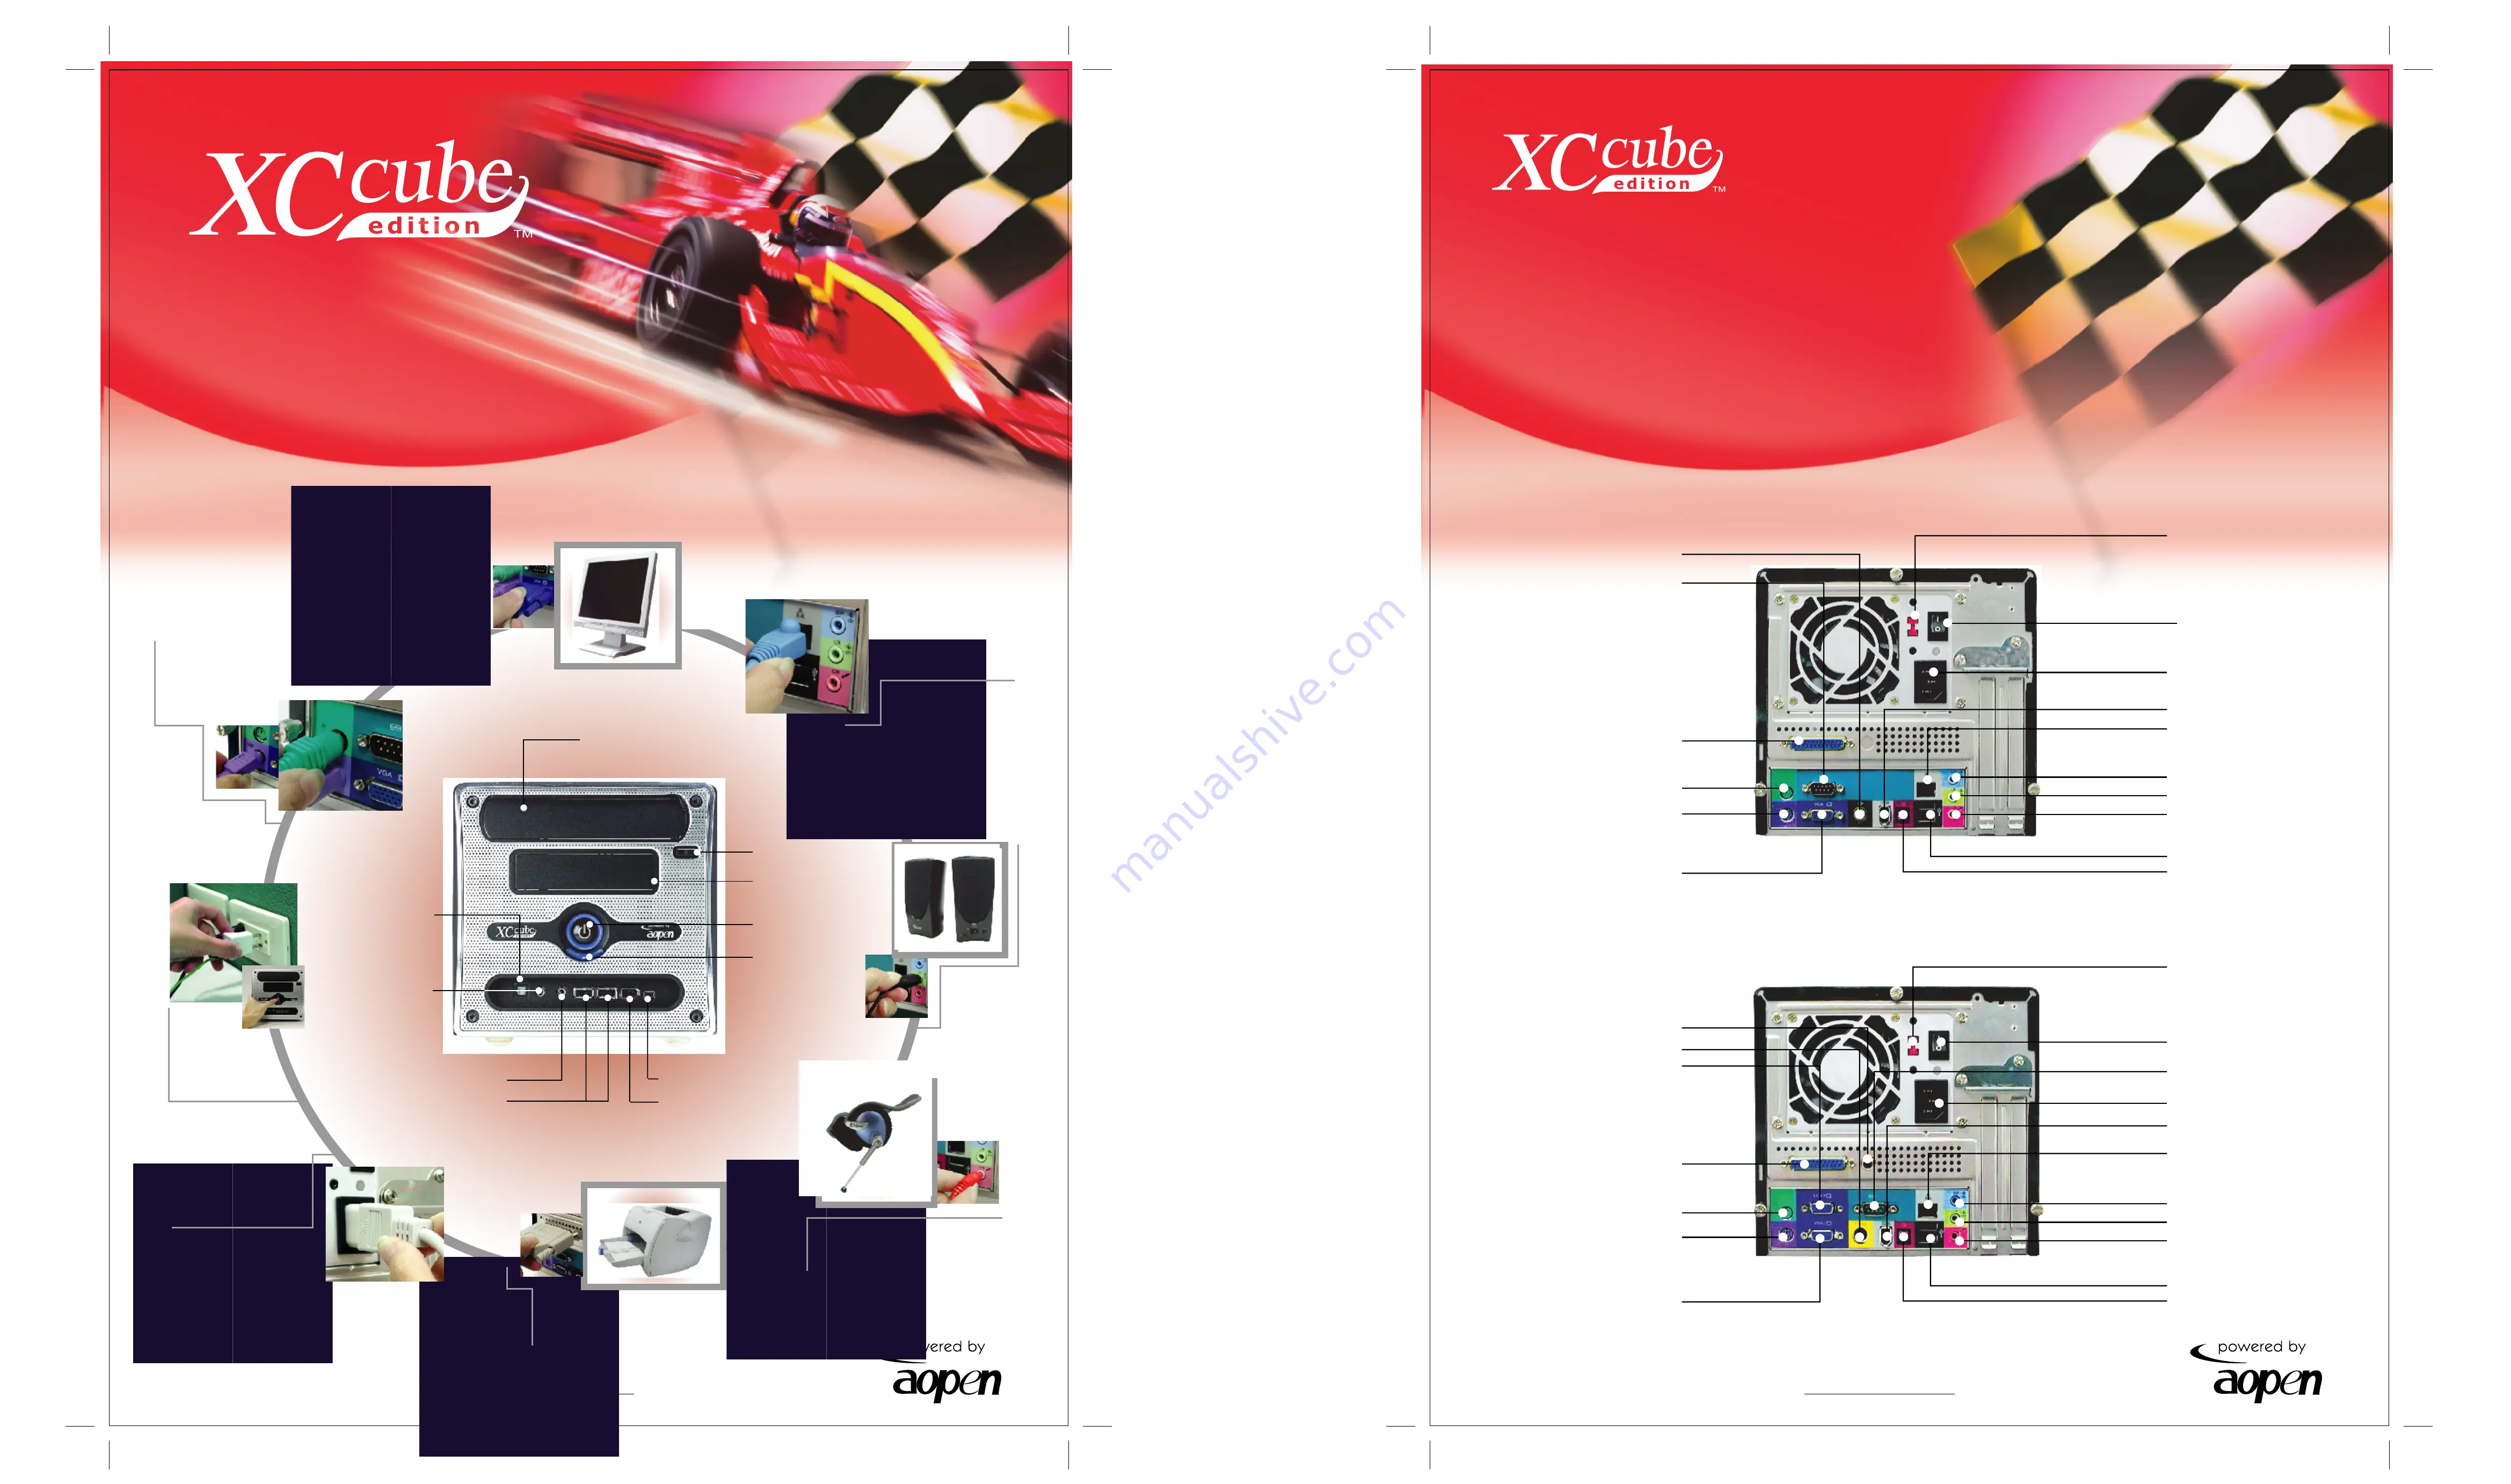
COM1 Port
PS/2 Mouse Connector
Parallel Port
PS/2 Keyboard Connector
VGA Port
EX65
Coaxial RCA Port
Power Connector
USB 2.0 Ports
Speaker Jack
Line-In Jack
RJ45 Jack
Microphone Jack
IEEE1394 Port(6 pin)
S/PDIF IN Port
Voltage adjustment
(115/230V)
Power Supply Switch
S-Video Port
EX65 / EX18
4
Connect the audio
cable of the speakers to
the light blue speaker jack
in the back panel. And
insert the power plug of
the speakers into the wall
AC outlet.
3
Plug the RJ45 cable to
the Network jack marked
with three tiny computers.
5
Connect the mic jack of the
microphone to the pink microphone
jack on the back panel.
6
Depending of the type of
printer that you have, connect the
printer cable to the Blue color
parallel port as shown.
7
Connect the power
cord to the power connector
as shown.
8
Connect the other end
of the power cord to the
wall AC outlet, and press
the power button to boot up
your system.
VGA1 Port
PS/2 Mouse Connector
Parallel Port
PS/2 Keyboard Connector
VGA2 Port
EX18
Coaxial RCA Port
Power Connector
USB 2.0 Ports
Speaker Jack
Line-In Jack
RJ45 Jack
Microphone Jack
IEEE1394 Port(6 pin)
S/PDIF IN Port
Voltage adjustment
(115/230V)
Power Supply Switch
Optical Devices
Optical Devices
Eject Button
Power Button
Floppy Disk Drive
/ Card Reader
HDD Indicator
USB 2.0 Ports
IEEE1394 Port (6 pin)
IEEE1394 Port (4 pin)
Microphone Jack
S/PDIF OUT Port
Speaker Jack
1
Connect purple connector of the
keyboard to the purple plug in the
back panel. Also connect green
connector of the mouse to the green
plug in the back
panel.
Easy Installation Guide
2
Connect the monitor video
cable to the blue
monitor connector
located on the
back panel.
COM1 Port


