


12
Connecting the Monitor
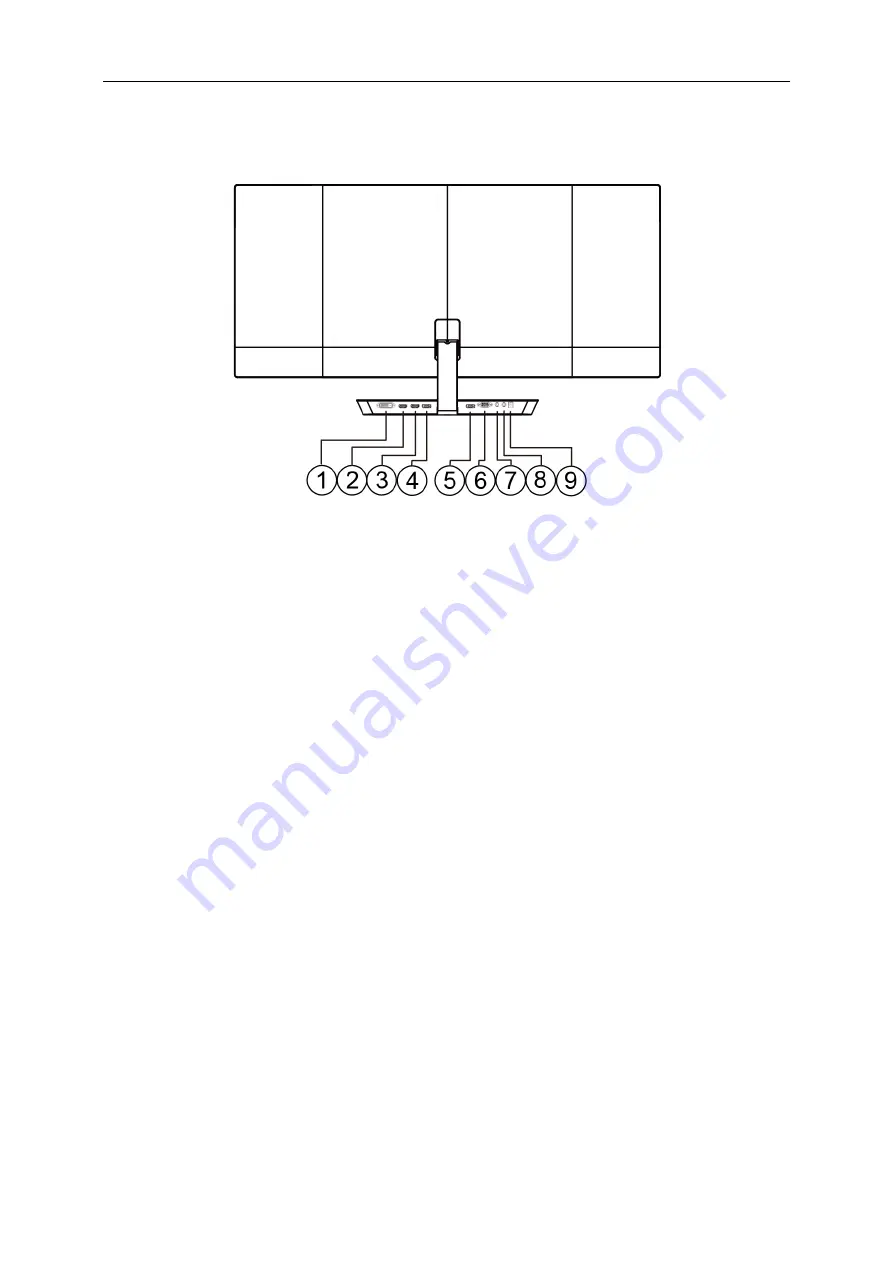
Cable Connections In Back of Monitor and Computer:
1
DVI-D (Dual link)
2
HDMI/MHL-2
3
HDMI/MHL-1
4
DP-2
5
DP-1
6
D-SUB
7
Audio in
8
Earphone out
9
Power
To protect equipment, always turn off the PC and LCD monitor before connecting.
1
Connect the power cable to the DC port on the back of the monitor.
2
Connect one end of the 15-pin D-Sub cable to the back of the monitor and connect the other end to the
computer's D-Sub port.
3
Optional
– (Requires a video card with DVI port) – Connect one end of the DVI cable to the back of the monitor
and connect the other end to the computer’s DVI port.
4
Optional
– (Requires a video card with HDMI port) – Connect one end of the HDMI cable to the back of the
monitor and connect the other end to the computer’s HDMI port.
5
Optional
– (Requires a video card with DP port) – Connect one end of the DP cable to the back of the monitor
and connect the other end to the computer’s DP port.
6
Turn on your monitor and computer.
7
Video content supporting resolution:
(1) MHL: 1920 x 1080/60Hz (Maximum)
(2) D-sub/DVI Dual-Link/HDMI: 2560x1080/60Hz (Maximum)
(3) DP: 2560x1080/144Hz (Maximum)
If your monitor displays an image, installation is complete. If it does not display an image, please refer
Troubleshooting.
Содержание C3583FQ
Страница 1: ...1 LCD Monitor User Manual C3583FQ LED backlight www aoc com 2015 AOC All Rights Reserved ...
Страница 15: ...15 Set the resolution SLIDE BAR to Optimal preset resolution ...
Страница 17: ...17 Set the resolution SLIDE BAR to Optimal preset resolution ...
Страница 19: ...19 Set the resolution SLIDE BAR to Optimal preset resolution ...
Страница 29: ...29 LED Indicator Status LED Color Power On Blue Power Saving Orange ...
Страница 63: ...63 TCO DOCUMENT FOR TCO CERTIFIED MODELS ...


