ASSEMBLY AND CARE GUIDE
2 x 1 m
FLOOR S
P
ACE REQUIRED
1 PEOPLE
REQUIRED FOR ASSEMBLY
1 HOUR
ASSEMBLY TIME
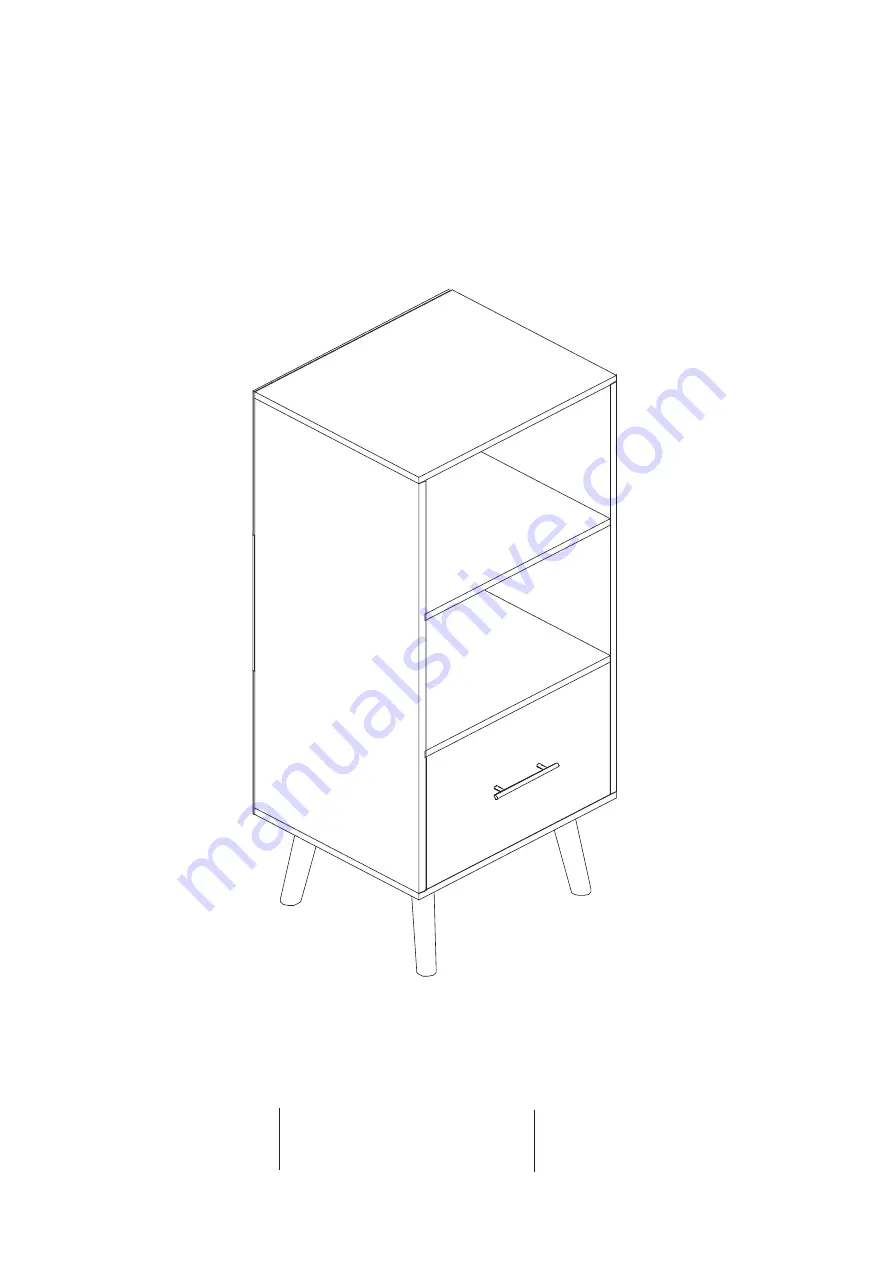
Scandinavian Multipurpose
Storage Cabinet with
Display Shelves and Drawer
Item No.: H0040
Contact Us:
[email protected]
m
Страница 1: ...D CARE GUIDE 2 x 1 m FLOOR SPACE REQUIRED 1 PEOPLE REQUIRED FOR ASSEMBLY 1 HOUR ASSEMBLY TIME Scandinavian Multipurpose Storage Cabinet with Display Shelves and Drawer Item No H0040 Contact Us service anmytek com ...
Страница 2: ...arts required for that step 3 For larger items please ensure that you have sufficient space and people to assemble your product safely 4 We recommend that where possible all items are assembled near to the area in which they will be placed in use to avoid moving the product unnecessarily once assembled 5 For the protection of your furniture we recommend that the product is placed on a protected surf...
Страница 3: ...LES SUPPORT 6 1 2 3 4 7 8 9 10 11 13 14 15 16 5 4 12 6 6 12 12 12 Item No H0040 3 If you have any general enquiries or require spare parts for this product please service anmytek com Item No H0040 Contact Us service anmytek com ...
Страница 4: ...may also have been included Philips head screwdriver required for assembly not included K L M 16pcs 4pc D A B E F H 1pc I J 2pcs 20pcs 8pcs 6x30mm 3x12mm 16pcs C 16pcs 8pcs Metal Plate 4x35mm 1pc 1pc 1pc N 4pcs O 12pcs P 12pcs Item No H0040 4 6x35mm 4x35mm 4x20mm 4x14mm 3x12mm Item No H0040 ...
Страница 5: ... a screwdriver A C C A A C C A 15 1 E E 2 A C A C A 16 C C A E E Secure 4 x quickfit screws A to panel 1 with a screwdriver Insert 4 x wooden dowels C into holes Find out the correct drawer glides 15 and 16 Fix 15 to panel 1 16 to panel 2 using 4 x screws E with a screwdriver Repeat with the panel 2 Item No H0040 ...
Страница 6: ...panels 2 using 4 x quickfit screws B Screw the quickfit screws clockwise to tighten Slide the back panel 6 into grooves Attach panel 1 to assembled unit using 4 x quickfit screws B Screw the quickfit screws clockwise to tighten Slide the other 2 x back panels 6 into grooves Step 4 B Item No H0040 ...
Страница 7: ...C C C 5 Attach 4 x metal sheets J to panel 5 using 20 x screws I with a screwdriver Attach the top panel 3 to assembled unit using 4 x wooden dowels C 4 x quickfit screws B Attach the bottom panel 5 to assembled unit using 4 x wooden dowels C 4 x screws D Tighten with a screwdriver 1 Step 5 Item No H0040 ...
Страница 8: ...cs N N N N D D D D 8 9 10 11 Step 8 D 4pcs Item No H0040 8 1 Fix 4 x legs 12 to assembled unit and paste 4 x foot pads N onto legs Attach panel 10 to panel 8 9 using 4 x screws D with a screwdriver Slide panel 11 into position Item No H0040 ...
Страница 9: ...2 x bolts H Secure 4 x quickfit screws A to panel 7 with a screwdriver Fix panel 7 to the drawer using 4 x cam locks B and tighten with a screwdriver Fix the drawer glides 13 and 14 to the drawer using 4 x screws E as shown Tighten with a screwdriver Please note that the glide 13 should be fixed on panel 8 while glide 14 is on panel 9 8 B E Item No H0040 ...
Страница 10: ...pc M 1pc Step 12 Fix 12 x plastic wedges P to back panels using 12 x screws o and tighten with a screwdriver Fix the safety strap K to the assembled cabinet using screw I and tighten with a screwdriver Fasten the cabinet to your wall using wall plug L and screw M with a screwdriver Item No H0040 ...
Страница 11: ...void splitting or cracking Ensure that wall plugs are well fitted and are a tight fit in the drilled hole Types of Walls Use one of the following types of wall plug not included if your walls are made of brick breeze block concrete stone or wood Screws may be able to be fixed directly to solid wood walls as they will provide a secure anchor point 1 General Purpose Wall Plug Generally aerated blocks s...