


DXZC-AM and DXZC-AMC Manual
Security Edition
www.amulethotkey.com |
22
Fix 1: Configure the correct display topology on each
zero client
Note:
We recommend this fix if the user is likely to connect
to their remote workstation from different zero clients (for
example, in a hot desking environment). Because the
physical monitor arrangement may differ for each zero
client, this fix ensures that the display topology is correctly
specified on each zero client.
Repeat these steps on each zero client used by the user:
1 Launch the zero client On Screen Display (OSD).
2 From the Options menu, choose
User Settings > Display
Topology
.
3 In the Display Topology tab, configure the monitor topology
used by the zero client:
a. Select the
Enable Configuration
check box.
b. Specify the display layout for the attached monitors (eg,
monitors arranged in a horizontal row), plus the position,
screen rotation and resolution for each attached
Note:
When the PCoIP session starts, the monitors
attached to the zero client may briefly go blank while
the PCoIP Host Driver Function updates the Windows
operating system with the correct display topology
details. This is normal and expected behaviour.
Fix 2: Disable the display topology on each zero client
Note:
If the user is likely to connect to their remote
workstation from different zero clients (for example, in a
hot desking environment), the most reliable solution is to
implement fix 1. We do not recommend fix 2 if the physical
monitor arrangements are likely to differ for each zero
client.
Repeat these steps on each zero client used by the user:
1 Disconnect the zero client from your network. For example,
unplug the network cable.
You cannot configure zero clients when a PCoIP session is
active. Disconnecting from the network is a necessary
precaution to prevent the zero client from automatically re-
establishing a PCoIP session.
2 Launch the zero client's OSD.
Press the Menu button on the zero client front panel to
display the OSD Connect screen. The
Options
menu in the
Connect screen gives access to various configuration pages.
3 From the
Options
menu, choose
User Settings > Display
Topology
.
Note:
Depending on how the zero client is configured,
you may need to enter a password before you can edit
zero client settings
;
see
.
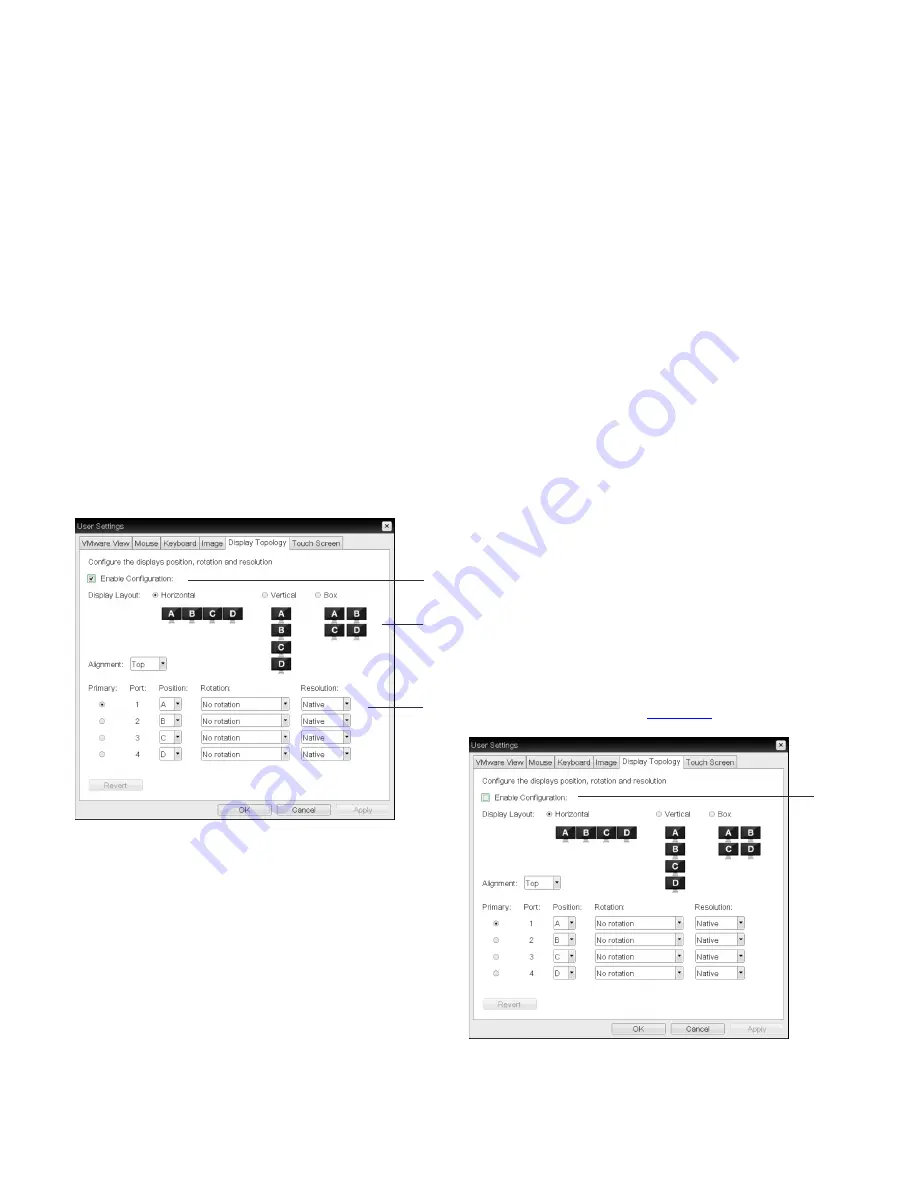
1
2
3
Zero Client OSD, Display Topology tab
1
Enable Configuration check box (selected)
2
Display layout
3
Individual settings for attached monitors, including
position, rotation and resolution.
4 Click
OK
to save the changes.
Note:
The display topology specified in the zero client
OSD overrides any monitor layout in the Display applet
of Windows Control Panel on the host PC.
5 When the next PCoIP session starts, the PCoIP host software
(running on the host computer) passes the correct display
configuration to the Windows operating system.
1
Zero Client OSD, Display Topology tab
1
Enable Configuration check box (cleared).