13
13.b
13.c
13.a
ASIENTO SANITARIO
Toilet seat
19.
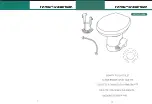
Limpie la taza con un paño húmedo, asegúrese de ubicar los agujeros de fijación del
mueble. Introduzca los pines de sujeción como lo indica la ilustración. Introduzca los pines
completamente, verificando que quede correctamente instalado
(13.a)
, el seguro de los
pines debe entrar a través de los agujeros
(13.b)
. Gire los pines hasta que logre que estos
queden firmemente instalados
(13c)
.
Clean the bowl with a wet cloth, ensure the place of the fixation holes on the seat. Put
the fixation pins like shown on the illustration. Put the pins completely, verify the correct
installation
(13.a),
the pin’s security must be inside the holes.
(13.b)
.Turn the pins until
reach them firmly
(13.c).
20.
Verifique que los pines de sujeción
queden debidamente instalados;
introduzca el asiento a través de los pines
como lo muestra la ilustración.
Verify that fixation pins be located
correctly. Introduce the seat through the
pins like shown on the illustration.
INSTALACIÓN DEL PRODUCTO
Product Installation
Содержание Duo Quadrato
Страница 1: ...DUO QUADRATO Toilet SANITARIO INSTRUCTIVO DE INSTALACI N Installation Instructions...
Страница 16: ...16 26 x 20 mm Refacciones Spare parts 27 x2 X 10 mm x2 X 30 mm Revisar Check 25 a 25 b x x2 x2 25...
Страница 17: ...17 90 x2 29 30 Click 31 x2 Click 31 a 31 b 32 28 28 a 28 b Presionar Press...


