


Installation and Operation Guide
95
APPENDIX A.
–IP camera UPnP How To
The most troublesome issue when you setup an IP camera is that you have no idea what the IP
address of this device is. Now IP camera supports the UPnP (Universal Plug and Play) protocol
which makes it easier for you to examine it; however, Microsoft Windows XP
®
doesn’t start this
service by default. Therefore, the following procedures will help you to turn it on and discover your
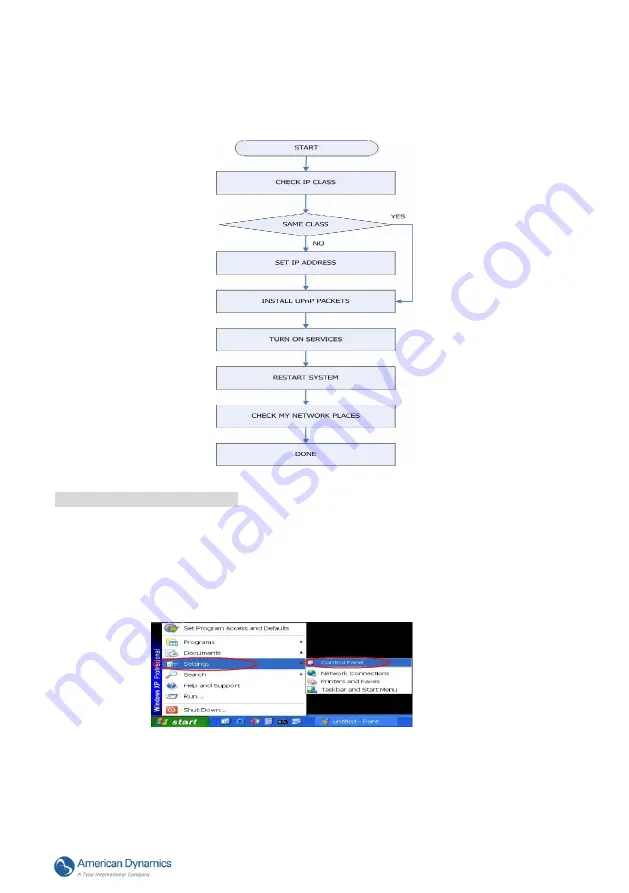
IP camera step by step as shown in Figure1 below.
Figure A-1 UPnP Setup Flow Chart
1. Check the IP class of your PC
In most cases Microsoft Windows XP
®
will assign an IP address, 169.254.*.*, automatically with a
subnet mask, 255.255.0.0, if the DHCP server is absent, while the default IP address of a IP
camera is 192.168.1.168 with a subnet mask of 255.255.255.0. There won’t be any communication
due to different IP class domains, and you have to modify the relative settings or the UPnP protocol
won’t work; however, checking your own IP address is necessary. Here are the procedures to check
and modify them.
Step 1:
From the
Start
menu, point to
Settings
, and then click
Control Panel
. See Figure A-2.
Figure A-2
Step 2:
When
Control Panel
appears, double-click the
Network Connections
icon. The
Network
Connections
dialog box appears. See Figure A-3.


