background image

Neo Threshold Shower System Installation Guide

TM

P

Содержание Sistine Stone Neo Threshold Shower System
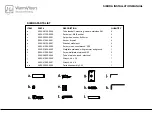
Страница 1: ...Neo Threshold Shower System Installation Guide TM P...

Страница 2: ...anbathfactory Sistine Stone showers are ideal for experienced Do It Yourselfers Please read through this entire installation guide before beginning your installation If you feel you can not confidentl...

Страница 3: ...look Installation time may vary depending on your experience complexity of shower and Pre Installation Preparation Work which may include plumbing relocation drain relocation and bathroom demolition P...

Страница 4: ...ll the items necessary for the installation This will also familiarize you with all the parts and hardware you will need to install your shower Package contents are dependent upon which package you or...

Страница 5: ...PREMIUM PACKAGE PACKING LIST PAN DRAIN THRESHOLDS GROUT 5 WALLS for 60 width shower WALLS for 36 54 width shower PLEASE REFER TO THE SEPARATE ENCLOSED FAUCET PACKING LIST FOR FAUCET PARTS...

Страница 6: ...2284 FOR ASSISTANCE 6 WALLS for 60 width shower WALLS for 36 54 width shower 3T 1T 2T 3B 1B 2B 3T 1T 3B 1B or PAN THRESHOLDS SETTING BLOCKS GLASS PANELS DOOR DOOR SEALS DOOR SWEEP DRAIN DOOR HANDLE H...

Страница 7: ...S HEAD SCREWDRIVER or PHILLIPS DRILL BIT JIG SAW or ROTO ZIP MEASURING TAPE SPONGE GROUT FLOAT BUCKET 1 8 PLASTIC TILE SPACERS SHEET ROCK SCREWS WOOD SHIMS 1 4 CEMENT BOARDS 60 GRIT SANDPAPER CLEAN CL...

Страница 8: ...er amount you will need for the project based on your shower size Depending on the size and threshold type of your shower you will need from 10 20 9 8 oz tubes of silicone to complete your shower inst...

Страница 9: ...tuds where the shower panel and door connect We recommend triple studs in these areas to make room for the cement board and hinge attachment Leave a overhang outside of the shower pan threshold if pos...

Страница 10: ...re out the pan This may cause problems installing the system if the walls are not straight and if the shower pan is not set against wall studs 5 Remove the shower pan and any wood shims after checking...

Страница 11: ...ion instructions included with your faucet Also check your local codes for additional assistance with installation guidelines 3 Finish wall surface is approximately 3 4 out from the stud Make sure out...

Страница 12: ...14 81 7 8 48 3 8 39 7 8 floor of pan 5 15 16 shower head pressure balance valve hand shower supply figure 6 Recommended Measurements 1 2 Variance _...

Страница 13: ...re with the shampoo shelf fig 7 These studs should have a minimum gap of 11 5 Add a horizontal 2 x 4 brace 1 2 to 1 below the shampoo shelf s desired height This will give you a platform to support th...

Страница 14: ...line all the way up from the inside edge of the pan on both sides fig 11 This line will be used as a guide for the placement of the wall panels and thresholds 6 Apply silicone to the gaps between the...

Страница 15: ...nel sets The panels are labeled for your convenience Set A is left faucet and Set B is right faucet Set C is left faucet and Set D is right faucet 2 Find a large area to layout and inspect all panels...

Страница 16: ...to install the top panels starting with panel 1T fig 14 Place the top panel above the bottom panel and match the space between the panels with the rest of the grout lines on the panel use spacers if n...

Страница 17: ...icone to the cement board and to the backside of the wall panel Refer to the Silicone Recommendations Chart for applying the silicone Also refer to the manufacturer s recommendations for application a...

Страница 18: ...hold into position making sure to align the threshold with the vertical line previously drawn on the cement board Apply pressure to the trim piece to bond it to the cement board The trim piece should...

Страница 19: ...etting the tile lines Order enough pieces to go around your entire shower unit so you can start and end anywhere you desire Refer to the table below to see how many pieces you will need for your showe...

Страница 20: ...ements from the outside edges of the glass The glass channels in the shower pan and wall thresholds will hold the glass in place while dry fitting the panels and door Make sure the small wall threshol...

Страница 21: ...fit the header side pieces and make sure the ends meet with the wall thresholds and the glass panels fit in the channels correctly fig 27 Depending on how square your walls are you may need to sand t...

Страница 22: ...readed portion of the bolt fig 29 6 Take one side of the handle and screw the long bolt into the end Just start the bolt until a few threads catch Keep loose fig 29 7 Put the second bolt through the l...

Страница 23: ...o slide into the hole in the pan threshold Make sure the bottom hinge has the spacer on the pin so it will be at the proper height for the door sweep fig 31 32 Be sure to keep the door in a vertical p...

Страница 24: ...and top and bottom of the door fig 34 There should be a minimum of 3 16 between the door and panels fig 35 If you need to you can push the panels into the wall thresholds to increase your gap 6 Locate...

Страница 25: ...e pan and the extra hinge hole in the stone header Also grout between the glass and the pan the glass and the wall thresholds and the glass and the stone header As well as between the joints between t...

Страница 26: ...om the area you will need to grout 2 Clean the area you are going to grout with a warm solution of dish soap and water This will remove any oils or grease from the surface Be sure to clean inside the...

Страница 27: ...eight wall thresholds work well refer to Instal lation Guide Packing List until cool and flat DO NOT CLEAN CUSTOM STONE WITH PAINT THINNER ACETONE LACQUER THINNER M E K or Other chemicals that attack...

Страница 28: ...lls once the shower has been installed This can occur with any grout application If any small cracks develop clean and then re apply a thin coat of the grout already provided to you Refer to Grouting...

Страница 29: ...NOTES...

Страница 30: ...G_00553 Rev E SP P 13395 Estelle Street Corona California 92879 Phone 1 800 454 2284 Fax 951 734 1480...

Отзывы: