background image

20

-EN


You can flexibly customize the unit to suit your own preferences and 
usage. Choose the SETUP menu from General Setting, Display Setting, 
etc., to select your desired setting.

1

Press and hold 

FUNC./SETUP

 for at least 2 

seconds to activate the SETUP selection mode.

2

Turn the 

Center Jog Dial

 to select the desired item, 

and then press 

ENT

.

Bluetooth 

 General 

 Display 

 iPod 

 XM

*


 SIRIUS

*


 HD Radio

*


(e.g. Select General)

* Only when HD / SAT receiver is connected.

3

Turn the 

Center Jog Dial

 to select a setting item, 

and then press 

ENT

.

(e.g. Select Beep)

Bluetooth:

Bluetooth IN

General:

Clock Mode 

 Clock Adjust

*

1


 Calendar Type 

 Daylight 

Time 

 Play Mode 

 Beep 

 Int Mute 

 Int Audio 


CHG Name

*

2


 AUX IN 

 AUX Name

*

3


 P.IC 


Language 

 Demo

Display:

Illumination 

 Dimmer 

 Dimmer Level 

 Text Scroll 


BGV Select 

 BGV Download

iPod:

Playlist 

 Artist 

 Album 

 Podcast 

 Audiobook 


Genre 

 Composer 

 Song

XM

*

4

:

XM ADF

SIRIUS

*

4

:

Game Alert

HD Radio

*

5

:

Station Call 

 Digital Seek

*

1

Refer to “Setting the Time and Calendar” (page 7).

*

2

The setting can be made only when a changer is connected.

*

3

The setting can be made only when AUX IN is set to ON.

*

4

Displayed only when SAT radio receiver is connected.
For the SAT Radio Setting, refer to “SAT Radio Receiver (Optional)
” 
(page 23
).

*

5

Displayed only when HD Radio TUNER MODULE (TUA-T500 HD) 
is connected.

4

Turn the 

Center Jog Dial

 to change the setting, 

and then press 

ENT

.

(e.g. Select Beep On or Beep Off.)

5

Press and hold 

BACK

 for 2 seconds to return to 

normal mode. 

Pressing


BACK

 during the procedure will return to the previous 

mode.

If the 

Center Jog Dial

 is turned 2 steps and held, you can change 

items continuously.

Select Bluetooth from the setup main menu in step 2 above.
If an optional Bluetooth Box is connected, you can place a hands-free 
call by a Bluetooth- equipped mobile phone.
Make this setting when the Bluetooth Box is connected and the 
Bluetooth function is used. For details, refer to the Owner’s Manual of 
the optional Bluetooth Box.

When Int Mute is set to On, the Bluetooth setting cannot be made. 
When the Bluetooth box is connected, set Int Mute to Off. Refer to 
Turning Mute Mode On/Off (Int Mute)
” (page 21).

Setting the Bluetooth Connection

General is selected on the setup main menu in step 2.

Setting the Clock Display (Clock Mode)

You can select the clock display type, 12-hour or 24-hour, depending on 
your preference.

Setting of Calendar Display Pattern Switching (Calendar 
Type)

You can switch the calendar display pattern to be shown when the time 
is displayed.

ex. M/D/Y 

 Dec/31/2007

Setting Daylight Saving Time (Summer Time)

Connecting an MP3 Changer (Play Mode)

Perform this setting when connecting MP3 changer. MP3 changer can 
playback CDs containing both CD and MP3 data. However, in some 
situations (some enhanced CDs), playback may be difficult. For these 
special cases, you can select playback of CD data only. When a disc 
contains both CD or the MP3 data, playback starts from the CD data 
portion of the disc.

Change discs after performing this setting.

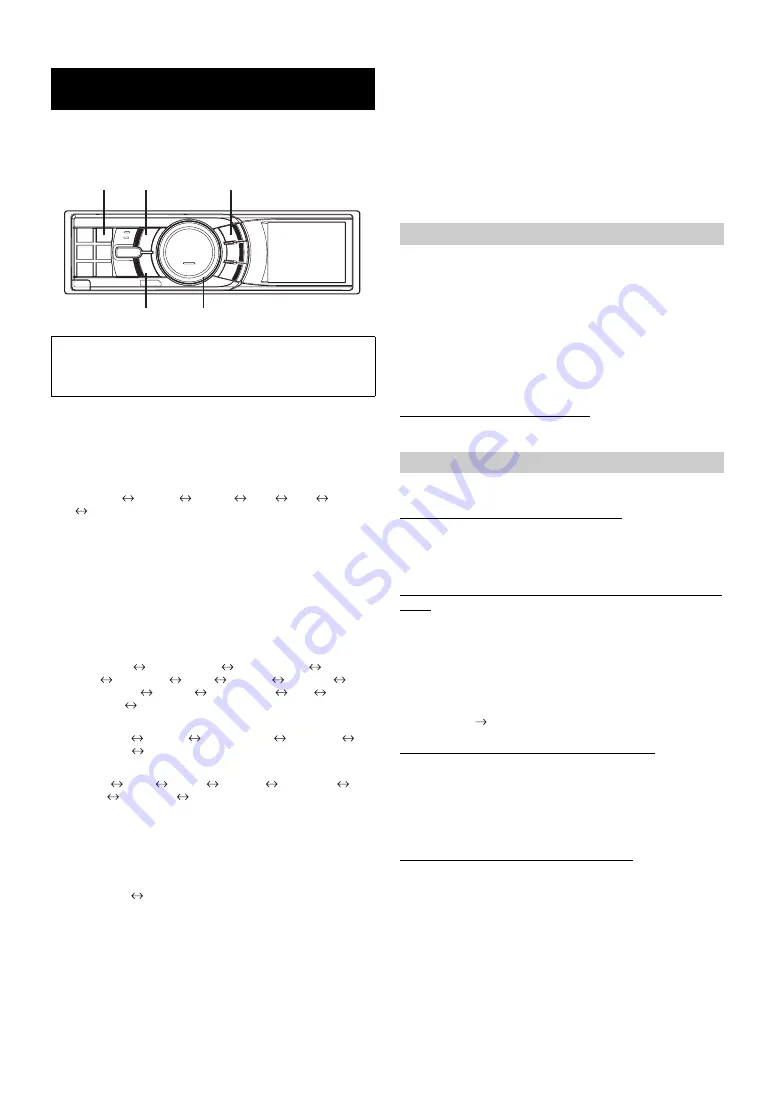
SETUP 

A typical SETUP procedure is shown in steps 1 to 5 as 
follows. See below for further information about each 
SETUP menu.

Center Jog Dial

BACK

ENT

FUNC./SETUP

BAND

Bluetooth Setting

Bluetooth IN Adapter / Bluetooth IN Off (Initial Setting)

General Setting

24H Type / 12H Type (Initial setting)

M/D/Y (Initial setting) / D/M/Y / Y/M/D

Y :

shows the year

M :

shows the month

D :

shows the day

On / Off (Initial setting)

On:

Turn Daylight Saving Time mode ON. The time 
advances by one hour for areas observing Daylight 
Saving Time.

Off:

Return to the ordinary time.

CDDA (Initial setting) / CDDA & MP3

CDDA :

Only CD data can be played back.

CDDA & MP3 :

Both CD data and MP3 file tracks can be played 
back.

Содержание IDAX001 - Radio / Digital Player

Страница 1: ...31 ALPINE ELECTRONICS OF AUSTRALIA PTY LTD 161 165 Princes Highway Hallam Victoria 3803 Australia Phone 03 8787 1200 ALPINE ELECTRONICS GmbH Frankfurter Ring 117 80807 München Germany Phone 089 32 42 640 ALPINE ELECTRONICS OF U K LTD Alpine House Fletchamstead Highway Coventry CV4 9TW U K Phone 0870 33 33 763 ALPINE ELECTRONICS FRANCE S A R L RCS PONTOISE B 338 101 280 98 Rue de la Belle Etoile Z ...

Страница 2: ......

Страница 3: ...l 12 Repeat Play 12 Changing the Display 12 USB memory Changer How to View the Display 13 Playback 14 Selecting a Disc Changer Optional 14 Multi Changer Selection Optional 14 Repeat Play 15 M I X Random Play 15 File Folder Name Search concerning MP3 WMA AAC 16 About MP3 WMA AAC 16 Sound Setting Adjusting Bass Treble Balance Between Left and Right Fader Between Front and Rear 18 Setting the MX mode...

Страница 4: ...umber 24 Storing Channel Presets 24 Receiving Stored Channels 24 Storing the desired Sports Team SIRIUS only 24 Storing while receiving a game broadcast 24 Game Alert Setup 25 Storing the desired Song Artist SIRIUS only 25 Recalling the stored information SIRIUS only 25 Canceling the stored Alert Memory SIRIUS only 25 Search Function 25 Category Search mode 26 Channel Artist Song Search mode 26 Re...

Страница 5: ...ctric shock or other injury HALT USE IMMEDIATELY IF A PROBLEM APPEARS Failure to do so may cause personal injury or damage to the product Return it to your authorized Alpine dealer or the nearest Alpine Service Center for repairing PRECAUTIONS Product Cleaning Use a soft dry cloth for periodic cleaning of the product For more severe stains please dampen the cloth with water only Anything else has ...

Страница 6: ...on audio data will not be recognized The resulting playback may contain noise that can damage speakers and or amplifiers It is recommended to back up important data on a personal computer Do not remove the USB device while playback is in progress Change SOURCE to something other than USB then remove the USB device to prevent possible damage to its memory Windows Media and the Windows logo are trad...

Страница 7: ...he Center Jog Dial one step and then turning and holding it for a moment without releasing it is expressed as Turn the Center Jog Dial one step and hold bBy turning the Center Jog Dial and holding it for a moment without releasing you can change the number and items continuously This operation is expressed as Turn the Center Jog Dial two steps and hold If Sound Beep Guide Function is set to On see...

Страница 8: ...side of the front panel into the main unit Align the groove on the front panel with the projections on the main unit 2 Push the left side of the front panel until it locks firmly into the main unit Before attaching the front panel make sure that there is no dirt or dust on the connector terminals and no foreign object between the front panel and the main unit Attach the front panel carefully Hold ...

Страница 9: ...tting for year is complete When year is set 7 Repeat steps 4 to 6 above to set month day hour and minutes 8 Press and hold BACK for at least 2 seconds to return to normal mode Pressing BACK during the procedure will return to the previous mode If the Center Jog Dial is turned two steps and held the number changes continuously Displaying the Calendar Time Press VIEW The calendar time is displayed P...

Страница 10: ...tically tuned in Automatic Seek Tuning Local mode Only strong stations will be automatically tuned in Automatic Seek Tuning Manual mode The frequency is manually tuned in steps Manual tuning 4 Press or to tune in the desired station Holding down or will change the frequency continuously The Digital appears on the display when a digital radio station which contains both audio and text information i...

Страница 11: ...n selected Receiving a Multicast Station HD Radio mode only Multicasting which is the Ability to broadcast multiple program streams over a single FM frequency thereby increasing the amount and diversity of content choices A maximum of eight multicast station channels can be selected on this unit 1 When multicast station is received the program number is displayed 2 Press SEARCH to display the Prog...

Страница 12: ... iPod nano If the unit is used with iPod software versions of iTunes earlier than 7 0 0 1 correct function and performance are not guaranteed How to View the Display iPod USB connected screen display example 1 Mode display 2 Song title Episode title Audiobook title 3 Album title Podcast title 4 Artist title Release date 5 Album cover screen 6 Elapsed time 7 Remaining time for playing 8 Calendar Ti...

Страница 13: ...ble If you press and hold ENT for at least 2 seconds all songs in the iPod are played back beginning from the first song listed No Support is displayed when text information is not compatible with the iDA X001 When a list is displayed you can use the page skip or initial skip function For details refer to Page Skip Function Initial Skip Function USB connection only page 11 During the search mode i...

Страница 14: ...og Dial to select a Song and press ENT 4 Press FUNC SETUP or BACK The song is repeatedly played back To cancel select Off in the above procedure During repeat playback no other songs are selectable by pressing or If USB is connected both the shuffle and repeat indicators that can be set are displayed only one song repeats Changing the Display Press VIEW USB connected Directly connected 1 TAG infor...

Страница 15: ...ar Time Changer display Changer CD screen display example if CD text exists 1 Mode display 2 CD text disc name 2 3 CD text track name 2 4 Disc number 5 Track number 6 Elapsed time 7 Calendar Time Changer CD screen display example if no CD text exists 1 Mode display 2 Disc number 3 Track number 4 Elapsed time 5 Volume 6 Calendar Time Changer MP3 screen display example if tag information exists 1 Mo...

Страница 16: ... files that are copy protected copyright protection cannot be played back on this unit The playback time may not be correctly displayed when a VBR Variable Bit Rate recorded file is played back Selecting a Disc Changer Optional An optional 6 disc or 12 disc CD Changer may be connected to this unit if it is Ai NET compatible With a CD Changer connected to the Ai NET input of this unit the CD Change...

Страница 17: ...he ALL M I X function is connected If M I X One is set to ON during Repeat Disc play in CD changer mode M I X will apply to the current disc only 5 Press ENT 6 Press FUNC SETUP or BACK The tracks files will be played back in random sequence To cancel select Off in the above procedure Repeat One Only a track is repeatedly played back Folder Only files in a folder are repeatedly played back Off Repe...

Страница 18: ...titution of the IEC MP3 files contain compressed audio data MP3 encoding is capable of compressing audio data at extremely high ratios reducing the size of music files to as much as one tenth their original size This is achieved while still maintaining near CD quality The MP3 format realizes such high compression ratios by eliminating the sounds that are either inaudible to the human ear or masked...

Страница 19: ...vice supports FAT 12 16 32 Order of tracks The unit plays the files in the order that the writing software writes them Therefore the playing order may not be the same as the order you input The playback order of the folders and files is as follows However the folder and file playback order differs from the folder and file number indicated on the display Bit rate This is the sound compression rate ...

Страница 20: ...s a large amount of data during playback MX takes advantage of this large data quantity to reproduce a more clear clean output MP3 WMA AAC SAT HD Radio Bluetooth Audio Level 1 to 3 Non Effect This corrects information that was lost at the time of compression This reproduces a well balanced sound close to the original DVD Video CD Level 1 to 2 MOVIE Non Effect The dialogue portion of a video is rep...

Страница 21: ...Subwoofer and press ENT The Subwoofer On Off setting mode is activated 3 Turn the Center Jog Dial to select On and press ENT 4 Turn the Center Jog Dial to select SUBW Phase and press ENT The Subwoofer phase selection mode is activated 5 Turn the Center Jog Dial to switch the phase of the subwoofer output and press ENT Select the phase to your preference Normal Reverse 6 Press BACK The unit returns...

Страница 22: ...lace a hands free call by a Bluetooth equipped mobile phone Make this setting when the Bluetooth Box is connected and the Bluetooth function is used For details refer to the Owner s Manual of the optional Bluetooth Box When Int Mute is set to On the Bluetooth setting cannot be made When the Bluetooth box is connected set Int Mute to Off Refer to Turning Mute Mode On Off Int Mute page 21 Setting th...

Страница 23: ...he desired AUX name then press ENT If the KCA 410C is connected it is possible to select two AUX names Via KCA 410C up to 2 external devices with RCA output can be connected In this case press SOURCE to select AUX mode and then press BAND to select your desired device Connecting to an External Amplifier P IC When an external amplifier is connected sound quality can be improved by stopping the powe...

Страница 24: ...ownload and press ENT Data in the USB memory is searched and maximum 10 files are displayed 2 Turn the Center Jog Dial to select a file and press ENT The selected file is downloaded to the unit The downloaded data extension is apn You cannot display your own wallpaper you made To display the wallpaper you have downloaded to the unit select User in Switching the Display Type BGV Select page 22 iPod...

Страница 25: ...E to activate the SAT Radio mode 2 Press BAND to select one of the three SAT Radio Preset Bands Each press changes the band XM mode XM 1 XM 2 XM 3 XM 1 SIRIUS mode SIRIUS 1 SIRIUS 2 SIRIUS 3 SIRIUS 1 3 Press or to select the desired channel Holding down or will change channels continuously When using the optional remote control RUE 4190 etc an SAT Radio Channel can be directly called up with the n...

Страница 26: ...eat the procedure A total of 18 channels can be stored in the preset memory 6 channels for each band XM 1 XM 2 and XM 3 or SIRIUS 1 SIRIUS 2 and SIRIUS 3 If you store a channel in a preset memory which already has a station the current channel will be cleared and replaced with the new one Receiving Stored Channels 1 Press BAND to select the desired band 2 Press PRESET The Preset screen is displaye...

Страница 27: ...to store but the memory area is fulled Alert list is displayed If you want to replace the Song title or Artist name after you have performed the procedure in step 3 turn the Center Jog Dial and then press ENT Recalling the stored information SIRIUS only Whenever the stored sports team song s or artist s are playing an interruption Alert appears in the display of the unit 1 After displaying Game Al...

Страница 28: ...r your local traffic weather information 2 Press and hold for at least 2 seconds in the SAT mode The received weather or traffic channel is stored 3 Press and hold BAND for at least 2 seconds The stored Weather or Traffic channel will be recalled 4 Press and hold BAND for at least 2 seconds Returns to normal mode Channel other than Weather or Traffic can also be stored and recalled Instant Replay ...

Страница 29: ...a Field Display The XM Auxiliary Data Field ADF display can be switched on or off There is no ADF function for the SIRIUS receiver 1 Press and hold FUNC SETUP for at least 2 seconds to enter the Setup mode 2 Turn the Center Jog Dial to select the XM mode and then press ENT 3 Press ENT to select XM ADF 4 Turn the Center Jog Dial to select On Off and then press ENT When setting to On Auxiliary Data ...

Страница 30: ...nna is poorly grounded Make sure the antenna is grounded properly at its mounting location MP3 WMA or AAC is not played back Writing error occurred The MP3 WMA AAC format is not compatible Make sure the MP3 WMA AAC has been written in a supported format Refer to About MP3 WMA AAC pages 16 17 then rewrite in the format supported by this device The sound is not output from the speakers Unit has no o...

Страница 31: ...atible with the unit is connected USB memory is a malfunction or it is shorted Connect another USB memory A USB device that is not supported by the unit is connected Connect a USB device that is supported by the unit A USB memory is not connected Make sure the USB memory device is correctly connected and the cable is not excessively bent No song file is stored in the USB memory Connect the USB mem...

Страница 32: ...ntenna is not connected to the XM or SIRIUS radio module Check whether the XM or SIRIUS antenna cable is attached securely to the XM or SIRIUS radio module Radio is being updated with latest encryption code Wait until encryption code is being updated Channels 0 and 1 should function normally XM or SIRIUS signal is too weak at the current location Wait until the car reaches a location with a strong...

Страница 33: ...FAT 12 16 32 MP3 Decoding MPEG 1 2 AUDIO Layer 3 WMA Decoding Windows Media Audio AAC Decoding AAC LC format m4a file Number of Channels 2 Channel Stereo Frequency Response 5 20 000 Hz 1 dB Total Harmonic Distortion 0 008 at 1 kHz Dynamic Range 95 dB at 1 kHz Signal to Noise Ratio 105 dB Channel Separation 85 dB at 1 kHz Frequency response may differ depending on the encoder software bit rate Powe...

Страница 34: ...act the dealer where you purchased this product to have the work done USE SPECIFIED ACCESSORY PARTS AND INSTALL THEM SECURELY Be sure to use only the specified accessory parts Use of other than designated parts may damage this unit internally or may not securely install the unit in place This may cause parts to become loose resulting in hazards or product failure ARRANGE THE WIRING SO IT IS NOT CR...

Страница 35: ...t press too hard and warp the metal plate that holds it in place 1 Remove mounting sleeve from the main unit see Removal on page 33 Heat sink Detachable Front Panel Mounting Sleeve Included Dashboard This unit Pressure Plates 2 Reinforce the head unit with the metal mounting strap not supplied Secure the ground lead of the unit to a clean metal spot using a screw 1 already attached to the vehicle ...

Страница 36: ...a may cause damage If sound is not output or the iPod is not recognized even when the iPod is connected remove the iPod once then connect it again or reset the iPod USB memory Connection sold separately Connect USB memory Connect USB memory to USB cable Remove USB memory Pull out USB memory squarely from the USB cable When removing USB memory pull it out straight If sound is not output or USB memo...

Страница 37: ...NT White Gray Black Violet Black Violet Green Green Black White Black SPEAKER RIGHT REAR SPEAKER LEFT REAR SPEAKER LEFT FRONT Antenna To power antenna To amplifier or equalizer To vehicle phone Ignition Key Battery To iPod To the instrument cluster illumination lead To iPod or USB memory Blue POWER ANT Blue White Orange ILLUMINATION Red IGNITION Yellow BATTERY Black GND REMOTE TURN ON Pink Black A...

Страница 38: ...s not recommended for use with this product Steering Remote Control Interface Connector To steering Remote control interface box Rear Output RCA Connectors RED is right and WHITE is left Front Output RCA Connectors RED is right and WHITE is left Subwoofer RCA Connectors RED is right and WHITE is left Ai NET Cable Included with CD Changer RCA Extension Cable sold separately iPod Direct Connector Co...

Страница 39: ...ct was shipped to an Authorized Alpine Service Center or Alpine Alpine will pay the return shipping charges B You should provide a detailed description of the problem s for which service is required C You must supply proof of your purchase of the product D You must package the product securely to avoid damage during shipment To prevent lost packages it is recommended to use a carrier that provides...

Отзывы: