


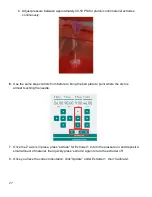


27
b.
Adjust pressure between approximately 30-50 PSI for pluronic until material extrudes
continuously.
6.
Use the same step controls from before to bring the bed plate to point where the dish is
almost touching the needle.
7.
Once the Z axis is in place, press “extrude” for Extruder 1 to turn the pressure on and deposit a
small amount of material, then quickly press
“extrude” again to turn the extruder off.
8.
Once you have the correct orientation, click “Update” under Extruder 1, then “Calibrate”.
Содержание 2
Страница 1: ...1 Allevi 1 User Guide Allevi 2 User Guide 1 6 0 ...
Страница 2: ...2 BUILD W ITH LIF E ...
Страница 6: ...6 Let s Get Started ...
Страница 13: ...13 Let s Start Printing ...
Страница 18: ...18 3 Connect your printer to your computer 4 First home the Z axis 5 Second home the E axis ...
Страница 34: ...34 Allevi Inc 3401 Grays Ferry Ave Building 176 Philadelphia PA 19146 Copyright Allevi Inc 2018 ...
Страница 35: ...35 ...