Rockwell Automation Publication 843ES-IN001B-EN-P - February 2020
5
CIP Safety Encoder
5. Slide the encoder back onto the shaft until the flex mount rests
on the machine surface.
6. Attach the encoder with two M3 (or equivalent) screws. Screw
the stator coupling and the torque stop without preload on the
drive flange. Tighten the screws to 1 N•m [8.9 lb•in].
7. Tighten the clamping ring screw to 2.5 N•m (22.1 lb•in).
8. Align machine to its mechanical zero or home position.
Electrical Installation
Route the encoder cable free of any tension, so that no additional force
is applied to the encoder. Consider the minimum bending radius of the
connection cable.
Connectivity Considerations
Consider using the shortest length possible for both Ethernet and
power cables. Run Ethernet cables separate from power cables and run
the DC power cable away from AC power.
Verify that no other devices with high interference levels such as
frequency converters, solenoid valves, or contactors, are connected to
the same power supply as the encoder. Otherwise, use suitable voltage
filtering.
We recommend shielded twisted-pair cables for both Ethernet and
power connections. These cables help avoid disruptions of signals from
electrical noise and from mechanical vibration and shock that are
common in most industrial environments. When installing the
shielded cables, you must follow the recommended installation
guidelines to avoid ground loops. You must comply with the maximum
permissible connection cable length.
For shielded Ethernet cables, you must provide an equipotential
grounding network that overlays the existing electrical grounding and
bonding system for safety and fire. If you cannot provide an
equipotential ground and the second connection from the encoder is
going to a switch, install a patch panel to break the shield to the switch.
Switches typically connect jack shield directly to the ground lug, which
connects the shield directly to ground.
Diagnostics
After switching on the power supply, wait at least 10 seconds until the
encoder is ready for operation and interfaces are ready for
communication. The encoder communicates with the digital interface
after this period.
ATTENTION:
• Make sure that the operating voltage is switched on or off
simultaneously for the encoder and the downstream device.
• Electrostatic discharges at the contacts of the connector or at
the cable ends could damage or destroy the device. Take
appropriate precautionary measures.
• Use a PELV supply voltage source according to IEC 60204-1
complying with the proper operating voltage and the
maximum permissible output current.
IMPORTANT
To connect the encoder, refer to the corresponding operating
and safety instructions of the external drive system/encoder
evaluation system.
When assembling a mating connector, comply with the
instructions that are attached to the connector.
IMPORTANT
Verify that all required cable wires/connectors are connected
before commissioning. Insulate individually all unused ends
of the output signals to avoid short-circuits.
ATTENTION:
Before connecting or disconnecting the signal cable,
always disconnect the power supply and secure it against
switching on again.
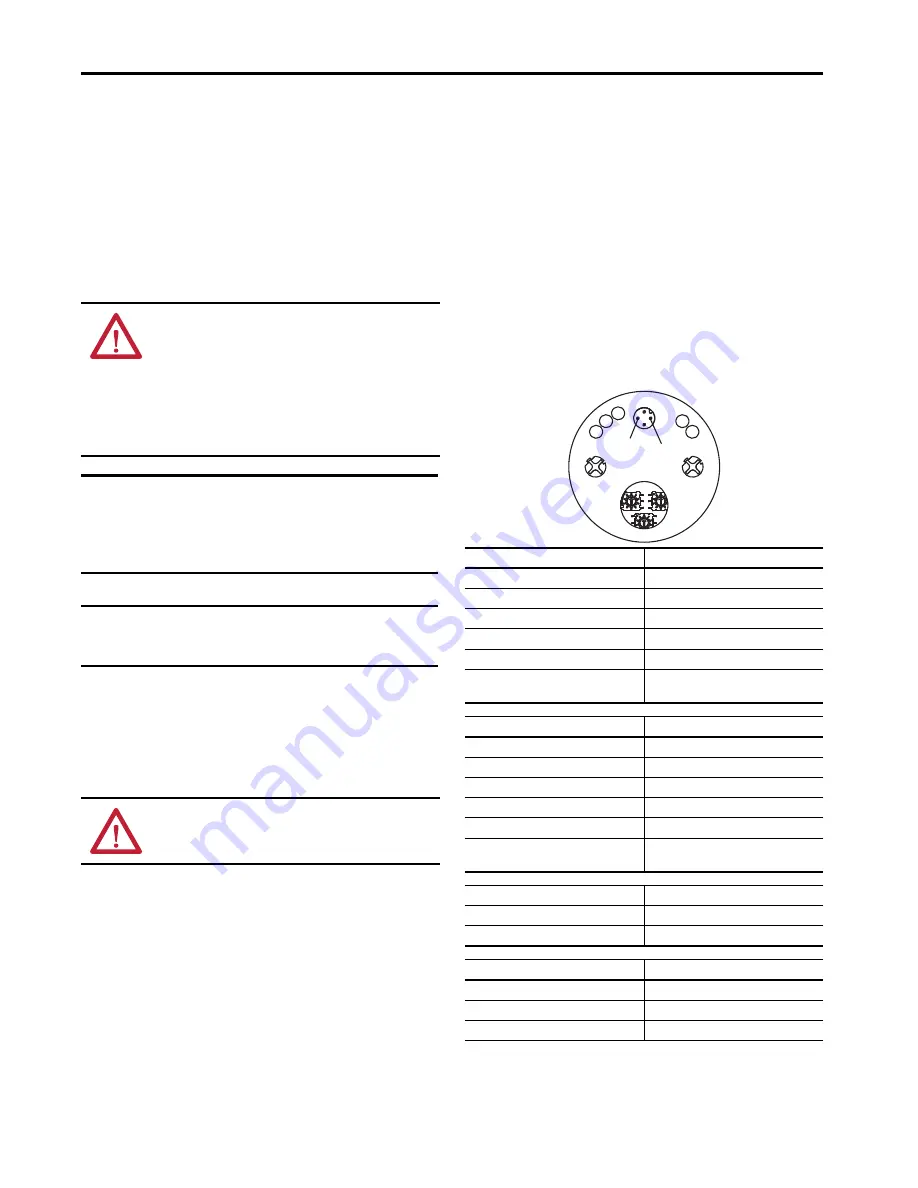
Module Status Indicator
Short Description
OFF
No power
Green flashing
Standby/idle
Green solid
Device operational
Red flashing
Minor fault
Red solid
Major fault
Green/red flashing
Self-test
Device not configured
Network Status Indicator
Short Description
OFF
No power/IP address
Green flashing
Not connected
Green solid
Connected
Red flashing
Minor fault
Red solid
Major fault
Green/red flashing
Self-test
Fast flashing during safety commissioning
Encoder Status Indicator
Short Description
Green solid
Power ON
OFF
No power
Link 1/Link 2 Status Indicator
(1)
(1)
The Ethernet link status indicators (Link 1 and Link 2) display the status of the physical connection on the
Ethernet interface.
Short Description
OFF
No link/power OFF
Green solid
Ethernet connection is established
Green flashing
Data transmission/port active
Net.
Encoder
Mod.
Link 1
GND
Port 1
x100
x10
x1
10…30V DC Link 2
Port 2


