Introduction
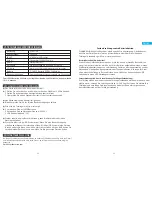
1. IR LED - When the light is not strong, it will enable infrared light to increase the
environment brightness.
2. Light Sensor - Enable the infrared light when illumination is below 2lux.
3. MIC - Capture voice and Intercom.
4. Main Button - Wake up the device and inform you when someone visit.
5. PIR - Detect human body’s movement and send alarm to smart phone.
6. Lens - Capture image video.
7. Indicator Light - Red light flash slowly: waiting for Wi-Fi configuration
Blue light flash slowly: working status
Red light and blue light flash alternately: Wi-Fi connecting failed
8. Speaker - Emit system sound and intercom.
9. USB - Supply power to device through USB cable.
10. AC Input - Supply power to device by installing the AC input supply hole on the
mounting bracket.
11. Reset Button - Long press more than 5 seconds to restore factory settings.
12. Battery Compartment - Mounting 18650 specification battery.
13. Fixed Hole-Fit the support on the wall with the mounting screws for the ounting kit.
14. AC Input Hole - The power supply of the equipment can be supplied by
connecting the hole and the AC power supply on the wall.
15. Stuck Hole - Mounting the equipment onto the bracket.
16. Security Screw Hole - Mounting the security screw on the fittings to prevent the
equipment from being removed.
AKASO DOORBELL
TWO 18650 BATTERIES
SCREWS AND ANCHORS
BRACKET
YouTube Installation Link:
https://youtu.be/nz3RPbAXreE
1. IR LED
2. Light Sensor
3. MIC
4. Main Button
5. PIR
6. Lens
7.Indicator Light
8. Speaker
9. USB Port
10. AC Input
11. Reset Button
12. Battery Compartment
13. Fixed Hole
14. AC Input Hole
15. Stuck Hole
16. Security Screw Hole
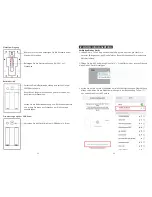
1. Select the place you would like to mount
your doorbell and position the mounting
bracket (ensure it is level).
2. Use the screws to mount your bracket.
Use the anchors for brick, concrete or stucco.
3. Screw the mounting bracket into the wall
using the four screws and a screwdriver (you
may need an electric screwdriver).
4. Place doorbell onto the top of the mounting
bracket, then slide doorbell down until the
device clicks into the bracket.
5. Screw the security screw into the base of doorbell to secure the device into the
mounting bracket.
1
2
English
III. INSTALLATION GUIDE
II. APPEARANCE INTRODUCTION
I. PACKING LIST


