


T-TAP Pro Thunderbolt 3 to 12G-SDI/HDMI v16.1 17 www.aja.com
On Mac:
• From the Finder, click on Go/Computer/<System HD>/Users/Shared/AJA/
and copy or move the "com.aja.devicesettings file" described above to this
location.
NOTE: The "AJA" folder needs to be created manually at this location before moving the
preference file into it.
On Windows there are three possible shared locations depending on your system:
• C:\Users\Public\Aja\
• C:\Users\All Users\Aja\
• C:\ProgramData\Aja
Copy or move the "com.aja.devicesettings file" described above to one of
these locations.
NOTE: The AJA Control Panel Info screen displays the path to the Global Preference file
on that computer.
NOTE: Clicking on the AJA Control Panel Erase All Prefs button does NOT delete an
existing Global Preference file from this location.
T-TAP Pro Audio Monitoring
T-TAP Pro can be used as your single audio monitoring solution whether you are
auditioning music in a web browser, playing a movie file on the desktop, creating
music, or playing a YouTube clip. As long as the output of your work or application
is normally output via the host system audio, your T-TAP Pro can route this audio
for monitoring. This cuts down on unnecessary cabling, and means you can
take advantage of a consistent audio monitoring environment whatever you are
currently doing with your host system.
NOTE: On first use, you will need to tell your operating system to use AJA hardware as
the default output hardware.
T-TAP Pro lets you listen to Host System audio concurrently with your NLE audio.
This is useful if you need to audition music tracks against playback of your NLE
timeline, or if you need to Skype with a remote producer during an edit session,
or for a myriad of other reasons.
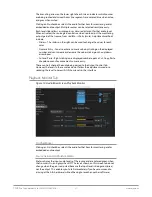
T-TAP Pro audio monitoring is routed and mixed using the Control Panel
application's Audio Mixer screen. You can select sources, and can adjust their
monitoring levels.
The mixed audio monitor signal is also routed to:
• SDI Embedded Audio out
• HDMI Embedded Audio Out
IMPORTANT: Even though you can hear changes in the signals and levels adjusted with
the Audio Mixer screen, these changes are NOT recorded to disk during NLE
Capture or Audio Punch In / Voice Over to Timeline. The Audio Mixer screen is
dedicated for monitoring only, not program mixing.


