


AirVelocity 1500 Installation Guide
DUG01560
Airspan Commercial and Internal Use
21
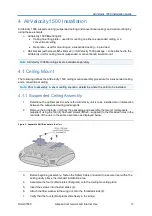
4.1.2 Conventional Ceiling Assembly
1.
Determine the required location where the AirVelocity unit is to be installed on the
conventional ceiling.
2.
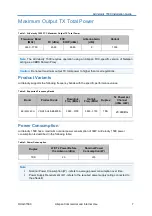
Remove the AirVelocity unit from the packaging and assemble the two (2) rail brackets
(supplied) using the four (4) flat-head screws (M5x8
– supplied) to the threaded holes in the
rear side of the unit, in the same orientation as displayed below:
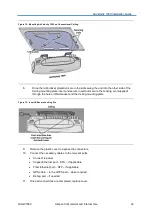
Figure 10: Assemble Rail Brackets to the Unit
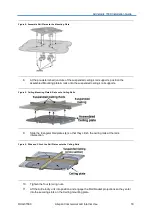
3.
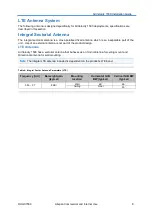
Position the Ceiling mounting plate on the ceiling. Be sure to position the Ceiling mounting
plate
straight to ensure the unit sits as required.
4.
Mark the screw positions carefully through the diagonal slots on the Ceiling mounting plate
onto the ceiling.
5.
After drilling holes and inserting approved ceiling anchors (plugs) fasten the Ceiling
mounting plate to the ceiling with approved screws and washers (not included).
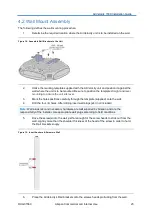
Figure 11: Attach Mounting Bracket to Standard Ceiling
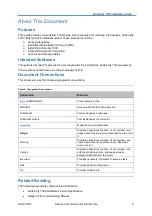
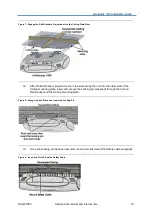
6.
Mounting plate is installed and ready for AirVelocity 1500 mounting.
Note:
Screws and washers (x4) and any necessary hardware are not supplied by Airspan
and are the responsibility of the installer. Use appropriate ceiling hardware according to
field conditions.
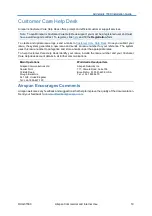
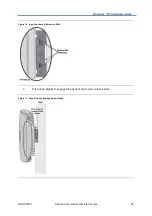
7.
Lift the AirVelocity unit into position and engage the Rail bracket projections so they enter
into the securing slots on the Ceiling mounting plate.