background image

Manual de Usuario

Manuel de l'utilisateur

User manual

Handbuchbenutzer

Manuale di istruzioni

NOTEBOOK

KIRA 

Series

Содержание KIRA N7000

Страница 1: ...Manual de Usuario Manuel de l utilisateur User manual Handbuchbenutzer Manuale di istruzioni NOTEBOOK KIRA Series ...

Страница 2: ...1 MANUAL DE USUARIO ESPAÑOL ...

Страница 3: ... Alimentación 11 Instalar la batería 11 Conectar el adaptador de corriente AC DC 11 Cargar la batería 12 Encender el equipo 12 Utilizar el teclado 13 Teclas de función 13 Función de teclado numérico 14 Utilizar la plataforma táctil touch pad 14 Solución de problemas 16 Identificar el problema 16 Información de regulación 17 Información FCC 17 Información CE 18 Comunicado de regulación R TTE 18 Esp...

Страница 4: ......

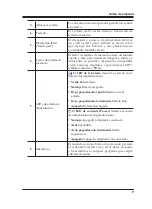
Страница 5: ...se de no bloquear las aberturas de ventilación NO presione ni toque la pantalla NO lo coloque en superficies desiguales o inestables NO utilice su ordenador portátil en condiciones adversas NO coloque o deje caer objetos sobre el ordena dor y NO ejerza una presión fuerte sobre él NO exponga el ordenador a campos magnéticos ...

Страница 6: ... o a la humedad NO lo coloque cerca del fuego u otras fuentes de calor NO manipule las baterías Manténgalas fuera del alcance de los niños NO lo exponga al polvo y o a productos químicos corrosivos NO cierre de golpe el portátil y nunca levante o sostenga el portátil por la pantalla NO pulverice agua u otros fluidos de limpieza directamente sobre la pantalla Si viaja con el ordenador recuerde llev...

Страница 7: ...os listados a continuación Ordenador portátil Batería Adaptador de corriente AC DC y cable de alimentación Manual de Usuario Bolsa de transporte CD de drivers y utilidades Una vez comprobado y confirmado que el sistema portátil está completo lea atentamente estas páginas para familiarizarse con su portátil ...

Страница 8: ...guiente modo Verde parpadeando Actividad de red inalámbrica en progreso Verde sin parpadear Red inalámbrica encendida pero sin actividad actualmente Apagado Red inalámbrica apagada El LED Bloq Núm se enciende cuando el teclado interno está en modo de teclado numérico El LED Bloq Mayús se enciende cuando el teclado está en modo Bloqueo de mayúsculas para escribir todo con mayúsculas El LEDdel disco...

Страница 9: ...ositivos compatibles como cámaras digitales reproductores MP3 teléfonos móviles y PDAs 7 LEDs de estado de alimentación El LED de la batería muestra el estado de la batería del siguiente modo Verde Batería llena Naranja Batería cargando Rojo parpadeando rápido Batería en mal estado Rojo parpadeando lentamente Batería baja Apagado Batería descargada El LED de corriente Power muestra el modo de alim...

Страница 10: ...r de corriente le permite enchufar el adaptador de corriente AC DC para alimentar al portátil y cargar la batería 3 Puerto de monitor externo El puerto del monitor externo le permite conectar un monitor externo mediante un cable VGA 4 Clavija para micrófono La clavija para micrófono le permite conectar un micrófono mono externo 5 Clavija para auriculares La clavija para auriculares le permite cone...

Страница 11: ...e tasas de intercambio de datos de hasta 480 Mb s 2 Puerto LAN RJ 45 El puerto LAN acepta un conector estándar RJ 45 para conectar a una red router o módem ADSL 3 Puerto módem RJ 11 El puerto módem RJ 11 se utiliza para conectar el módem interno de 56k a una línea de teléfono 4 Botón encender apagar Este botón enciende y apaga su portátil Consulte Encender el equipo en la página 12 ...

Страница 12: ...e guarda durante un largo período de tiempo o para cambiar una batería descargada por otra cargada 2 Batería Pestillo de liberación Deslice este pestillo para quitar la batería 3 Salida del ventilador y Ranuras de ventilación Son puertos abiertos para disipar el calor de los componentes internos del ordenador No coloque el ordenador en una posición en la que queden bloqueados ...

Страница 13: ...ía hasta que quede 333 ajustada y el pestillo haga clic Conectar el adaptador de corriente AC DC Para proteger a su ordenador de daños utilice únicamente el adaptador de alimentación que venía con él pues cada adaptador de alimentación tiene su propia tasa de salida de corriente Para conectar el adaptador de corriente AC DC Enchufe el cable de salida DC en la clavija de alimentación DC de su PC po...

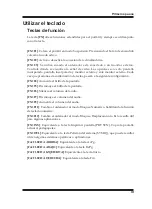
Страница 14: ...vez conectado su adaptador de corriente AC DC o cargada la batería de litio interna encienda el portátil presionando el botón Encendido Apagado situado en la parte superior del teclado Para apagarlo mantenga presionado el botón durante cuatro segundos Cuando encienda el portátil realizará un test automático de arranque POST para comprobar el hardware interno y la configuración Si se encuentra un e...

Страница 15: ... configuración FN F4 Aumenta el brillo de la pantalla FN F5 Disminuye el brillo de la pantalla FN F6 Silencia el volumen del audio FN F7 Disminuye el volumen del audio FN F8 Aumenta el volumen del audio FN F11 Cambia el ordenador al modo Bloqueo Numérico habilitando la función de teclado numérico FN F12 Cambia el ordenador al modo Bloqueo Desplazamiento Esto resulta útil para algunas aplicaciones ...

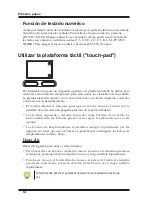
Страница 16: ...ento El control del cursor funciona igual que un ratón y mueve el cursor por la pantalla Sólo necesita una pequeña presión con la punta del dedo Los botones izquierdo y derecho funcionan como botones de un ratón La funcionalidad de los botones puede variar según la aplicación que se esté usando Los botones de desplazamiento le permiten navegar rápidamente por las páginas sin tener que usar el curs...

Страница 17: ... el cursor Para arrastrar mueva el cursor al elemento que desea mover Mantenga presionado el botón izquierdo mientras mueve el elemento a su nueva ubicación y luego suéltelo También puede arrastrar usando sólo la plataforma táctil Primero puntee en la plataforma táctil dos veces sobre el elemento que desea mover asegurándose de dejar el dedo sobre la plataforma tras el segundo punteo A continuació...

Страница 18: ...tencia Identificar el problema Si encuentra un problema siga estos pasos antes de pasar a soluciones más complejas Apague el portátil 111 Asegúrese de que el adaptador de corriente AC DC esté enchufado al portátil y 222 cuenta con una fuente de alimentación activa Asegúrese de que los dispositivos conectados a los conectores externos estén 333 bien enchufados También puede desconectar los disposit...

Страница 19: ...sté conectado el receptor Consulte con el distribuidor o con un técnico especialista en radio televisión para más ayuda 2 Se le avisa de que cualquier cambio o modificación no admitida expresamente por la parte responsable del acuerdo podría anular su autoridad para operar con el equipo 3 Este dispositivo cumple con el Apartado 15 de las Normas de la FCC Su utilización está sujeta a estas dos cond...

Страница 20: ...o 1999 5 EC y 2004 108 EC El equipo ha pasado las pruebas Las pruebas han sido realizadas según los siguientes estándares europeos EN 300 328 V 1 7 1 2006 EN 301 489 1 V 1 6 1 2005 EN 301 489 17 V 1 2 1 2006 EN 50385 2002 EN 60950 1 2001 EN 55022 2006 Clase B EN 61000 3 2 2000 A2 2005 EN 61000 3 3 1995 A1 2001 A2 2005 EN 55024 1998 A1 2001 A2 2003 Comunicado de regulación R TTE Los estándares euro...

Страница 21: ...ernet 2 puertos USB Salida VGA Audio Altavoces estéreo internos Micrófono mono interno Lector de tarjetas 3 en 1 SD MMC MS LEDs de estado del sistema Alimentación dos colores Estado de la batería dos colores Wifi encendido apagado Bloqueo de mayúsculas Bloqueo numérico Administración de energía ACPI 2 0 Mecánica apagado Soft apagado funcionando en suspensión Batería y duración depende del modelo L...

Страница 22: ...Bloqueo desplazamiento Fn INS Imprimir pantalla Fn DEL Petición del sistema Fn FLECHA ARRIBA Avance página Fn FLECHA ABAJO Retroceso página Fn FLECHA IZQUIERDA Inicio Fn FLECHA DERECHA Fin Dispositivo puntero Plataforma táctil incorporada con función de desplazamiento scroll en 2 sentidos 2 botones de clic Dimensiones Peso 243 10 x 171 9 x 28 53 42 47 mm Ancho x Fondo x Alto depende del modelo 1 0...

Страница 23: ...21 USER S MANUAL FRANÇAIS ...

Страница 24: ...us 10 Mise en route 11 Alimentation 11 Installer la batterie 11 Connecter l adaptateur CA 11 Charger la batterie 12 Mettre sous tension 12 Utilisation du clavier 13 Touches de fonction 13 Pavé incorporé 14 Utilisation du TouchPad 14 Dépannage 16 Identifier le problème 16 Informations règlementaires 17 Informations de la FCC 17 Informations de la CE 18 Déclarations de règlementation R TTE 18 Spécif...

Страница 25: ......

Страница 26: ...révues pour la ventilation NE PAS toucher ni appuyer sur le panneau d affichage NE PAS le placer sur une surface de travail instable NE PAS utiliser votre notebook dans des conditions particulièrement difficiles NE PAS placer ni faire tomber d objets sur l ordinateur et NE PAS y appliquer une forte pression NE PAS soumettre l ordinateur à des champs magnétiques ...

Страница 27: ...placer près d un feu ou autre source de chaleur NE PAS agir à la légère avec les batteries Rangezles hors de portée des enfants NE PAS exposer à la poussière et ou à des produits corrosifs NE PAS fermer votre notebook en le claquant et ne prenez ou ne soulevez jamais votre note book par l affichage NE PAS vaporiser d eau ou tout autre liquide de nettoyage directement sur l affichage Si vous voyage...

Страница 28: ...fiez que vous avez les éléments de la liste ci dessous Ordinateur portable Batterie Adaptateur CA avec cordon d alimentation Manuel de l utilisateur Etui souple de transport Après avoir vérifié et confirmé que votre notebook est complet lisez les pages suivantes pour en savoir plus sur votre notebook ...

Страница 29: ...que l état du réseau sans fil comme suit Vert clignotant réseau sans fil d activité Vert non clignotant réseau sans fil activé mais pas en cours d activité Eteint réseau sans fil désactivé La LED Verr Num est allumée quand le clavier interne est en mode de pavé numérique incorporé La LED Verr Maj est allumée quand le clavier est en mode Verr Maj défini pour taper tout en lettres capitales La LED d...

Страница 30: ...des appareils photo numériques des lecteurs MP3 des téléphones mobiles et des PDA assistant numérique personnel 7 LEDs d état d alimentation La LED batterie indique l état de la batterie comme suit Vert batterie pleine Orange batterie en cours de charge Rouge clignotant rapidement problème de batterie Rouge clignotant lentement Batterie faible Eteint batterie déchargée La LED d alimentation indiqu...

Страница 31: ...e port d adaptateur d alimentation vous permet de brancher un adaptateur d alimentation CA pour alimenter votre notebook et charger la batterie 3 Port du moniteur externe Le port du moniteur externe vous permet de connecter un moniteur externe 4 Prise Microphone La prise microphone vous permet de connecter un microphone mono externe 5 Prise casque La prise casque vous permet de connecter des casqu...

Страница 32: ... des vitesses d échange de données allant jusqu à 480 Mb s 2 Port LAN RJ 45 Le port LAN accepte une fiche RJ 45 standard pour connecter à un réseau un routeur ou un modem ADSL 3 Port Modem RJ 11 Le port modem RJ 11 est utilisé pour connecter le modem 56K interne à une ligne de téléphone 4 Bouton Marche Arrêt Ce bouton allume et éteint votre notebook VoirMettre sous tension à la page 12 ...

Страница 33: ... une période prolongée ou pour échanger une batterie déchargée par une batterie chargée 2 Batterie Loquet Faites coulisser ce loquet pour retirer la batterie 3 Sortie de ventilation et fentes de ventilation Ce sont des ouvertures permettant de dissiper la chaleur provenant des composants internes de l ordinateur Ne placez pas l ordinateur dans une position telle que les ouvertures soient bouchées ...

Страница 34: ... 333 prenne sa place avec un déclic Connecter l adaptateur CA Pour éviter d endommager votre ordinateur utilisez uniquement l adaptateur d alimentation fourni avec celui ci car chaque adaptateur d alimentation possède son propre étalonnage de sortie Pour connecter l adaptateur CA Branchez le câble de sortie CC à la prise d alimentation CC de votre notebook 111 Branchez l adaptateur CA à la prise d...

Страница 35: ...que vous avez connecté votre adaptateur CA ou rechargé la batterie Lithium interne vous pouvez allumer votre notebook en appuyant sur le bouton Marche Arrêt situé au dessus du clavier Pour éteindre appuyez sur le bouton pendant quatre secondes Quand vous allumez votre notebook il effectue un auto test de démarrage POST pour vérifier les composants internes et la configuration Si une erreur est tro...

Страница 36: ...e combinaison de touches vous passez au paramètre suivant FN F4 Augmente la luminosité de l écran FN F5 Diminue la luminosité de l écran FN F6 Coupe le son FN F7 Diminue le volume audio FN F8 Augmente le volume audio FN F11 Bascule l ordinateur en mode Verr Num activant le pavé numérique incorporé FN F12 Bascule l ordinateur en mode Arrêt Défil Ceci est utilisé dans certaines applications FN INS C...

Страница 37: ...u curseur fonctionne de la même façon que celui d une souris et déplace le curseur sur l affichage Il nécessite seulement une légère pression du bout du doigt Les boutons gauche et droit fonctionnent de la même façon que les boutons d une souris La fonctionnalité effective des boutons peut varier en fonction de l application utilisée Les boutons de défilement vous permettent de naviguer rapidement...

Страница 38: ...seur sur l élément que vous désirez déplacer Appuyez sur le bouton gauche et maintenez le enfoncé tout en déplaçant l élément à son nouvel emplacement et relâchez le ensuite Vous pouvez aussi faire glisser à l aide du seul TouchPad D abord tapez deux fois sur le TouchPad au dessus de l élément que vous désirez déplacer en prenant soin de laisser votre doigt sur le pavé tactile après le second tape...

Страница 39: ...lème Si vous rencontrez un problème effectuez tout d abord la procédure suivante avant de vous lancer dans un dépannage complexe Eteignez votre notebook 111 Vérifiez que l adaptateur CA est branché à votre notebook et à une source 222 d alimentation CA Vérifiez que les périphériques connectés aux connecteurs externes sont 333 correctement branchés Vous pouvez aussi déconnecter ces périphériques él...

Страница 40: ...essayer de corriger ces interférences en employant l une des méthodes suivantes Réorienter ou déplacer l antenne de réception Eloignez le matériel du récepteur Branchez cet équipement sur la prise de courant d un circuit différent de celui sur lequel est branché le récepteur Consultez votre revendeur ou un technicien expérimenté en radio télévision 2 Vous êtes prévenus que tout changement ou modif...

Страница 41: ...s Etats membres concernant la Directive de compatibilité électromagnétique 2004 108 EC la Directive sur les basses tensions 2006 95 EC et la directive d amendement 93 68 EEC les procédures données dans la directive du Conseil Européen 1999 5 EC et 2004 108 EC L équipement a été déclaré conforme Le test a été réalisé conformément aux standards européens suivants EN 300 328 V 1 7 1 2006 EN 301 489 1...

Страница 42: ... 2 ports USB Sortie VGA Audio Haut parleurs stéréo internes Microphone mono interne Lecteur de carte 3 en 1 SD MMC MS LEDs d état du système Alimentation double couleur Etat de la batterie double couleur Wifi activé désactivé Verr Maj Verr Num Gestion de l alimentation ACPI 2 0 Mécanique désactivée Logiciel désactivé En cours de fonctionnement Veille Module Batterie longévité Li Ion 4 éléments 240...

Страница 43: ...er le volume Fn F8 Augmenter le volume Fn F11 Verr Num Fn F12 ArrêtDéfil Fn INS Impression d écran Fn SUPPR Appel système Fn FLÈCHE HAUT Page Préc Fn FLÈCHE BAS Page Suiv Fn FLÈCHE GAUCHE Accueil Fn FLÈCHE DROITE Fin Dispositif de pointage TouchPad intégré avec fonction de défilement à 2 sens 2 boutons de clic Dimensions Poids 243 10mm l 171 9mm P 28 53 mm 42 47mm H selon le modèle 1020 1196g selo...

Страница 44: ...1 USER S MANUAL ENGLISH ...

Страница 45: ... 10 Getting Started 11 Power 11 Installing the battery 11 Connecting the AC adapter 11 Charging the battery 11 Switching the Power On 12 Using the Keyboard 13 Function Keys 13 Keypad Overlay 14 Using the Touch Pad 14 Troubleshooting 16 Identifying the Problem 16 Regulatory Information 17 FCC Information 17 CE Information 18 Regulatory statement R TTE 18 Specifications 19 ...

Страница 46: ......

Страница 47: ... t block the openings provided for ventilation DO NOT press or touch the display panel DO NOT place on uneven or unstable work surfaces DO NOT use your notebook computer in extreme weather conditions DO NOT place or drop objects on the computer and DO NOT apply heavy pressure on it DO NOT subject the computer to mag netic fields ...

Страница 48: ... to rain or moisture DO NOT place near fire or other sources of heat DO NOT tamper with the batteries Keep them away from children DO NOT expose to dust and or corro sive chemicals DO NOT slam your notebook shut and never hold it by the display DO NOT spray water or any other clean ing fluids directly on the display If you are traveling with your computer remember to carry it as hand luggage Don t...

Страница 49: ...ebook PC make sure you have the items listed below Notebook computer Battery AC adapter with power cord User s Manual Soft carry pouch Once you have checked and confirmed that your notebook system is complete read through the following pages to learn about your notebook ...

Страница 50: ...s as follows Green flashing Wireless networking activity in progress Green not flashing Wireless networking switched on but no current activity Off Wireless networking switched off The Num Lock LED is lit when the internal keyboard is in numeric keypad overlay mode The Caps Lock LED is lit when the keyboard is in Caps Lock mode set to type in all capital let ters The Hard Disk Drive LED is lit whe...

Страница 51: ... flash compatible devices such as digital cameras MP3 players mo bile phones and PDAs 7 Power Status LEDs The Battery LED shows the battery status as follows Green Battery full Orange Battery charging Red flashing quickly Battery bad Red flashing slowly Battery low Off Battery discharged The Power LED shows the power mode as fol lows Orange Power off adapter connected Blue Power on Blue flashing s...

Страница 52: ...Port The power adapter port allows you to plug in the AC adapter to power your notebook and charge the battery pack 3 External Monitor The external monitor port allows you to connect an external monitor 4 Microphone Jack The microphone jack allows you to connect an ex ternal mono microphone 5 Headphone Jack The headphone jack allows you to connect head phones external speakers or an amplifier ...

Страница 53: ...allows data exchange rates as high as 480 Mb s 2 LAN RJ 45 Port The LAN port accepts a standard RJ 45 plug to connect to a network router or ADSL modem 3 Modem RJ 11 Port The modem RJ 11 port is used to connect the in ternal 56k modem with a telephone line 4 Power On Off Button This button turns your notebook on and off See Switching the Power On on page 12 ...

Страница 54: ...stored over a long period of time or for swapping a discharged battery with a charged battery 2 Battery Pack Release Latch Slide this latch to remove the battery pack 3 Fan Outlet and Ventilation Slots These are open ports to dissipate heat from the computer s internal components Do not place the computer in such a position that you allow them to become blocked ...

Страница 55: ...e into the DC power jack of your notebook PC 111 Plug the AC adapter into an AC electrical outlet 222 To switch from AC adapter power to DC battery power Make sure you have at least one charged battery installed 111 Unplug the AC adapter Your notebook will automatically to battery power 222 Charging the battery The lithium battery is recharged internally using the AC adapter To recharge the batter...

Страница 56: ...rm a power on self test POST to check the internal hardware and configuration If a fault is found your computer makes a warning sound or displays an error message Depending on the nature of the problem you may be able to continue by starting the operating system or by en tering the BIOS setup utility and revising the settings After satisfactory completion of the POST your notebook loads the instal...

Страница 57: ...combination you step to the next setting FN F4 Increases the screen brightness FN F5 Decreases the screen brightness FN F6 Mutes the audio volume FN F7 Decreases the audio volume FN F8 Increases the audio volume FN F11 Switches the computer into Num Lock mode enabling the numeric key pad overlay FN F12 Switches the computer into Scroll Lock mode This is used in some appli cations FN INS This funct...

Страница 58: ...uttons The cursor control works the same way a mouse does and moves the cursor around the display It only requires light pressure from the tip of your finger The left and right buttons function as mouse buttons The actual functionality of the buttons may vary depending on the application that is being used The scroll buttons allow you to navigate quickly through pages without having to use the on ...

Страница 59: ... the cursor To drag move the cursor to the item you wish to move Press and hold the left button while moving the item to its new location and then release it You can also drag using the Touch Pad alone First tap the Touch Pad twice over the item you wish to move making sure to leave your finger on the pad after the second tap Next move the object to its new location by moving your finger across th...

Страница 60: ...he Problem If you encounter a problem go through the following procedure before pursuing complex troubleshooting Turn off your notebook 111 Make sure the AC adapter is plugged into your notebook and to an active AC 222 power source Make sure that any devices connected to the external connectors are plugged in 333 properly You can also disconnect such devices thus eliminating them as pos sible caus...

Страница 61: ...eceiver is connected Consult the dealer or an experienced radio TV technician for help 2 You are cautioned that changes or modifications not expressly approved by the party responsible for compliance could void your authority to operate the equipment 3 This device complies with Part 15 of the FCC Rules Operation is subject to the following two conditions 1 this device may not cause harmful interfe...

Страница 62: ...he following Eu ropean standards EN 300 328 V 1 7 1 2006 EN 301 489 1 V 1 6 1 2005 EN 301 489 17 V 1 2 1 2006 EN 50385 2002 EN 60950 1 2001 EN 55022 2006 Class B EN 61000 3 2 2000 A2 2005 EN 61000 3 3 1995 A1 2001 A2 2005 EN 55024 1998 A1 2001 A2 2003 Regulatory statement R TTE European standards dictate maximum radiated transmit power of 100mW EIRP and frequency range 2 400 2 4835GHz In France th...

Страница 63: ...J 11 connector for modem RJ 45 connector for Ethernet 2 USB ports VGA out Audio Internal stereo speakers Internal mono microphone Card Reader 3 in 1 SD MMC MS System Status LEDs Power dual color Battery status dual color Wifi on off Caps lock Num lock Power Management ACPI 2 0 Mechanical Off Soft Off Working Sleeping Battery Pack Life Li Ion 4 cells 2400mAH cell Li Ion 6 cells 2400mAh cell LiFePO4...

Страница 64: ...Volume Down Fn F8 Volume Up Fn F11 Num Lock Fn F12 Scroll Lock Fn INS Print Screen Fn DEL System Request Fn UP ARROW Page Up Fn DOWN ARROW Page Down Fn LEFT ARROW Home Fn RIGHT ARROW End Pointing Device Built in Touch Pad with 2 way scroll function 2 click buttons Dimensions Weight 243 10mm W 171 9mm D 28 53 mm 42 47mm H de pending on model 1020 1196g depending on model Operating Temperature 0 C 3...

Страница 65: ...21 BENUTZERHANDBUCH DEUTSCH ...

Страница 66: ... des Akkus 11 Anschließen des AC Adapters 11 Aufladen des Akkus 12 Einschalten des Notebooks 12 Verwenden der Tastatur 13 Funktionstasten 13 Eingebettetes Zifferntastenfeld 14 Verwenden des Touch Pads 14 Fehlerbehebung 16 Herausfinden des Problems 16 Hinweise zu rechtlichen Vorschriften 17 Einhaltung der FCC Richtlinien 17 CE Informationen 18 Richtlinie für Funkanlagen und Telekommunikationsendger...

Страница 67: ......

Страница 68: ...otebook NICHT auf unebene oder wacklige Unterlagen Verwenden Sie das Notebook NICHT bei extremen Umgebungsbedingungen Stellen oder legen Sie KEINE Gegenstände auf das Notebook und lassen Sie nichts darauf fallen Üben Sie KEINE Gewalt auf das Gerät aus Setzen Sie das Notebook KEINEN Mag netfeldern aus Setzen Sie das Notebook KEINEM direkten Sonnenlicht aus Setzen Sie das Notebook NICHT extremen Tem...

Страница 69: ... und anderen Wärmequellen auf Versuchen Sie NICHT den Akku zu manipu lieren Halten Sie ihn außerhalb der Reich weite von Kindern Setzen Sie das Notebook NICHT Staub und oder korrosiven Chemikalien aus Schlagen Sie das Notebook NICHT zu und heben Sie es nicht am Bildschirm hoch Sprühen Sie KEIN Wasser oder andere Reini gungsflüssigkeiten direkt auf den Bildschirm Wenn Sie das Notebook auf Reisen mi...

Страница 70: ...k erhalten stellen Sie sicher dass die unten aufgeführten Tei le enthalten sind Notebook Akku AC Adapter mit Netzkabel Benutzerhandbuch Tragetasche Wenn Sie den Packungsinhalt geprüft haben lesen Sie sich die folgenden Seiten durch um etwas über das Notebook zu erfahren ...

Страница 71: ...snetzwerkstatus wie folgt an LEDblinkt grün Drahtlosnetzwerkaktivität LED leuchtet grün Drahtlosnetzwerk eingeschaltet aber ohne Aktivität Aus Drahtlosnetzwerk ausgeschaltet Die Num Lock LED leuchtet wenn das in die Tastatur integrierte Zahlenfeld aktiviert ist Die Caps Lock LED leuchtet wenn die Feststelltaste aktiviert ist wenn alle Buchstaben in Großbuchstaben geschrieben werden soll Die Festpl...

Страница 72: ...m patiblen Geräten wie Digitalkameras MP3 Playern Mobiltelefonen oder PDAs auszutau schen 7 Stromanzeige LEDs Die Akku LED zeigt den Ladestand des Akkus folgendermaßen an Grün Akku voll Orange Akku wird geladen Blinkt schnell rot Akku ist fast leer Blinkt langsam rot Akkuladestand niedrig Aus Akku ist leer Die Stromanzeige LED zeigt den Strommodus wie folgt an Orange Strom aus Netzadapter angeschl...

Страница 73: ...pteranschluss Am Netzadapteranschluss wird der AC Adapter angeschlossen um das Notebook mit Strom zu versorgen und den Akku aufzuladen 3 Anschluss für externen Monitor An diesen Anschluss kann ein externer Monitor angeschlossen werden 4 Mikrofonanschluss An diesen Anschluss kann ein externes Mono Mikrofon angeschlossen werden 5 Kopfhöreranschluss An diesen Anschluss können Kopfhörer externe Lautsp...

Страница 74: ...gsrate von bis zu 480 Mb s möglich ist 2 LAN Anschluss RJ 45 An den LAN Anschluss kann ein Netzwerkkabel RouteroderADSL ModemmitRJ 45 Standardstecker angeschlossen werden 3 Modemanschluss RJ 11 Über den Modemanschluss RJ 11 kann das interne 56k Modem mit einer Telefonleitung verbunden werden 4 Ein Aus Taste Mit dieser Taste wird das Notebook ein und ausgeschaltet Siehe Einschalten des Notebooks au...

Страница 75: ...ei langer unbenutzter Lagerung zu entnehmen oder um den Akku zu wechseln 2 Akkufach riegel Schieben Sie den Riegel zur Seite um das Akkufach zu öffnen 3 Lüfter und Belüftungsöffnungen Durch diese Öffnungen gelangt die Wärme aus dem Inneren des Notebooks nach draußen Stellen Sie das Notebook immer so auf dass diese Öff nungen nicht verdeckt werden ...

Страница 76: ...kku vorsichtig so weit in das Akkufach bis es einrastet 333 Anschließen des AC Adapters Verwenden Sie nur den mitgelieferten Netzadapter da dieser über eine ganz bestimmte Ausgabenennwerte verfügt Anderenfalls kann das Notebook be schädigt werden So schließen Sie den AC Adapter an Schließen Sie das DC Ausgangskabel an den DC Anschluss des Notebooks an 111 Schließen Sie den AC Adapter an eine Netzs...

Страница 77: ...dapter angeschlossen bzw der Lithium Akku aufgeladen ist kön nen Sie das Notebook einschalten indem Sie auf die Ein Aus Taste drücken die sich über der Tastatur befindet Um das Gerät auszuschalten müssen Sie vier Se kunden lang auf die Taste drücken Beim Einschalten des Notebooks wird zunächst ein Einschalt Selbsttest POST aus geführt bei dem die interne Hardware und die Konfigurationen geprüft we...

Страница 78: ...irmhelligkeit FN F5 Verringert die Bildschirmhelligkeit FN F6 Schaltet den Ton aus FN F7 Verringert die Lautstärke FN F8 Erhöht die Lautstärke FN F11 Schaltet das Notebook in den Num Lock Modus bei dem das in die Ta statur integrierte Zahlenfeld aktiviert wird FN F12 Dieser wird für einige Anwendungen benötigt FN EINFG Diese Tastenkombination funktioniert wie eine Print Screen Taste PRT SCN Sie ko...

Страница 79: ...esteht aus einer Cursorsteuerung einer linken und einer rechten Taste und zwei Scroll Tasten Die Cursorsteuerung funktioniert wie eine Maus Mit ihr kann der Cursor auf dem Monitor verschoben werden Dazu ist nur eine leichte Berührung mit Ihrer nötig Die linke und rechte Taste funktionieren wie die Maustasten Die tatsächlichen Funktionen hängen vom jeweils verwendeten Programm ab Mit den Scroll Tas...

Страница 80: ...e drückt Ziehen Sie dann den Cursor an die gewünschte Stelle des Bildschirms Halten Sie die Taste beim Verschieben so lange gedrückt bis sich der Cursor an der ge wünschten Stelle befindet Sie können den Cursor auch mit dem Touch Pad selbst verschieben Schieben Sie den Zeiger zunächst über das gewünschte Objekt Tippen Sie dann zweimal das Touch Pad wobei Sie nach dem zweiten Mal Tippen den Finger ...

Страница 81: ...lten Sie zunächst die folgenden Schritte aus führen bevor Sie eine komplexe Fehlerbehebung ausführen Schalten Sie Ihr Notebook aus 111 Stellen Sie sicher dass der AC Adapter an das Notebook und an eine funktio 222 nierende Netzsteckdose angeschlossen ist Stellen Sie sicher dass alle Peripheriegeräte richtig angeschlossen sind Um so 333 viele Fehlerursachen wie möglich auszuschließen können Sie die...

Страница 82: ...er folgenden Maßnahmen zu beheben Richten Sie die Empfangsantenne neu aus oder stellen Sie sie an einen ande ren Ort Vergrößern Sie den Abstand zwischen Gerät und Empfänger Schließen Sie das Gerät und den Empfänger an zwei unterschiedliche Strom kreise an Wenden Sie sich an einen erfahrenen Radio Fernsehtechniker 2 Alle Änderungen und Modifikationen am Gerät die nicht ausdrücklich von der für die ...

Страница 83: ...romagnetischen Verträg lichkeit 2004 108 EC der Niederspannungsrichtlinie 2006 95 EC der Ände rungsrichtlinie 93 68 EEC und der in den Europaratsdirektive 1999 5 EC und 2004 108 EC vorgegebenen Schritte eingehalten werden Das Gerät hat den Test bestanden Der Test wurde entsprechend den folgenden eu ropäischen Standards durchgeführt EN 300 328 V 1 7 1 2006 EN 301 489 1 V 1 6 1 2005 EN 301 489 17 V ...

Страница 84: ...5 Anschluss für Ethernet 2 USB Anschlüsse VGA Ausgang Audio Interne Stereolautsprecher Internes Monomikrofon Kartenleser 3 in 1 SD MMC MS Systemstatusanzei ge LEDs Strom zweifarbig Akkustatus zweifarbig Wifi ein aus Caps Lock Feststellfunktion Num Lock Zahlenfeststellfunktion Strom management ACPI 2 0 Mechanisch Aus Soft Aus Arbeit Schlaf Akkupack und Akkubetriebsdauer Li Ionen 4 Zellen 2400 mAH Z...

Страница 85: ...n Fn F8 Lautstärke erhöhen Fn F11 Num Lock Fn F12 Scroll Lock Fn INS Print Screen Fn DEL System Request Fn Pfeil nach oben Seite nach oben Fn Pfeil nach unten Seite nach unten Fn Pfeil nach links Pos 1 Fn Pfeil nach rechts Ende Zeigegerät Integriertes Touch Pad mit Scrollfunktion in 2 Richtungen 2 Klicktasten Abmessungen Gewicht 243 10 mm B 171 9 mm T 28 53 mm 42 47 mm H abhängig vom Modell 1020 1...

Страница 86: ...1 MANUALE DELL UTENTE ITALIANO ...

Страница 87: ...ne 11 Installazione della batteria 11 Collegamento dell alimentatore 11 Caricamento della batteria 12 Accensione del notebook 12 Utilizzo della tastiera 13 Tasti funzione 13 Tastierino numerico 14 Uso del Touch Pad 14 Risoluzione dei problemi 16 Identificazione del problema 16 Informazioni sulle normative 17 Informativa FCC 17 Informativa CE 18 Dichiarazione sulle normative applicabili R TTE 18 Ca...

Страница 88: ......
Страница 89: ...loccati NON premere sul o toccare il pannello del display NON posare sulle superficie irregolari o instabili NON usare il notebook computer in condizioni rigide NON posare o lasciar cadere oggetti sul computer e NON applicarne una grande pressione NON esporre il computer ai campi mag netici NON esporre alla luce diretta del sole NON usare o conservare in temperature estremi ...

Страница 90: ...oco o altri fonti di calore NON manomettere la batteria Tenerla fuori dalla portata dei bambini NON esporre alla polvere e o ai prodotti chimici corrosivi NON chiudere bruscamente il display e non sollevarlo mai per il display NON spruzzare direttamente dell acqua o altri liquidi sul display Se si va in giro con il computer portarlo sempre come bagaglio a mano Non las ciarlo prendere in consegna c...

Страница 91: ...enti elencati di seguito Notebook Batteria Alimentatore con cavo di alimentazione Manuale dell utente Borsa morbida da trasporto Dopo aver controllato e confermato la presenza di tutti gli elementi che compongono il sistema leggere attentamente le pagine seguenti per conoscere tutte le informazioni relative al notebook ...

Страница 92: ...ss in base alle configurazioni seguenti Verde lampeggiante Attività di rete wireless in corso Verde fisso Rete wireless attivata ma correntemente non attiva Spento Rete wireless disattivata Il LEDBloc Num è acceso quando la tastiera interna è in modalità utilizzo tastierino numerico Il LEDBloc Maiusc è acceso quando la tastiera è in modalità Maiuscole vengono digitate tutte lettere maiuscole Il LE...

Страница 93: ...me ad esempio fotocamere digitali lettori MP3 cellulari e palmari 7 LEDdi stato dell alimentazione Il LEDBatteria mostra lo stato della batteria nelle configurazioni seguenti Verde Batteria piena Arancione Batteria in carica Rosso lampeggiamento veloce Batteria con problemi Rosso lampeggiamento lento Batteria quasi scarica Spento Batteria scarica Il LED Alimentazione indica la modalità di alimenta...

Страница 94: ...dell alimentatore La porta per l alimentatore consente di collegare l alimentatore al notebook e di caricare la batteria 3 Monitor esterno La porta per il monitor esterno consente di collegare un monitor esterno 4 Jack del microfono Il jack del microfono consente di collegare un microfono mono esterno 5 Jack delle cuffie Il jack delle cuffie consente di collegare le cuffie altoparlanti esterni o u...

Страница 95: ...o alla velocità di 480 Mb s 2 Porta LAN RJ 45 La porta LAN accetta un connettore RJ 45 standard per il collegamento a una rete router o modem ADSL 3 Porta del modem RJ 11 La porta del modem RJ 11 consente di collegare il modem interno da 56k a una linea telefonica 4 Pulsante di accensione spegnimento Questo pulsante accende spegne il notebook Vedere Accensione del notebook a pagina 12 ...

Страница 96: ...eriodo di tempo prolungato oppure quando occorre scambiare una batteria scarica con una carica 2 Pacco batteria Fermo di rilascio Spostare questo fermo per rimuovere la batteria 3 Uscita dell aria calda e feritoie per la ventilazione Si tratta di aperture per il passaggio dell aria necessario alla dissipazione del calore dei componenti interno del computer Non posizionare il computer in una posizi...

Страница 97: ...non ne 333 segnala la corretta installazione in posizione Collegamento dell alimentatore Per evitare danni al computer utilizzare solo l alimentatore fornito a corredo dato che ogni alimentatore ha valori nominali di potenza in uscita diversi Per collegare l alimentatore Collegare il cavo dell alimentatore all apposita presa del notebook 111 Collegare l altra estremità dell alimentatore alla presa...

Страница 98: ...gato l alimentatore o ricaricato la batteria al Litio interna accendere il notebook premendo il pulsante di Accensione Spegnimento situato sopra la tastiera Per spegnere il notebook tenere premuto lo stesso pulsante per quattro secondi Quando si accende il notebook questo esegue un test di autodiagnosi iniziale POST power on self test per controllare l hardware interno e la configurazione Se viene...

Страница 99: ...ll impostazione successiva FN F4 aumenta la luminosità dello schermo FN F5 riduce la luminosità dello schermo FN F6 disattiva l audio FN F7 riduce il volume dell audio FN F8 aumenta il volume dell audio FN F11 passa il computer in modalità Bloc Num abilitando il tastierino numerico della tastiera FN F12 passa il computer in modalità Bloc Scorr Questa funzione è utilizzata in alcune applicazioni FN...

Страница 100: ...scorrimento Il controllo del cursore funziona allo stesso modo di quello del mouse per muovere il cursore sullo schermo È richiesta solo una leggerissima pressione del dito I pulsanti sinistro e destro funzionano come i tasti del mouse Le funzionalità effettive dei pulsanti possono variare a seconda dell applicazione in uso I pulsanti di scorrimento consentono di navigare velocemente tra le pagine...

Страница 101: ...Muovere il cursore sull elemento da trascinare Tenere premuto il tasto sinistro e spostare l elemento nella posizione desiderata e quindi rilasciare il tasto Per trascinare è possibile utilizzare anche il solo Touch Pad Per prima cosa toccare due volte il Touch Pad in corrispondenza dell elemento da trascinare facendo attenzione a lasciare il dito premuto al secondo tocco Trascinare quindi l ogget...

Страница 102: ... richiedono assistenza Identificazione del problema In caso di problemi attenersi alla procedura seguente prima di continuare con operazioni più complesse Spegnere il notebook 111 Verificare che l alimentatore sia collegato al notebook e a una presa di corrente 222 funzionante Verificare che tutti i dispositivi collegati ai connettori esterni siano collegati 333 correttamente È anche possibile sco...

Страница 103: ...endo l apparecchiatura si prega di correggere il problema applicando uno o più dei seguenti rimedi Orientare o posizionare nuovamente l antenna ricevente Aumentare la distanza tra apparecchiatura e ricevitore Collegare l apparecchiatura ad una presa appartenente ad un circuito diverso da quello a cui è collegato il ricevitore Consultare il rivenditore o un tecnico radio tv per assistenza 2 L utent...

Страница 104: ...lle direttive su Compatibilità elettromagnetica 2004 108 EC Bassa tensione 2006 95 EC e direttiva di emendamento 93 68 EEC procedure stabilite dal Consiglio Europeo 1999 5 EC e 2004 108 EC L apparecchio ha passato i test Il test è stato eseguito in conformità con gli standard Europei seguenti EN 300 328 V 1 7 1 2006 EN 301 489 1 V 1 6 1 2005 EN 301 489 17 V 1 2 1 2006 EN 50385 2002 EN 60950 1 2001...

Страница 105: ...92 LAN e WLAN Ethernet incorporata Porte I O d interfaccia Uscita linea Ingresso microfono Ingresso corrente c c Connettore RJ 11 per il modemù Connettore RJ 45 per Ethernet 2 porte USB Uscita VGA Audio Altoparlanti stereo interni Microfono mono interno Lettore di schede 3 in 1 SD MMC MS LED di stato del sistema Alimentazione due colori Stato batteria due colori Wifi attivato disattivato Bloc Maiu...

Страница 106: ... disattiva wireless Fn F3 selettore schermo LCD CRT LCD CRT Fn F4 luminosità Fn F5 luminosità Fn F6 disattiva audio Fn F7 volume Fn F8 volume Fn F11 Bloc Num Fn F12 Bloc Scorr Fn INS Stampa Fn DEL R Sist Fn Freccia Su Pag su Fn Freccia Giù Pag giù Fn Freccia sinistra Home Fn Freccia destra Fine Dispositivo di puntamento Touch Pad incorporato con funzione di scorrimento a 2 vie 2 tasti clic Dimensi...

Отзывы: