background image

Weekly Cleaning & Care

CAUTION: Before cleaning always turn power off and unplug the unit from outlet.
DO NOT use any solvents or aggressive cleaning agents.
Keep water away from the Air Outlet. DO NOT tamper with the Water Sensor.
Change water bottle regularly.

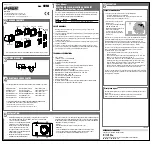
1.  Emptying the Water Reservoir
 

Remove the water bottle and Top Cover from the unit.  Pour the water in the water reservoir  


away from the Air Outlet as shown.  This may prevent water from pouring into the Air Outlet  


which can cause the unit to malfunction.

2.  Main Body Cleaning
 

Gently wipe with a soft damp cloth, do not immerse in water.  Never scrape the Ultrasonic  


Nebulizer with a hard or sharp object.

3.  White Dust Cleaning
 

If mineral deposits “White Dust” are evident around the Ultrasonic Nebulizer and Water  


Sensor, clean their surfaces with a soft, cloth and a small amount of undiluted white vinegar.  


If necessary, mix a solution of 50% white vinegar and 50% water and fill the Base with  


enough solution to cover the Ultrasonic Nebulizer. Allow it to soak for an hour and then use  


a cotton swab to gently loosen buildup on the Ultrasonic Nebulizer. Rinse out the unit with  


clean water and wipe clean with a soft cloth.

4.  Bottle Adaptor Cleaning
 

Remove the water bottle adaptor from the bottle and rinse thoroughly with tap water, then  


replace on bottle

6

1

2

3

4

Содержание GH-2193

Страница 1: ...COMPACT PERSONAL ULTRASONIC HUMIDIFIER Instruction Manual and Warranty Information READ AND SAVE THESE INSTRUCTIONS IM0006A...

Страница 2: ...ns 1 No More Dry Air Assembly Instructions Specifications 2 Parts Contents 3 Attaching Water Bottle 4 Operating Instructions Storage About White Dust 5 Weekly Cleaning Care 6 Troubleshooting 7 Other G...

Страница 3: ...e after a malfunction after it has been dropped or damaged in any other way Only operate when fully assembled Keep out of reach of children Close supervision is necessary when this appliance is used b...

Страница 4: ...ry air Assembly Instructions 1 Carefully remove the humidifier and all its contents from the box 2 Slide out the two bottom supports 3 Remove the top cover and the Mist Nozzle from Main Body 4 Insert...

Страница 5: ...ltrasonic Humidifier Parts Contents 1 Ultrasonic Nebulizer 2 Water Sensor 3 Travel Bag 4 Power Adapter 5 Top Cover 6 Bottom Support 7 Power Button Mist Output 8 Bottle Adaptor 9 Mist Nozzle 2 5 6 7 8...

Страница 6: ...ce bottle on a flat surface 3 Hold the bottle by the neck and start inserting the bottle adaptor at an angle 4 Once the first threads are inside the bottle press the adaptor straight down until it tou...

Страница 7: ...seconds this is normal Storage 1 Follow all cleaning instructions prior to storage 2 Dry all parts Never leave water inside the unit for several days 3 To prolong the life of the bottle adapter do not...

Страница 8: ...mp cloth do not immerse in water Never scrape the Ultrasonic Nebulizer with a hard or sharp object 3 White Dust Cleaning If mineral deposits White Dust are evident around the Ultrasonic Nebulizer and...

Страница 9: ...utput to High and wait for 10 15 minutes f Use only DC24V power adapter included g See Warranty PROBLEM Peculiar Odor POSSIBLE CAUSES a If new unit b Dirty water bottle or old water in unit c Old bott...

Страница 10: ...Try These Other Great Products For Your Life Available at www qvc com www forlifeproducts com Clean Restore Protect For All Hard Floors Wood Cabinets Furniture Coco Doormats...

Страница 11: ...iramar FL 33027 USA Please fill out the warranty card and mail back to the above address Or register your warranty online today Simply go to http www greatinnovations tv warranty php THIS UNIT COMES W...

Страница 12: ...COMPACT PERSONAL ULTRASONIC HUMIDIFIER...

Отзывы: