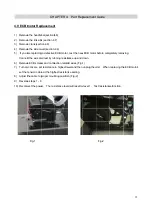
4.9 ECB m
1) Remove
2) Remove
3) Remove
4) Remove
5) .If you a
Connec
6) Remove
7) Turn on
set the
8) Adjust t
9) Reverse
10) Reconn
.
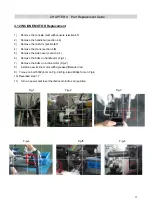
motor Rep
e the handle
e the link arm
e crank(sect
e the side co
are replacing
ct the wire an
e ECB screw
n console, se
tension cabl
the cable to p
e steps 1 - 6
nect the powe
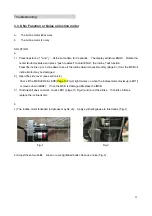
Fig-1
CHA
placement
bar(section4
m (section 4.
ion4.8)
over(section.4
g a defective
nd test by run
ws and conne
t resistance t
e at the high
proper moun
er. The res
APTER 4:
t
4.6)
7)
4.4)
ECB motor,
nning resista
ection related
to highest lev
hest resistanc
nting position
istance level
Part Rep
test the new
ance up and
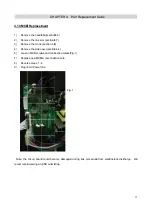
d wires.(Fig-
vel and then
ce setting.
n. (Fig-2)
l will reset to
placement
w ECB motor
down.
1)
unplug the u
o level 1. Te
Guide
before comp
unit. When
est resistance
Fig-2
pletely remov
replacing the
e function.
32
ving:
e ECB motor
2
r,
Содержание Pro 7.2AI
Страница 2: ...Pro oduct B Browse e 2 2...
Страница 5: ...1 1 Serial l Number CH Location HAPTER 1 Serial Number Loca ation 5 5...
Страница 8: ...2 2 Engin neering mo ode instruc CHAPTER ction R 2 Console Instru uction 8 8...
Страница 9: ...CHAPTER R 2 Console Instru uction 9 9...
Страница 10: ...3 1 ELEC 7 2AI SCH CTRICAL D HEMATIC DIAGRAM MCB EC CHAPTER CB R 3 Troubleshooting 10 0...
Страница 11: ...Console c connection n layout CHAPTER R 3 Troubleshooting 11...

