1
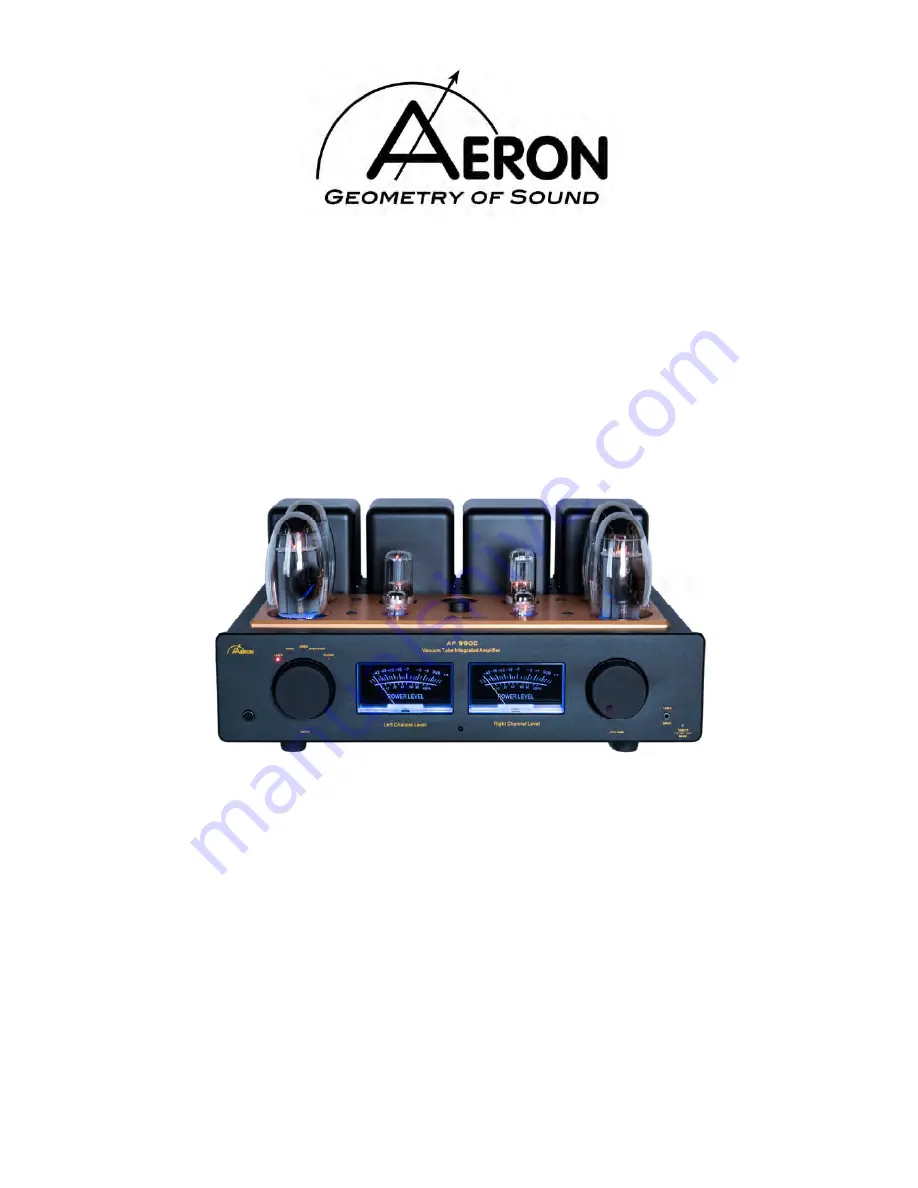
AP990C
VACUUM TUBE INTEGRATED AMPLIFIER
Manual Rev 1.
4
.
201
7
USER MANUAL
Страница 1: ...1 AP990C VACUUM TUBE INTEGRATED AMPLIFIER Manual Rev 1 4 2017 USER MANUAL...
Страница 2: ...nection 9 Operation Power up Procedure 10 Direct Power Amp Mode Procedure 11 General Notes about Usage 11 Front Panel Control Function 12 Remote Control Function 12 Maintenance Test for Quiescent Curr...
Страница 3: ...designed to provide you many years of playback Before use we encourage you to please read this manual thoroughly to properly acquaint yourself with its features We hope you enjoy listen ing to Aeron...
Страница 4: ...or Rear Panel 1 mm Phono input 2 Line input Line 1 Line 2 3 Balanced input Left Right 4 4ohms ve Speaker Output Right 5 ve Speaker Output Right 6 8ohms ve Speaker Output Right 7 AC Mains Voltage Selec...
Страница 5: ...hen cleaning any component To completely disconnect this apparatus from the AC mains disconnect the power supply cord plug from the AC receptacle 2 NEVER use flammable or combustible chemicals for cle...
Страница 6: ...to the following instructions Carefully remove each vacuum tube from its protective foam and match its lo cation V number written on the base of the tube to the V number printed next to each socket Fi...
Страница 7: ...arpet If the unit is to be operated in an enclosed equipment cabinet an exhaust fan is desirable so as not to operate the AP990C in overheated ambient air The ambient operating temperature should neve...
Страница 8: ...cally for best overall sonic results It is important sonically that your entire system be connected so that the audio signal arriving at the speakers has correct or absolute polarity i e non inverted...
Страница 9: ...g system that generally does not re quire a ground lifter adapter plug on the AC power cord to minimize hum The power cord supplied with the AP990C has a standard three prong grounding plug to provide...
Страница 10: ...operation Power On 1 Adjust volume control to minimum setting 2 Press the Power button to turn unit ON 3 Choose the Audio Source the source LED indicator is sparkling wait 30secs to 1mins till the LE...
Страница 11: ...off the AP990C wait at least five minutes before turning it on again This brief cool down period will reduce stress on the output tubes and potential damage to them Aeron does not recommend leaving yo...
Страница 12: ...ion of any of three single ended input sources 1 2 3 Switch the input selector button through each input as indicated on the panel POWER Toggles power on and off from AC wall outlet to AP990C Remote C...
Страница 13: ...g 1 If V1 quiescent current is out of work required please set the volume to minimum first 2 Switch set to V1 use a flathead screwdriver adjust to potentiometer V1 BIS ADJ please note the value of the...
Страница 14: ...op cover surfaces with a soft damp not wet cloth to remove dust A mild non alkaline soap solution may be used to remove fingerprints or similar smudges Cleaners containing abrasives should not be used...
Страница 15: ...eron products sold by them The specific terms and remedies for fulfillment of the Limited Warranty may vary from country to country Warranty service should normally be obtained from the importing reta...
Страница 16: ...pplicable amendments Power Output 50Wx2 KT 88 Frequency Response 20Hz 50kHz 5W Distortion 0 1 10W S N Ratio LINE 86dB Input Sensitivity 300mV Input Impedance 80k ohms Balanced Impedance 95k ohms MM Im...