background image

171

PT

Quando uma chamada é bloqueada, o telefone não toca. Se o 
atendedor de chamadas estiver ligado, a chamada bloqueada será 
atendida pelo mesmo.

11.1 

Escolher o modo de bloqueio (Block Mode)

Para ativar a funcionalidade de bloqueio de chamada, tem de 
selecionar primeiro o modo de bloqueio. Pode escolher entre 
bloquear todas as chamadas, permitir apenas entradas da lista VIP ou 
apenas bloquear as entradas da lista negra.
• Prima

 M 

e

 . 

para exibir 

BLOQ. CHAM. (CALL BLOCKER)

.

• Prima

 M 

e

 . 

para exibir 

CONFIGURAÇÃO (SETTINGS)

.

• Prima

 M 

para exibir 

MODO BLOQ. (BLOCK MODE)

.

• Prima

 M 

e

 . 

para selecionar 

DESLIGADO (OFF)

BLOQ. 

TODAS (BLOCK ALL)

PERMITIR VIP (ALLOW VIP)

, ou 

BLOQ. 

LISTA (BLOCK BLIST)

.

• Prima

 M 

para confirmar.

• Se 

DESLIGADO (OFF)

 estiver selecionado, a configuração está 

concluída e todas as chamadas serão recebidas normalmente.

Se 

BLOQ. TODAS (BLOCK ALL)

PERMITIR VIP (ALLOW VIP)

 ou 

BLOQ. LISTA (BLOCK BLIST)

 estiverem selecionadas, aparecerá 

SEMPRE LIG. (ALWAYS ON)

.

• Prima

 M 

se pretender que o modo de bloqueio selecionado 

fique sempre ligado, ou prima

 . 

para exibir 

TEMPORIZADA 

(TIMED)

, e depois prima 

e defina a 

HORA LIG. (TIME ON)

 e 

HORA DESLIG. (TIME OFF)

 para o período para o qual pretende 

que o bloqueio fique ativo.

11.2 

Adicionar um número à lista negra

• Prima

 M 

e

 . 

para exibir 

BLOQ. CHAM. (CALL BLOCKER)

.

• Prima

 M 

para exibir 

LISTA NEGRA (BLACK LIST)

.

• Prima

 M 

twice to show

 ADD

.

Содержание LloydCombo 15

Страница 1: ...QUICK USER GUIDE CORDLESS TELEPHONE Lloyd Combo15 V3 PT ES IT NL FR DE UK ...

Страница 2: ...2 P1 P2 P3 P4 P5 8 7 4 6 2 10 9 1 2 3 4 7 11 12 5 6 8 9 10 6 5 13 14 15 16 17 1 5 11 3 ...

Страница 3: ...hen using your telephone equipment to reduce risk of fire electric shock and injury Read and understand all the instructions Follow all warnings and instructions marked on the product Unplug this product from the wall outlet before cleaning Do not use liquid cleaners or aerosol cleaners Use a damp cloth for cleaning Keep this product away from hot humid conditions or strong sunlight and don t let ...

Страница 4: ...y may cause interference and or damage to the unit or surroundings The manufacturer will not be held liable for damage arising from such non compliance Do not use third party charging pods Damage may be caused to the batteries Please ensure that the batteries are inserted in the correct polarity Dispose of batteries safely Do not burn immerse them in water disassemble or puncture the batteries 3 I...

Страница 5: ...atteries Place the back cover over the back of the handset and press down until it clicks into place Place the handset on the base and charge for 15 hours before using the handset for the first time The handset will give a double beep when it is properly placed on the base and the battery charging indicator on the base lights up to indicate charging Note The handset may become warm when the batter...

Страница 6: ...igit or press and hold to delete all the characters digits During a call Press to mute unmute the microphone 3 In idle mode Press to access the call list In menus and lists Press to move up the options During a call Press to increase the volume During ringing Press to increase the handset ringer volume 4 In idle mode Press to access the redial list In menus and lists Press to move down the options...

Страница 7: ...e handset ringer key in predialling number editing mode Press and hold to insert a pause key in Call List mode Press to view more digits of the caller s number if applicable 8 F During a call press to send a Recall signal also called Flash for network services 9 Microphone 10 Speaker 11 Call blocker 6 2 Base Station Overview see P4 1 ALPHA NUMERIC KEYPAD During dialling or storing a number Press t...

Страница 8: ...l Press to access the intercom list or make an intercom call directly if only one handset is registered 11 In idle mode Press to find page all registered cordless handsets Press and hold to enter registration mode 12 In use LED Steadily ON During a call Flashing During ringing or new TAM message is received 13 Charge LED Steadily on while the handset is charging 14 ANS ON OFF Press to turn the ans...

Страница 9: ...rm is set Flashes when the alarm is sounding Indicates the keypad is locked Indicates the battery is fully charged Battery segments cycle during charging Indicates the battery needs charging Flashes when low battery power level is detected Note the handset backlight will not turn on when the battery is low Indicates a new TAM message is playing or a new call is being viewed in the calls list Indic...

Страница 10: ...to delete the entire text string 7 USE YOUR PHONE 7 1 Make a Call 7 1 1 Preparatory Dialing Enter the phone number maximum 24 digits If you make a mistake press to delete the last digit Press to dial the number 7 1 2 Direct Dialing Press to take the line Enter the phone number to dial 7 1 3 Call from the Phonebook Press M then to select PHONEBOOK Press M to show ALL CONTACTS Press M again to acces...

Страница 11: ... handset to answer a call If you wish to switch AUTO ANSWER Off see Set the Auto Answer The default setting is ON 7 3 Adjust Earpiece and Speakerphone Volume There are 5 levels VOLUME 1 to VOLUME 5 to choose from for each of earpiece and speakerphone volume During a call Press to select from VOLUME 1 to VOLUME 5 The current setting is shown When you end the call the setting will remain at the last...

Страница 12: ...handset or on the base station again to stop paging NOTE If there is an incoming call during paging the phone will ring with the incoming call instead of paging 7 8 Internal call from Base to Handset s From the Idle mode press the on the Base If there is only one handset registered to the base it will start ringing and can be answered by the handset to initiate the intercom call If there are two o...

Страница 13: ...ets registered to the base press 5 to start ringing the base or number 1 4 for another handset which can then answer it to initiate the intercom call The intercom is terminated when either party ends the call 7 11 Transfer a call from Handset s to base During a call on the handset press the M button to show INTERCOM and then press Magain The external call will be put on hold If there is no other h...

Страница 14: ...ok NOTE The first entry in the phonebook will be displayed If there is no entry stored in the phonebook it will show EMPTY Press M to select ADD Press M and enter the name Press M and enter the number Press M and to select the desired melody Press M to save 8 1 1 Entering Names Use the keypad letters to enter names e g to store Tom Press 8once to enter T Press 6three times to enter o Press 6once t...

Страница 15: ... DATE TIME Press M and to select SET TIME Press M then enter the time information according to 12 HR or 24 HR format The time will be in the format you set Press M then enter the year information The last two digits of the year will flash for year input Press M then enter the date information according to DD MM YY or MM DD YY format The date will be in the format you set Press M to confirm 9 2 Han...

Страница 16: ...in standby mode 10 CALLER DISPLAY NETWORK DEPENDENT 10 1 Call List This feature is available if you have subscribed to the Caller Line Identification service from your telephone company Your phone can store up to 50 received calls with date time information in the Call List The number will be shown on the LCD when the phone is ringing If the number matches with one of the entries in your Private P...

Страница 17: ... between the phonebook including the VIP list and the black list Calls can also be blocked by the following Call Types Withheld Unavailable International and Payphone See 11 5 When a call is blocked the telephone will not ring If the answering machine is turned on the blocked call will be answered by the answering machine 11 1 Choose the Block Mode To activate the number call blocker feature you m...

Страница 18: ...ull LIST FULL appears after selecting ADD and you will have to delete an entry from the phonebook or blacklist before you can store another blacklist entry 11 3 View a Black List Entry Press M and to show CALL BLOCKER Press M to show BLACK LIST Press M and to select the desired black list entry Press M and to show VIEW Press M to review the number and name of the selected Black List entry If the n...

Страница 19: ...ystem can store up to 59 messages within the maximum recording time of about 15 minutes As well as recording incoming messages you can record memos for other users of your phone If the answering machine memory is full the handset will display TAM FULL alternately with the handset name and you will have to delete messages before more new ones can be recorded When the TAM is full it will only play y...

Страница 20: ...show MSG PLAYBACK Press M to start playing any messages through its loudspeaker Note The display shows the time and date that the message was recorded and a symbol at the top of the screen if it is a new message For options during playback Press to increase or decrease the playback volume Press M and for the options STOP to stop the playback FORWARD to skip on to the next message PREVIOUS to repea...

Страница 21: ...GM for ANS REC mode or ANSWER ONLY mode When you record your own OGM it will be used when the answering machine answers the call If your personal OGM is deleted the pre set OGM will be restored automatically In idle mode press M and to show ANS MACHINE Press M and to show TAM SETTINGS Press M and to show OGM SETTINGS Press M and to select ANS REC or ANSWER ONLY Press M and to show RECORD MESS Pres...

Страница 22: ... INPUT 100 240VAC 50 60HZ 150MA OUTPUT 6VDC 450MA TENPAO S003IB0600045 S003IV0600045 INPUT 100 240VAC 50 60HZ 150MA OUTPUT 6VDC 450MA RJ AS060450B001 RJ AS060450E002 INPUT 100 240VAC 50 60HZ 150MA OUTPUT 6VDC 450MA BATTERY INFORMATION TYPE NI MH RECHARGEABLE BATTERY 400MAH 2 X 1 2V AAA 14 CLEANING AND CARE Do not clean any part of your unit with benzene thinners or other solvent chemicals as this ...

Страница 23: ...all parts of your device using the original package Return the unit to the shop where you bought it making sure you take your sales receipt Remember to include the mains adapter 15 2 After the Guarantee has expired If the unit is no longer under Guarantee contact us via www aegtelephones eu This product works with rechargeable batteries only If you put nonrechargeable batteries in the handset and ...

Страница 24: ...r box indicate this Some of the product materials can be re used if you bring them to a recycling point By reusing some parts or raw materials from used products you make an important contribution to the protection of the environment Please contact your local authorities in case you need more information on the collection points in your area Batteries must be removed before disposing of the device...

Страница 25: ...ucken Vielen Dank dass Sie uns beim Umweltschutz unterstützent 2 WICHTIGE SICHERHEITSANWEISUNGEN Bitte beachten und befolgen Sie diese Hinweise um die Gefahr eines Feuers elektrischen Schlags und Personenschäden so gering wie möglich zu halten Lesen und verstehen Sie alle Anweisungen Befolgen Sie alle auf dem Produkt angegebenen Warnhinweise und Anleitungen Ziehen Sie vor dem Reinigen den Gerätest...

Страница 26: ...eller empfohlene Ersatzakkus verwenden Beim Einsetzen falscher Akku oder Batterietypen besteht Explosionsgefahr Die Verwendung anderer Akkutypen oder nicht aufladbarer Einwegbatterien Primärzellen kann gefährlich sein Dies kann zu Funkstörungen und oder Schäden am Gerät oder in seiner Umgebung führen Der Hersteller lehnt jegliche Haftung für Schäden ab die aufgrund solcher Nichtbeachtungen verursa...

Страница 27: ...ischen Strom um normal zu funktionieren 4 2 Einsetzen und Aufladen der Akkus siehe P3 Legen Sie die zwei beiliegenden Akkus unter Beachtung der Polarität korrekt ein siehe Markierungen im Akkufach Warnung Bitte nur die im Lieferumfang enthaltenen Ni MH Akkus verwenden Richten Sie die Akkufachabdeckung auf der Rückseite des Akkufachs aus und lassen Sie die Abdeckung mit etwas Druck einrasten Legen ...

Страница 28: ...uszuwählen Drücken Sie M und um LANGUAGE SPRACHE auszuwählen Drücken Sie M und um die gewünschte Sprache auszuwählen Drücken Sie M zum Bestätigen 6 MACHEN SIE SICH MIT IHREM TELEFON VERTRAUT 6 1 Überblick Mobilteil siehe S P1 1 M Im Stand by Modus Zum Aufrufen des Hauptmenüs drücken Im Untermenü Modus Zum Bestätigen der Auswahl drücken Während eines Anrufs Zum Anwählen anderer interner Mobilteile ...

Страница 29: ...nd eines Anrufs Zum Deaktivieren Aktivieren des Mikrofons drücken 3 Im Stand by Modus Zum Aufrufen der Anrufliste drücken In Menüs und Listen Drücken um in der Liste nach oben zu blättern Während eines Anrufs Zum Erhöhen der Lautstärke drücken Während des Ruftons Zum Erhöhen der Ruftonlautstärke des Handapparates drücken 4 Im Stand by Modus Zum Aufrufen der Wahlwiederholungsliste drücken In Menüs ...

Страница 30: ... by Display zurückzukehren Im Stand by Modus Zum ein ausschalten des Mobilteils drücken und gedrückt halten 7 ALPHA NUME RISCHE TASTA TUR Zur Eingabe einer Zahl eines Zeichens drücken Taste im Stand by Modus Drücken und halten um die Tastensperre ein auszuschalten Taste im Stand by Modus Zum ein ausschalten des Ruftons des Mobilteils drücken und gedrückt halten Taste bei der Wahlvorbereitung beim ...

Страница 31: ...ärke drücken Beim Klingeln Zum Erhöhen der Ruftonlautstärke der kabelgebundenen Basis drücken 6 Bei einem Anruf Zum Verringern der Lautstärke drücken Beim Klingeln Zum Verringern der Ruftonlautstärke der kabelgebundenen Basis drücken 7 Im Ruhemodus Zum Zugreifen auf die Leitung im Lautsprechermodus drücken 8 Beim Wählen oder Speichern einer Nummer Zum Einfügen von drücken 9 Bei einem Anruf Zum Sen...

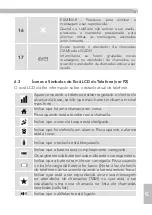
Страница 32: ...richt drücken Wenn das Telefon nicht verwendet wird drücken und gedrückt halten um alle vorher geprüften Nachrichten zu löschen 17 Eingeschaltet wenn der Anrufbeantworter AB eingeschaltet ist Blinkt wenn neue AB Nachrichten aufgenommen werden oder wenn der AB gerade verwendet wird 6 3 Mobilteil Symbole und Zeichen siehe P2 Das Display erteilt hilfreiche Informationen zum aktuellen Zustand des Tele...

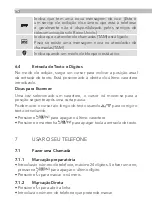
Страница 33: ...igt wenn Sie neue Textnachrichten haben Dieser CLIP Service zur Anruferanzeige ist im Allgemeinen nicht innerhalb von UK verfügbar Schaltet sich ein wenn der Anrufbeantworter AB eingeschaltet ON ist Blinkt wenn Sie eine neue Nachricht auf dem Anrufbeantworter haben Zeigt an wenn ein Blockmodus eingeschaltet ist 6 4 Telefontastaturzeichen Im Bearbeitungsmodus erscheint ein Cursor der die aktuelle P...

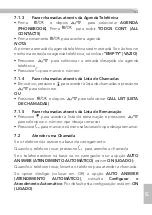
Страница 34: ...ummer ein 7 1 3 Anruf aus dem Telefonbuch Drücken Sie M dann umt TELEFONBUCH PHONEBOOK zu wählen Drücken Sie M um ALLE KONTA ALL CONTACTS anzuzeigen Drücken Sie erneut M um das Telefonbuch aufzurufen HINWEIS Der erste Telefonbucheintrag wird angezeigt Wenn kein Eintrag im Telefonbuch vorhanden ist wird EMPTY LEER angezeigt Wählen Sie mit den gewünschten Telefonbucheintrag Drücken Sie um die Nummer...

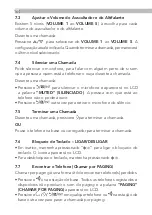
Страница 35: ...t drücken Sie nehmen Sie das Mobilteil von der Basisstation ab Zum Ausschalten von AUTO ANSWER siehen Auto Antwort einstellen Die werkseitige Einstellung ist ON EIN 7 3 Laustärkeregelung von Hörer und Lautsprecher Es können 5 Lautstärkestufen VOLUME 1 bis VOLUME 5 LAUTST 1 bis LAUTST 5 des Hörers und der Freisprecheinrichtung eingestellt werden Während eines Anrufs Drücken Sie um VOLUME 1 bis VOLU...

Страница 36: ...eder die Taste X gedrückt halten 7 7 Mobilteile suchen PAGING Diese Funktion is nützlich wenn Sie das Mobilteil verlegt haben Drücken Sie auf der Basisstation Alle an der Basis angemeldeten Mobilteile in Funktionsreichweite klingeln gleichzeitig und es erscheint PAGING auf dem Display Drücken Sie O auf einem der Mobilteile oder auf der Basisstation um die Suche zu beenden HINWEIS Wenn während des ...

Страница 37: ...t sind drücken Sie die Nummer 1 4 um das entsprechende Mobilteil anzurufen das dann zum Initiieren des Internanrufs verwendet werden kann Um den Internanruf zu beenden und zum externen Anruf zurückzukehren drücken Sie Um den externen Anruf an das Mobilteil weiterzuverbinden drücken Sie 7 10 Anruf von Mobilteilen zur Basisstation Drücken Sie im Ruhemodus die Taste am Mobilteil Wenn kein anderes Mob...

Страница 38: ...drücken Sie dann Merneut Um den externen Anruf an die Basisstation oder ein anderes Mobilteil weiterzuverbinden drücken Sie O 8 TELEFONBUCH Jedes Mobilteil kann bis zu 100 Telefonbucheinträge mit Namen und Rufnummern speichern Jeder Telefonbucheintrag kann maximal 24 Ziffern für die Rufnummer und 12 Buchstaben für den Namen erhalten Sie können auch verschiedene Ruftöne für Ihre Telefonbucheinträge...

Страница 39: ...ken Sie erneut M um das Telefonbuch aufzurufen Wählen Sie mit den gewünschten Telefonbucheintrag Drücken Sie Mund um LOESCHEN DELETE zu wählen Zum Bestätigen M drücken 8 3 Hinzufügen eines Telefonbucheintrags zur VIP Liste Drücken Sie M und um TELEFONBUCH PHONEBOOK zu wählen dann M um ALLE KONTAKTE ALL CONTACTS anzuzeigen Drücken Sie erneut M um das Telefonbuch aufzurufen Wählen Sie mit den gewüns...

Страница 40: ...LE KONTAKTE ALL CONTACTS anzuzeigen Wählen Sie mit den gewünschten VIP Telefonbucheintrag der mit einem gekennzeichnet ist Drücken Sie M und um VIP ENTF DEL FROM VIP zu wählen Drücken Sie M um den Eintrag aus der VIP Liste zu entfernen Der Eintrag bleibt im Telefonbuch aber das wird nicht mehr neben dem Namen angezeigt Wahlweise Im Stand by Modus M drücken und um TELEFONBUCH PHONEBOOK anzuzeigen D...

Страница 41: ...eszahl einzustellen Die letzten beiden Ziffern der Jahresangabe blinken Drücken Sie M und geben Sie das Datum anhand des Formats DD MM YY TT MM JJ MM DD YY MM TT JJ ein Das Datum wird in dem von Ihnen eingestellten Format angezeigt Zum Bestätigen M drücken 9 2 Mobilteileinstellungen 9 2 1 Weckereinstellungen Das Mobilteil kann als Wecker benutzt werden Wenn eine Weckzeit eingestellt ist erscheint ...

Страница 42: ...tätigungston und es wird automatisch die nächst verfügbare Mobilteilnummer zugewiesen Diese Mobilteilnummer wird im Stand by auf dem Mobilteildisplay angezeigt 10 ANRUFER ID ANZEIGE NETZWERKABHÄNGIG 10 1 Anrufliste Diese Funktion steht nur zur Verfügung wenn Sie den CLIP Service bei Ihrem Telefonanbieter abonniert und auf Ihrem Telefon aktiviert haben Ihr Telefon kann bis zu 50 eingehende Anrufe m...

Страница 43: ... Sie M Wählen Sie mit den gewünschten Eintrag 11 RUFSPERRE IWenn Sie die Anruferkennung abonniert haben können Sie die Rufsperrenfunktion benutzen um automatisch bestimmte Rufnummern abzulehnen indem Sie diese Nummern in die Blacklist aufnehmen siehe 11 2 Sie können auch alle Anrufe blockieren oder nur Anrufe von Nummern in der VIP Liste erlauben Jedes Mobilteil kann bis zu insgesamt 100 Einträge ...

Страница 44: ... Wenn ALLES BLOCK BLOCK ALL VIP ERLAUB ALLOW VIP oder BLIST BLOCK BLOCK BLIST gewählt sind wird IMMER EIN ALWAYS ON angezeigt Drücken Sie M wenn Sie den gewählten Blockmodus ständig aktiviert lassen wollen oder drücken Sie um ZEITZÄHL TIMED und dann M und rufen Sie die Optionen ZEIT EIN TIME ON und ZEIT AUS TIME OFF auf um den gewünschten Zeitraum einzustellen in dem Sie die Anrufe blockieren woll...

Страница 45: ...rücken Sie um die anderen Ziffern anzuzeigen 11 4 Alle Blacklist Einträge löschen Drücken Sie M und rufen Sie RUFSPERRE CALL BLOCKER auf Drücken Sie M um BLACKLIST BLACKLIST anzuzeigen Drücken Sie zweimal auf M und dann um LOESCHEN DELETE ALL anzuzeigen Drücken Sie M um BESTAE CONFIRM anzuzeigen Zum Bestätigen M drücken Alle Einträge werden gelöscht und auf dem Display erscheint LEER EMPTY 11 5 An...

Страница 46: ...e der Name des Handteils und Sie müssen ein paar Nachrichten löschen bevor Sie wieder neue aufnehmen können Wenn der AB voll ist wird nur Ihre Ansage abgespielt und der Anrufer hat keine Möglichkeit eine Nachricht zu hinterlassen 12 1 AB ein ausschalten Sie können mithilfe des Handteils den Anrufbeantworter ein oder ausschalten Wenn der Anrufbeantworter auf EIN ON steht dann schaltetsichdieAB Anze...

Страница 47: ... Sie M um alle Nachrichten über die Freisprecheinrichtung abzuspielen Anmerkung Das Display zeigt die Uhrzeit und das Datum an an dem die Nachricht aufgenommen wurde und ein Symbol am oberen Rand des Bildschirms wenn es sich um eine neue Nachricht handelt Für Optionen während der Wiedergabe Drücken Sie um die Wiedergabelautstärke zu erhöhen oder zu vermindern Drücken Sie M und für die Optionen STO...

Страница 48: ...ie M und um MIT AUFZ ANS REC oder OHNE AUFZ ANSWER ONLY zu wählen Drücken Sie M um die Einstellung zu bestätigen 12 3 2 Ansage aufnehmen OGM Sie können Ihre eigene Ansage im Modus ANS REC oder im Modus ANSWER ONLY NUR ANSAGE aufnehmen Wenn Sie Ihre eigene Ansage aufnehmen wird diese abgespielt sobald ein Anruf eingeht Wenn Ihre Ansage gelöscht wurde schaltet sich automatisch die voreingestellte An...

Страница 49: ...HZ KANALBANDBREITE 1 728 MHZ REICHWEITE BIS ZU 300 M IM FREIEN BIS ZU 50 M IM INNENBEREICH BETRIEBS LADEZEITEN STANDBY 100 STUNDEN GESPRÄCHZEIT 10 STUNDEN AKKULADEZEIT 15 STUNDEN UMGEBUNGSBE DINGUNGEN BETRIEB 0 C BIS 40 C LAGERUNG 20 C BIS 60 C STROMVERSORGUNG BBASISSTATION VT04EUK06045 VT04EEU06045 EINGANG 100 240VAC 50 60Hz 150MA AUSGANG 6VDC 450MA TENPAO S003IB0600045 S003IV0600045 EINGANG 100 ...

Страница 50: ...suche zur Veränderung Reparatur des Geräts seitens des Kunden oder nicht zugelassenen Servicepersonals entstanden sind Bitte heben Sie Ihren Kaufbeleg Kassenzettel auf er dient als Garantiebeweis 15 1 Während der Garantiezeit Trennen Sie die Basisstation von der Telefonleitung und dem Stromnetz Verpacken Sie alle Teile des Telefons in der Originalverpackung Bringen Sie das Gerät zu dem Händler bei...

Страница 51: ...schen und elektronischen Geräten bringen Das Symbol auf dem Produkt auf der Bedienungsanleitung und oder der Verpackung weist darauf hin Einige der Materialen können wiederverwendet werden wenn sie an einer Recyclingstelle abgegeben werden Mit der Verwertung einiger Teile oder Rohstoffe aus gebrauchten Produkten leisten Sie einen wichtigen Beitrag zum Umweltschutz Bitte setzen Sie sich mit Ihren ö...

Страница 52: ...CTIONS DE SÉCURITÉ IMPORTANTES Veuillez suivre ces consignes de sécurité lorsque vous utilisez votre téléphone afin de réduire les risques d incendie d électrocution et de blessure Veuillez lire et vous assurer d avoir compris toutes les consignes Respectez toutes les mises en garde et instructions figurant sur le produit Débranchez le produit de la prise murale avant de le nettoyer N utilisez pas...

Страница 53: ...iles ou de piles non rechargeables piles primaires peut s avérer dangereuse Celles ci peuvent provoquer des interférences et ou endommager l appareil ou son environnement Le fabricant ne saurait être tenu responsable de dommages résultant du non respect de ces instructions N utilisez pas de stations de charge tierces Cela pourrait endommager les piles Veuillez vous assurer que les piles sont insta...

Страница 54: ...partiment des piles en veillant à respecter la polarité voir les repères à l intérieur du compartiment des piles Avertissement Utilisez uniquement les piles rechargeables NiMH fournies Placez le couvercle à l arrière du combiné et appuyez dessus jusqu à ce qu il se mette en place avec un clic Placez le combiné sur la base et laissez le charger pendant 15 heures avant la première utilisation Le com...

Страница 55: ...sous menu appuyez pour confirmer la sélection Pendant un appel appuyez pour accéder à Intercom Répertoire Liste bis Journal 2 En mode veille appuyez pour effectuer un appel par intercom En mode menu principal appuyez pour retourner à l écran de veille En mode sous menu appuyez pour retourner à l option précédente ou maintenir appuyée pour retourner à l écran de veille En mode modification pré numé...

Страница 56: ...z pour baisser le volume Pendant une sonnerie appuyez pour baisser le volume de sonnerie du combiné 5 En mode veille mode pré numérotation Liste bis Journal Liste de répertoire appuyez pour effectuer un appel Pendant une sonnerie appuyez pour répondre à un appel Pendant un appel appuyez pour allumer éteindre le haut parleur 6 O Pendant un appel appuyez pour terminer un appel et retourner à l écran...

Страница 57: ...r voir plus de chiffres du numéro appelant si applicable 8 F Pendant un appel appuyez pour envoyer un signal de Rappel aussi appelé Flash pour les services de réseau 9 Microphone 10 Haut parleur 11 Blocage d appel 6 2 Présentation de la base voir P4 1 CLAVIER ALPHA NUMÉRIQUE Composition ou stockage d un numéro appuyez pour saisir les chiffres 2 Composition ou stockage d un numéro appuyez pour insé...

Страница 58: ...pendant un appel appuyez pour afficher la liste des combinés souscrits et en choisir un pour un appel interne ou pour passer directement un appel interne si un seul combiné est souscrit 11 En mode veille appuyez pour chercher ou appeler tous les combinés souscrits Appuyez longuement pour lancer la procédure de souscription 12 DEL de fonctionnement Allumée pendant un appel Clignotante lorsque le té...

Страница 59: ...rres allumées plus le signal est fort Indique qu un appel est en cours sur le combiné Clignote pour signaler un appel entrant Indique que la sonnerie du combiné est éteinte Indique qu une alarme est activée Clignote lorsque l alarme sonne Indique que le clavier est verrouillé Indique que la batterie est entièrement chargée Segments de la batterie pendant le cycle de chargement Indique que la batte...

Страница 60: ...sur lequel la saisie est en cours Il se trouve à droite du dernier caractère entré Conseils pour la saisie Dès lors qu un caractère est sélectionné le curseur se positionne sur l emplacement suivant après un court instant Vous pouvez déplacer le curseur à l aide des touches afin de modifier le texte saisi Appuyez sur pour effacer le dernier caractère Appuyez et maintenez la touche enfoncée pour ef...

Страница 61: ... à partir du journal d appels En mode inactif appuyez sur pour ouvrir le journal d appels et appuyez sur pour sélectionner une entrée OU Appuyez sur M puis sur pour sélectionner CALL LIST JOURNAL D APPELS 7 1 5 Appel à partir de la liste bis Appuyez sur pour ouvrir la liste bis et appuyez sur pour sélectionner le numéro à rappeler Appuyez sur pour composer le numéro sélectionné 7 2 Répondre à un a...

Страница 62: ... microphone au cours d un appel de manière à pouvoir parler avec quelqu un qui se trouve près de vous sans que l appelant puisse vous entendre Pendant une communication Appuyez sur pour mettre le microphone en mode muet le message MUTED MUET s affiche sur l écran LCD L appelant ne peut pas vous entendre Appuyez à nouveau sur pour réactiver le microphone 7 5 Terminer une communication Pendant un ap...

Страница 63: ...ombiné s En mode veille appuyez sur la touche de la base Si un seul combiné est souscrit à la base il sonne et peut répondre à l appel interne Si deux combinés ou plus sont souscrits à la base appuyez sur le numéro du combiné que vous désirez appeler 1 4 Mettez fin à l appel interne depuis la base ou depuis le combiné appelé 7 9 Transférer un appel de la base aux combinés Pendant un appel externe ...

Страница 64: ...cun autre combiné n est souscrit à la base celle ci sonne et vous pouvez répondre à l appel interne en appuyant sur Si plusieurs combinés sont souscrits à la base appuyez sur 5 pour appeler la base ou sur les touches 1 4 pour appeler un autre combiné et passer l appel interne Pour mettre fin à l appel interne et reprendre l appel externe appuyez sur M pour afficher INTERCOM puis appuyez de nouveau...

Страница 65: ... sur M et sur pour sélectionner la mélodie désirée Appuyez sur M pour enregistrer 8 1 1 Saisie des noms Pour saisir les noms utilisez les lettres du clavier Par exemple pour enregistrer Tom Appuyez une fois sur 8pour taper T Appuyez trois fois sur 6pour taper o Appuyez une fois sur 6pour taper m 8 2 Effacer une entrée du répertoire Appuyez sur M et sur pour sélectionner RÉPERTOIRE PHONEBOOK Appuye...

Страница 66: ...tres que vous pouvez modifier afin de personnaliser son fonctionnement 9 1 Paramètrage de la date et de l heure 9 1 1 Réglage de l heure la date et l année Appuyez sur M et sur pour sélectionner HS SETTINGS RÉGLAGES COMBINÉ Appuyez sur M et sur pour sélectionner DATE TIME DATE HEURE Appuyez sur M et sur pour sélectionner SET TIME RÉGLAGE HEURE Appuyez sur M puis entrez l heure suivant le format 12...

Страница 67: ... cinq combinés peuvent être enregistrés sur une seule station de base Si pour une raison quelconque votre combiné n était pas enregistré sur la station de base le message REGISTER ENREGISTRER s afficherait sur l écran du combiné enregistrez votre combiné en suivant la procédure ci dessous Appuyez sur la touche la station de base et maintenez la enfoncée pendant environ cinq secondes la station de ...

Страница 68: ...pour tous les appels entrants Les appelants peuvent cacher délibérément leurs noms et ou numéros de téléphone Messages écrans concernant l affichage du journal d appels WITHHELD PRIVÉ L appelant refuse de communiquer son numéro de téléphone OUT OF AREA HORS ZONE Le numéro de l appelant n est pas disponible Lorsque la liste est pleine et qu un nouvel appel est reçu l entrée la plus ancienne est aut...

Страница 69: ...pel de numéro vous devez d abord choisir le mode de blocage Vous pouvez choisir de bloquer tous les appels de ne permettre que les entrées VIP ou de ne bloquer que les entrées de la liste de blocage Appuyez sur M et sur pour afficher BLOC APPEL CALL BLOCKER Appuyez sur M et sur pour afficher RÉGLAGES SETTINGS Appuyez sur M pour afficher MODE BLOC BLOCK MODE Appuyez sur M pour sélectionner ARRÊT OF...

Страница 70: ...liste de blocage 11 3 Voir une entrée de la Liste de blocage Appuyez sur M et sur pour afficher BLOC APPEL CALL BLOCKER Appuyez sur M pour afficher BLOC LISTE BLACK LIST Appuyez sur M et sur pour sélectionner l entrée de la liste de blocage souhaitée Appuyez sur M et sur pour afficher VOIR VIEW Appuyez sur M pour voir le numéro et le nom de l entrée sélectionnée de la liste de blocage Si le numéro...

Страница 71: ... ou DÉSACTIVER OFF Appuyez sur M pour confirmer le réglage pour ce type Pour effectuer un réglage pour d autres types d appel répéter depuis l étape 4 12 RÉPONDEUR Votre système de téléphone inclut un répondeur qui enregistre les appels auxquels vous n avez pas répondu lorsqu il est activé Le système de répondeur peut mémoriser jusqu à 59 messages sur une durée maximum d enregistrement d environ 1...

Страница 72: ...r choisir MARCHE ON ou ARRÊT OFF Appuyez sur M pour confirmer le réglage 12 2 Lire des messages sur le répondeur Lorsque de nouveaux messages sont enregistrés le voyant du répondeur de la base et l icône du répondeur sur le combiné clignotent Si vous avez de nouveaux messages ils sont lus en premier puis seront lus les anciens messages conservés jusqu à ce qu ils soient supprimés Les anciens messa...

Страница 73: ... répondeur Vous pouvez sélectionner REP ENREG ANS REC le mode par défaut si vous voulez laisser les appelants laisser un message ou le mode REP SEUL ANSWER ONLY si vous ne voulez pas que les appelants laissent de messages sur le répondeur En mode veille appuyez sur M et sur pour afficher RÉPONDEUR ANS MACHINE Appuyez sur M et sur pour afficher REGLAGES REP TAM SETTINGS Appuyez sur M pour afficher ...

Страница 74: ...NS REC ou REP SEUL ANSWER ONLY Appuyez sur M et sur pour afficher ENR ANONCE RECORD MESS Appuyez sur M pour commencer à enregistrer votre annonce personnelle ENREG RECORDING s affiche à l écran Appuyez sur M pour arrêter et sauvegarder votre annonce personnelle qui sera alors automatiquement lue Vous pouvez aussi appuyer sur pour retourner à l écran précédent sans sauvegarder l annonce personnelle...

Страница 75: ...U06045 ENTRÉE 100 240VAC 50 60HZ 150mA SORTIE 6VDC 450MA TENPAO S003IB0600045 S003IV0600045 ENTRÉE 100 240VAC 50 60HZ 150mA SORTIE 6VDC 450mA RJ AS060450B001 RJ AS060450E002 ENTRÉE 100 240VAC 50 60HZ 150mA SORTIE 6VDC 450mA INFORMATIONS SUR LES PILES TYPE NI MH PILE RECHARGEABLE 400mAh 2 X 1 2V AAA 14 NETTOYAGE ET ENTRETIEN Ne nettoyez aucun élément de votre téléphone avec du benzène des diluants ...

Страница 76: ...prise d alimentation secteur Rangez toutes les pièces de votre téléphone dans l emballage d origine Retournez l appareil au magasin où vous l avez acheté en veillant à vous munir de votre ticket de caisse N oubliez pas de retourner également l adaptateur secteur 15 2 Lorsque la garantie a expiré Si l appareil n est plus sous garantie contactez nous via notre site www aegtelephones eu Cet appareil ...

Страница 77: ...r le produit dans le mode d emploi ou sur l emballage Certains matériaux de l appareil sont réutilisables si vous l apportez à un centre de recyclage En permettant la réutilisation de certaines pièces ou matières premières d appareils hors d usage vous contribuez de façon importante à la protection de l environnement Veuillez vous adresser aux autorités locales pour plus d informations concernant ...

Страница 78: ...or het milieu 2 BELANGRIJKE VEILIGEIDSINSTRUCTIES Volg deze veiligheidsvoorschriften wanneer u uw telefoonapparatuur gebruikt om het risico van brand elektrische schokken of lichamelijk letsel te verminderen Lees en begrijp alle instructies Volg alle waarschuwingen en instructies op die zijn gemarkeerd op het product Ontkoppel dit product van het stopcontact voor het reinigen Gebruik geen vloeibar...

Страница 79: ...vanging die door de fabrikant wordt aanbevolen Er is explosiegevaar als u de batterij vervangt met een verkeerd type batterij Het gebruik van andere typen batterijen of niet oplaadbare batterijen primaire cellen kan gevaarlijk zijn Zij kunnen storing en of schade aan het apparaat of aan de omgeving veroorzaken De fabrikant kan niet aansprakelijk worden gesteld voor schade als gevolg van een dergel...

Страница 80: ...ats de 2 meegeleverde batterijen in het batterijcompartiment en houd rekening met de juiste polariteit zie markeringen in batterijcompartiment Waarschuwing Gebruik alleen de meegeleverde NiMH oplaadbare batterijen Plaats het achterste deksel op de achterzijde van de handset en druk het naar beneden totdat deze vastklikt Plaats de handset op het basisstation en laad deze 15 uur op alvorens de hands...

Страница 81: ... standby modus Druk om een intercom gesprek te starten In hoofdmenu modus Druk om terug te gaan naar het standby scherm In submenu Druk om terug te gaan naar de vorige optie of houdt het ingedrukt om terug te gaan naar het standby scherm In bewerking modus Druk om een teken cijfer te verwijderen of houdt ingedrukt om alle tekens cijfers te verwijderen Tijdens een gesprek Druk om de microfoon te ui...

Страница 82: ...scherm In menu bewerking modus Druk om terug te gaan naar het vorige menu of houdt ingedrukt om terug te gaan naar het standby scherm In standby modus Houdt ingedrukt om de handset aan uit te schakelen 7 ALFANU MERIEK TOETSEN BORD Druk om een cijfer teken in te voeren toets in standby modus Houdt ingedrukt om de toetsenbord vergrendeling aan of uit te schakelen toets in standby Houdt ingedrukt om ...

Страница 83: ...s te verhogen 6 Tijdenshetbellen Indrukkenomhetluistervolume te verlagen Terwijl de telefoon overgaat Indrukken om het belvolume van de basis te verlagen 7 Indrukken voor een lijn in de speakerphone modus 8 Indrukken om een in te voeren 9 Tijdens het bellen Indrukken op een Recall signaal Flash te versturen 10 In standby Tijdens het bellen Indrukken voor de intercom lijst als er meer dan één hands...

Страница 84: ...7 Aan wanneerhet antwoordapparaat TAM AAN is Knippert als een bericht is opgenomen of wanneer TAM in gebruik is 6 3 Handset LCD display iconen en symbolen Zie P2 Het LCD display geeft u informatie over de huidige status van uw telefoon Toont wanneer de handset is geregistreerd en binnen het bereik van het basisstation meer blokjes wijst op een sterker signaal Toont dat de handset in gesprek is Kni...

Страница 85: ...n oproep blokkering modus aangeschakeld is 6 4 Tekst en cijfer invoeren In de bewerkingsmodus wordt een cursor weergegeven om de huidige tekstinvoer positie aan te geven Deze is gepositioneerd aan de rechterkant van het laatst ingevoerde teken Schrijf tips Zodra een teken is geselecteerd zal de cursor na een korte pauze naar de volgende positie bewegen U kunt de cursor in de tekst bewegen met om d...

Страница 86: ...ellen 7 1 4 Bellen vanuit de oproeplijst In stand by druk op om toegang te krijgen tot de oproeplijst en druk op om te selecteren OF Druk op M dan op om CALL LIST GESPREKSLIJST te selecteren 7 1 5 Bellen vanuit de herhaallijst Druk op om toegang te krijgen tot de herhaallijst en druk op om het gewenste nummer te selecteren Druk op om het geselecteerde nummer te bellen 7 2 Een oproep beantwoorden A...

Страница 87: ...t u met iemand kunt praten zonder dat de beller u kan horen tijdens een oproep Tijdens een oproep Druk op om de microfoon uit te schakelen en MUTED GEDEMPT wordt weergegeven op de LCD Uw beller kan u niet horen Druk nogmaals op om microfoon opnieuw te activeren 7 5 Een oproep beëindigen Tijdens een verbinding drukt u op Oom de oproep te beëindigen OF Plaats de handset op de basis of oplader om de ...

Страница 88: ...ngemeld drukt u op nummer 1 4 om de bijbehorende handset te bellen De intercom wordt beëindigd wanneer de basis of de handset het gesprek beëindigt 7 9 Oproep doorschakelen van basis naar Handset s Druk tijdens een gesprek via de basis op de knop Het externe gesprek wordt in de wacht gezet Als er slechts één handset is aangemeld bij de basis begint het toestel te rinkelen en kan door de handset wo...

Страница 89: ...l de basis rinkelen en kan worden beantwoord door te drukken op om het intercomgesprek te starten Als er andere handsets bij de basis zijn aangemeld drukt u op 5 om de basis te bellen of nummer 1 4 voor een andere handset die vervolgens kan opnemen om een intercomgesprek te starten Om de intercom gesprek te beëindigen en terug te keren naar het externe gesprek drukt u op M voor INTERCOM en nogmaal...

Страница 90: ...al op 6om m in te voeren 8 2 Een telefoonboek invoer verwijderen Druk op M en om TEL BOEK PHONEBOOK te selecteren Druk nogmaals op M om ALLE CONT ALL CONTACTS te tonen Druk nogmaals op om toegang te krijgen tot telefoonboek Druk op M om de gewenste telefoonboek invoer te selecteren Druk op M en om WISSEN DELETE te selecteren Druk op M om te bevestigen 8 3 Voeg invoer toe aan VIP VIP lijst Druk op ...

Страница 91: ...e jaar informatie in De laatste twee cijfers van het jaar zullen knipperen voor de jaar invoer Druk op M en voer dan de datum informatie in volgens het DD MM JJ of MM DD JJ formaat De datum zal in het formaat zijn zoals u het heeft ingesteld Druk op M om te bevestigen 9 2 Handset instellingen 9 2 1 Alarm U kunt deze telefoon gebruiken om een alarm klok in te stellen Wanneer een alarm is ingesteld ...

Страница 92: ... en druk op M om te bevestigen OPMERKING Als de handset registratie succesvol is zal de handset automatisch het eerstvolgende beschikbare handset nummer worden toegewezen Dit nummer wordt in de stand by modus weergegeven in het display van de handset 10 NUMMERWEERGAVE NETWERKAFHANKELIJK 10 1 Oproeplijst Deze functie is beschikbaar als u bij uw telefoonprovider een abonnement op de dienst nummerwee...

Страница 93: ...gegevens in de oproeplijst staan Druk op om toegang te krijgen tot de oproeplijst OF Druk op M en op om CALL LIST GESPREKSLIJST te selecteren Druk op M Druk op om de gewenste invoer te selecteren 11 OPROEP FILTER CALL BLOCKER Indien u zich heeft geabonneerd op een Beller ID dienst kunt u blokkering functie gebruiken om bepaalde oproepen automatisch te blokkeren door nummers toe te voegen aan de Zw...

Страница 94: ...dien UIT OFF geselecteerd is zal de oproep filter uitgeschakeld zijn en zullen alle oproepen normaal ontvangen worden Als ALLES BLOCK ALL VIP TOESTAAN ALLOW VIP of ZWARTE LIJST BLOCK BLIST zijn geselecteerd zal ALTIJD AAN ALWAYS ON getoond worden Druk op M als u wilt dat de geselecteerde blokkering modus altijd aan is of druk op om TIJD STURING TIMED te tonen en druk dan op M en stel de TIJD AAN T...

Страница 95: ... Alle zwarte lijst invoeren verwijderen Druk op M en om OPROEP BLOK CALL BLOCKER te tonen Druk op M om ZWARTE LIJST BLACK LIST te tonen Druk tweemaal op M en dan om ALLES WISSEN DELETE ALL te tonen Druk op M om BEVES CONFIRM weer te geven Druk op M om te bevestigen Alle Zwarte lijst invoeren zullen worden verwijderd en het beeldscherm zal LEEG EMPTY weergeven 11 5 Blokkeer oproepen per oproep type...

Страница 96: ...e naam van de handset en u zult berichten moeten verwijderen voordat nieuwe kunnen worden opgenomen Wanneer de TAM vol is zal het alleen uw Alleen Beantwoorden uitgaande bericht afspelen en de beller niet toelaten om een bericht achter te laten 12 1 TAM aan uitschakelen U kunt het antwoordapparaat aan of uitschakelen met behulp van de handset Wanneer het antwoordapparaat is ingesteld op AAN de bas...

Страница 97: ...s opgenomen en een symbool aan de bovenzijde van het beeldscherm als het een nieuw bericht is Voor opties tijdens het afspelen Druk op om het afspeelvolume te verhogen of verlagen Druk op M en voor de opties STOP STOP om het afspelen te stoppen VOLGENDE FORWARD om verder te gaan naar het volgende bericht VORIGE PREVIOUS om het huidige bericht dat afspeelt te herhalen WISSEN DELETE om het huidige b...

Страница 98: ... U kunt uw eigen uitgaand bericht opnemen voor de ANTW OPN ANS REC modus of ANTW ANSWER ONLY modus Wanneer u uw eigen OGM opneemt zal het worden gebruikt wanneer het antwoordapparaat de oproep beantwoordt Indien uw persoonlijke OGM verwijderd is zal de vooraf ingestelde OGM automatisch worden hersteld Druk in standby modus op M en om BEANTWOORDER ANS MACHINE te tonen Druk op M en om ANTW INSTEL TA...

Страница 99: ... 0 C ELEKTRISCHE AANSLUITING BASIS EENHEID VT04EUK06045 VT04EEU06045 INGANG 100 240VAC 50 60HZ 150MA UITGANG 6VDC 450MA TENPAO S003IB0600045 S003IV0600045 IINGANG 100 240VAC 50 60HZ 150MA UITGANG 6VDC 450MA RJ AS060450B001 RJ AS060450E002 INGANG 100 240VAC 50 60HZ 150MA UITGANG 6VDC 450MA BATTERIJ INFORMATIE TYPE NI MH HERLAADBARE BATTERIJ 400MAH 2 X 1 2V AAA 14 REINIGING EN ZORG Reinig geen onder...

Страница 100: ...et apparaat in met de originele verpakking Breng het toestel terug naar de winkel waar u het hebt gekocht en neem uw aankoopbon mee Vergeet niet om de netadapter mee te nemen 15 2 Na de garantieperiode Als het toestel niet meer onder garantie valt kunt u contact met ons opnemen via www aegtelephones eu Dit product werkt alleen op oplaadbare batterijen Als u niet oplaadbare batterijen in de handset...

Страница 101: ... of op de verpakking Sommige productmaterialen kunnen worden hergebruikt als u ze naar een inzamelingspunt brengt Door sommige onderdelen of grondstoffen van gebruikte producten aan te bieden voor hergebruik levert u een belangrijke bijdrage aan de bescherming van het milieu Neem contact op met de plaatselijke autoriteiten voor meer informatie over de inzamelingspunten in uw regio De batterijen mo...

Страница 102: ...RTANTI ISTRUZIONI DI SICUREZZA Osservare queste istruzioni di sicurezza quando si usa il telefono per ridurre il rischio di incendio scosse elettriche e lesioni Leggere e comprendere tutte le istruzioni Segue un elenco di tutte le avvertenze ed istruzioni impresse sul prodotto Disinserire la presa del prodotto prima di pulirlo Non usare detersive liquidi o aerosol Per pulire l unità utilizzare un ...

Страница 103: ...bero causare interferenze e o danneggiare l unità e l ambiente Il produttore non sarà responsabile per danni derivanti da tale non rispetto Non usare caricatori di terzi Le batterie potrebbero causare danni Verificare che le batterie sono inserite nella corretta polarità Smaltire le batterie in modo sicuro Non bruciare o immergere in acqua smontare o perforare le batterie 3 USO PREVISTO Questo tel...

Страница 104: ...ni all interno del vano batterie Avvertenza Usare solo le batterie ricaricabili NiMH Collocare il coperchio posteriore sul retro del ricevitore e premere finché non è in posizione Collocare il ricevitore sulla base e caricare per 15 ore prima di usare il ricevitore per la prima volta Il ricevitore emetterà un doppio bip se collocato correttamente sulla base e l indicatore di carica della batteria ...

Страница 105: ... Durante una chiamata Premere per accedere all elenco Intercom Rubrica Elenco di ricomposizione Elenco chiamate 2 In modalità di standby Premere per avviare una chiamata intercom In modalità menu principale Premere per tornare alla schermata di standby In modalità menu secondario Premere per tornare all opzione precedente o premere e tenere premuto per tornare alla schermata di standby In modalità...

Страница 106: ...re il volume Quando squilla Premere per diminuire il volume della suoneria 5 In modalità di standby precomposizione Elenco di ricomposizione Elenco chiamate Voce rubrica Premere per effettuare una chiamata Quando squilla Premere per rispondere ad una chiamata Durante una chiamata Premere per attivare disattivare l altoparlante 6 O Durante una chiamata Premere per terminare una chiamata e tornare a...

Страница 107: ...enco chiamate Premere per visualizzare altre cifre del numero del chiamante se possibile 8 F Durante una chiamata premere per inviare un segnale di richiamo chiamata anche Flash per i servizi di rete 9 Microfono 10 Altoparlante 11 Blocco chiamate 6 2 Panoramica della stazione di base vedere P4 1 TASTIERINO ALFANUMERICO Mentre si digita o si salva un numero Premere per immettere le cifre 2 Premere ...

Страница 108: ...odalità inattiva durante una chiamata Premere per accedere all elenco intercom se più di un dispositivo è registrato o per fare direttamente una chiamata intercom se è registrato un unico dispositivo 11 In modalità di inattività Premere per trovare chiamare tutti i dispositivi senza cavo registrati Tenere premuto per entrare in modalità di registrazione 12 I LED durante l utilizzo ACCESO fisso Dur...

Страница 109: ...e che indicano un segnale più forte Indica che il ricevitore è in chiamata Lampeggia quando c è una chiamata in entrata Indica che la suoneria del ricevitore è disattivata Indica che è impostata un allarme Lampeggia quando suona l allarme Indica che la tastiera è bloccata Indica che la batteria è completamente carica Le tacche della batteria il ciclo durante la fase di caricamento della batteria I...

Страница 110: ...imo carattere inserito Suggerimenti di scrittura Quando viene selezionato un carattere il cursore si sposterà alla posizione successiva dopo una breve pausa È possibile spostare il cursore all interno del testo per per modificare la voce di testo Premere per eliminare l ultimo carattere Tenere premuto per eliminare l intera stringa di testo 7 USARE IL TELEFONO 7 1 Effettuare una telefonata 7 1 1 C...

Страница 111: ...Elenco chiamate 7 1 5 Chiamare dall elenco di ricomposizione Premere per accedere all elenco di ricomposizione e premere per selezionare il numero di ricomposizione desiderato Premere per comporre il numero di ricomposizione selezionato 7 2 Rispondere ad una chiamata Se il ricevitore non è nella base di ricarica Quando il telefono squilla premere per rispondere ad una chiamata Se il ricevitore è s...

Страница 112: ...er disattivare l audio del microfono e MUTED Audio disattivato comparirà sull LCD Il chiamante non può sentirvi Premere di nuovo per attivare di nuovo l audio del microfono 7 5 Terminare una chiamata Durante una chiamata premere Oper terminare la chiamata OPPURE Mettere il ricevitore sulla base o caricatore per terminare la chiamata 7 6 Attivare disattivare il blocco tastiera In standby tenere pre...

Страница 113: ...rasferimento di chiamata dalla base a ricevitore i Durante una chiamata alla base premere il pulsante sulla base La chiamata esterna viene messa in attesa Se c è un solo ricevitore registrato sulla base inizia a squillare ed è possibile rispondere dal ricevitore per avviare una chiamata intercom Se ci sono due o più ricevitori registrati sulla base premere i numeri 1 4 per chiamare il ricevitore a...

Страница 114: ...4 per un altro ricevitore che può quindi rispondere per avviare la chiamata intercom Per terminare la chiamata intercom e tornare alla chiamata esterna premere Mper visualizzare INTERCOM e poi premere di nuovo M Per trasferire la chiamata esterna alla base o a un altro ricevitore premere O 8 RUBRICA Il telefono può salvare fino a 100 voci di rubrica con nomi e numeri Ogni voce della rubrica può av...

Страница 115: ...nuovo M per accedere alla rubrica Premere per selezionare la voce desiderata della rubrica Premere M e per selezionare ELIMINA DELETE Premere M per confermare 8 3 Aggiungere una voce della rubrica all elenco VIP Premere M e per selezionare RUBRICA PHONEBOOK quindi M per mostrare TUTTI CONT ALL CONTACTS Premere di nuovo M per accedere alla rubrica Premere per selezionare la voce desiderata della ru...

Страница 116: ... 1 Sveglia È possibile usare questo telefono per impostare l orario della sveglia Quando è impostata una sveglia ALARM ICON icona sveglia compare sullo schermo LCD Quando si raggiunge l ora della sveglia l ALARM ICON Icona della sveglia e ALARM ON Sveglia attiva lampeggiano sullo schermo Il ricevitore suona anche per 45 secondi Premere M e per selezionare HS SETTINGS Impostazioni ricevitore Premer...

Страница 117: ...a chiamante dal proprio gestore telefonico Il telefono può salvare massimo 50 chiamate ricevute con data ora nell Elenco chiamate Il numero comparirà sullo schermo LCD quando suona il telefono Se il numero corrisponde ad una delle voci nella Rubrica privata il nome del chiamante salvato nella rubrica privata comparirà col numero Il ricevitore suonerà con la suoneria associata con quella voce della...

Страница 118: ...utte le chiamate o consentire solo chiamate da numeri nell elenco VIP Ogni ricevitore può salvare fino ad un totale di 100 voci divise tra rubrica compreso l elenco VIP e la lista nera Le chiamate possono anche essere bloccate dai seguenti tipi di chiamate Consenti Non disponibile Internazionale e Telef Pag Vedere 11 7 Quando una chiamata è bloccata il telefono non squilla Se la segreteria telefon...

Страница 119: ...ere un numero nella Lista nera Premere M e per mostrare BLOC CHIA CALL BLOCKER Premere M per mostrare LISTA NERA BLACK LIST Premere M due volte per mostrare AGGIUNGI ADD Premere M e poi inserir un Nome quindi M e inserire il Numero Premere M per salvare il numero nella lista nera Nota Ogni voce della Lista nera riduce la capacità della Rubrica Nota Se la rubrica è piena LISTA COMP LIST FULL compar...

Страница 120: ...che normalmente non hanno un numero ID chiamante impostando il tipo di chiamata rispettivo su ON Ogni tipo di chiamata Consenti Non disponibile Internazionale e Tel Pag può essere bloccata indipendentemente dalle altre Premere M e per mostrare BLOC CHIA CALL BLOCKER Premere M e per mostrare IMPOSTAZIONI SETTINGS Premere M e per mostrare TIPO CHIAM CALL TYPE Premere M e per selezionare CONSENTI WIT...

Страница 121: ...à l icona TAM Le chiamate saranno risposte che il ritardo di risposta impostato e se è impostato sulla modalità Rispondi e Registra il chiamante può lasciare un messaggio Se la segreteria telefonica è impostata su DISATTIVO OFF le chiamate saranno risposte dopo 14 squilli e il messaggio di sola risposta sarà riprodotto ai chiamanti Non sarà possibile lasciare un messaggio In modalità di standby pr...

Страница 122: ...minare la riproduzione del messaggio corrente In alternativa premere i seguenti tasti numerici 5 per interrompere la riproduzione 6 per passare al messaggio successivo 4 per ripetere la riproduzione del messaggio corrente 4 4 per passare al messaggio precedente 2 per eliminare la riproduzione del messaggio corrente NOTA È impossibile eliminare nuovi messaggi quindi sarà necessario riprodurli prima...

Страница 123: ...inato viene salvato automaticamente l OGM preimpostato In modalità di standby premere M e per mostrare SEGRETERIA ANS MACHINE Premere M e per mostrare IMPOSTA SEGR TAM SETTINGS Premere M e per mostrare IMPOST OGM OGM SETTINGS Premere M e per selezionare RISP REG ANS REC o SOLO RISP ANSWER ONLY Premere M e per mostrare REGISTRA MESS RECORD MESS Premere M per iniziare la registrazione dell OGM perso...

Страница 124: ...VT04EUK06045 VT04EEU06045 INGRESSO 100 240VAC 50 60HZ 150MA USCITA 6VDC 450MA TENPAO S003IB0600045 S003IV0600045 INGRESSO 100 240VAC 50 60HZ 150MA USCITA 6VDC 450MA RJ AS060450B001 RJ AS060450E002 INGRESSO 100 240VAC 50 60HZ 150MA USCITA 6VDC 450MA INFORMAZIONI DELLA BATTERIA TIPO NI MH BATTERIA RICARICABILE 400MAH 2 X 1 2V AAA 14 PULIZIA E MANUTENZIONE Non pulire nessuna parte del telefono con be...

Страница 125: ...efono usando la confezione originale Riportare l unità al negozio dove è stata acquistata verificando di avere con sé la ricevuta d acquisto Ricordarsi di allegare l adattatore 15 2 Alla scadenza della garanzia Se l unità non è più coperta da garanzia contattateci tramite www aegtelephones eu Questo prodotto funziona solo con batterie ricaricabili Se si mettono batterie non ricaricabili nel ricevi...

Страница 126: ...odotto sul manuale d uso e o sulla confezione Alcuni materiali del prodotto possono essere riutilizzati se consegnati presso un centro di riciclaggio Riciclando alcune parti o materie prime dei prodotti usati si offre un importante contributo alla protezione dell ambiente Per maggiori informazioni sui punti di raccolta più vicini contattare le autorità locali Prima di smaltire il dispositivo è nec...

Страница 127: ...teger nuestro medio ambiente 2 INSTRUCCIONES IMPORTANTES DE SEGURIDAD Por favor siga las instrucciones de seguridad cuando utilice el equipo telefónico para reducir el riesgo de incendio descarga eléctrica y lesiones Lea y entienda todas las instrucciones Siga todas las advertencias e instrucciones indicadas en el producto Desenchufe este producto de la toma de corriente antes de limpiarlo No use ...

Страница 128: ...un sustituto autorizado recomendado por el fabricante Existe riesgo de explosión si reemplaza la batería con un tipo de batería incorrecto El uso de otros tipos de baterías o baterías no recargables células primarias puede ser peligroso Pueden causar interferencias y o daños en la unidad o en sus alrededores El fabricante no se hace responsable de los daños derivados de dicho incumplimiento No uti...

Страница 129: ...onarán sin ella 4 2 Instalación y carga de las baterías recargables consulte P3 Inserte las 2 baterías suministradas en el compartimento de la batería respetando la polaridad consulte las marcas en el interior del compartimento de la batería Advertencia Utilice únicamente las baterías suministradas recargables de NiMH Coloque la tapa sobre la parte trasera del terminal y presione hacia abajo hasta...

Страница 130: ...onar HS SETTINGS AJUSTES DEL TELF Pulse My para seleccionar LANGUAGE IDIOMA Pulse M y para seleccionar el idioma deseado Pulse M para confirmar 6 FAMILIARIZARSE CON SU TELÉFONO 6 1 Resumen del teléfono consulte P1 1 M En modo inactivo Pulse para acceder al menú principal En modo sub menú Pulse para confirmar la selección Durante una llamada Pulse para acceder a Intercom Agenda Lista Rellamada List...

Страница 131: ...ta de llamadas En menús y listas Pulse para mover hacia arriba las opciones Durante una llamada Pulse para subir el volumen Mientras está sonando Pulse para subir el volumen del timbre del terminal 4 En modo inactivo Pulse para acceder a la lista de rellamadas En menús y listas Pulse para mover hacia abajo las opciones Durante una llamada Pulse para bajar el volumen Mientras está sonando Pulse par...

Страница 132: ...esactivar el bloqueo del teclado Tecla en modo inactivo Mantenga pulsado para encender apagar el timbre del terminal Tecla en modo pre marcación edición de números Mantenga pulsado para introducir una pausa Tecla en modo Lista Llamada Pulse para ver más dígitos del número de la persona que llama si procede 8 F Durante una llamada pulse para enviar una señal de rellamada también llamado Flash para ...

Страница 133: ...era pulsar para acceder a la línea en el modo de altavoz 8 Al marcar o guardar un número pulsar para insertar un 9 Durante una llamada pulsar para enviar una señal de rellamada también conocida como Flash 10 En el modo de espera o durante una llamada pulsarparaaccederalalistadeintercomunicador si hay más de un terminal registrado o realizar una llamada de intercomunicador directamente si solo hay ...

Страница 134: ...tador automático está encendido Parpadea si hay nuevos mensajes grabados en el contestador y cuando el contestador se está utilizando 6 3 Iconos y símbolos de la pantalla LCD del teléfono consulte P2 La pantalla LCD le da información sobre el estado actual del teléfono Visualiza cuando el terminal está registrado y dentro del alcance de la estación base con más bloques indicando una señal más fuer...

Страница 135: ...ión de llamadas y no se suele ofrecer por proveedores de red del Reino Unido Indica que el contestador automático está activado Parpadea si hay un nuevo mensaje del contestador automático Indica cuando se activa cualquier modo de bloqueo 6 4 Entrada de texto y dígito En el modo de edición aparece un cursor para indicar la posición actual de la entrada de texto Se coloca en la derecha del último ca...

Страница 136: ... la primera entrada de la agenda Si no existen entradas en la agenda se visualizará EMPTY VACÍA Pulse para seleccionar la entrada de agenda deseada Pulse para marcar el número 7 1 4 Llamada desde la lista de llamadas En modo reposo pulse para acceder a la lista de llamadas y pulse para seleccionar O Pulse M luego para seleccionar CALL LIST LISTA DE LLAMADAS 7 1 5 Llamada de la lista de rellamada P...

Страница 137: ...te una llamada Pulse para seleccionar entre VOLUMEN 1 a VOLUMEN 5 Se muestra la configuración actual Cuando finaliza una llamada se guardará la configuración del último nivel guardado 7 4 Silenciar una llamada Puede silenciar el micrófono de tal manera que pueda hablar con alguien cerca sin que le escuche la persona al teléfono durante la llamada Durante una llamada Pulse para silenciar el micrófo...

Страница 138: ...de la base a los terminales Pulse el botón de la base en el modo de inactividad Si solo hay un terminal registrado en la base empezará a sonar y podrá responderse desde el terminal para iniciar la llamada de intercomunicación Si hay dos o más terminales registrados en la base pulse del número 1 al 4 para llamar al terminal asociado La intercomunicación finaliza cuando la base o el terminal finaliz...

Страница 139: ...a base Durante una llamada en el terminal pulse el botón M para mostrar INTERCOMUNICADOR y pulse Mde nuevo Se retendrá la llamada externa Si no hay ningún otro terminal registrado en la base la base empezará a sonar y se podrá pulsar para iniciar la llamada de intercomunicación Si hay otros terminales registrados en la base pulse 5 para que empiece a sonar la base o un número del 1 al 4 para que s...

Страница 140: ...ADD AGREGAR Pulse M e introduzca el nombre Pulse M e introduzca el número Pulse M y para seleccionar la melodía deseada Pulse M para guardar 8 1 1 Introducir nombres Utilice las letras del teclado para introducir nombres por ejemplo para guardar Tom Pulse 8una vez para introducir la T Pulse 6tres veces para introducir la o Pulse 6una vez para introducir la m 8 2 Eliminar una entrada de la agenda P...

Страница 141: ...y hora 9 1 1 Configure hora fecha y año Pulse M y para seleccionar HS SETTINGS AJUSTES DEL TELF Pulse M y para seleccionar DATE TIME FECHA HORA Pulse M y para seleccionar SET TIME CONFIGURAR FECHA Pulse M luego introduzca la información de hora según el formato de 12 HR o 24 HR La hora se verá en el formato que usted elija Pulse M luego introduzca la información de año Los últimos dos dígitos del ...

Страница 142: ... Pulse M para confirmar 9 2 2 Configurar la Respuesta Automática Si activa la respuesta automática puede contestar una llamada automáticamente simplemente levantando el auricular de la base o el cargador sin necesidad de pulsar ninguna tecla Pulse M y para seleccionar HS SETTINGS AJUSTES DEL TELF Pulse M y para seleccionar AUTO ANSWER RESPUESTA AUTOMÁTICA Pulse M y para seleccionar ON o OFF ENCEND...

Страница 143: ...nfirmar INDICACIÓN Si el registro del terminal es exitoso al terminal le será asignado automáticamente el siguiente número de teléfono disponible Este número de teléfono se muestra en la pantalla del teléfono en el modo de reposo 10 IDENTIFICADOR DE LLAMADAS DEPENDIENTE DE LA RED 10 1 Lista de llamadas Esta función está disponible si se ha suscrito al servicio de identificación de línea de llamada...

Страница 144: ...llamadas Pulse para acceder a la lista de llamadas O Pulse M y para seleccionar CALL LIST LISTA DE LLAMADAS Pulse M Pulse para seleccionar la entrada deseada 11 BLOQ LLAM CALL BLOCKER Si se ha suscrito al servicio de identificación de llamadas podrá utilizar la función de bloqueo de llamadas para bloquear ciertas llamadas de forma automática mediante la adición de números a la Lista Negra ver 11 2...

Страница 145: ...IP or BLOQUE BLIST BLOCK BLIST aparecerá SIEMPRE ENC ALWAYS ON Pulse M OK si quiere que el modo de bloque esté activado todo el tiempo o pulse para visualizar EN HORA TIMED y luego pulse M y ajuste la HORA ENC TIME ON and HORA APAG TIME OFF para el periodo en el cual quiera activar el bloqueo 11 2 Agregar un Número a la Lista Negra Pulse M y para visualizar BLOQ LLAM CALL BLOCKER Pulse M para visu...

Страница 146: ...rmar Todas las entradas de la Lista Negra se borrarán y en la pantalla se visualizará SIN NÚMERO EMPTY 11 5 Bloquear Llamadas por Tipo de Llamada Usted puede elegir bloquear diferentes tipos de llamadas entrantes que normalmente no tienen un identificador de llamadas programando el respectivo tipo de llamada a ENCENDIDO Cada Tipo de Llamada Privado Internacional No Disponible y Teléfono Público pu...

Страница 147: ... persona que llame 12 1 Encender apagar el CONTES AUTO TAM Puede encender o apagar el contestador automático utilizando el terminal Cuando el contestador automático está ENCENDIDO el indicador de la base del contestador automático estará encendido y el terminal visualizará el icono del contestador automático Las llamadas serán contestadas después del tiempo de respuesta programado y si está progra...

Страница 148: ...avoz Indicación La pantalla muestra el tiempo y la fecha en la cual fue grabado el mensaje y un símbolo en la parte superior de la pantalla si es un mensaje nuevo Para opciones durante la reproducción Pulse para subir o bajar el volumen de reproducción Pulse M y para las opciones PARA STOP para detener la reproducción SIGUIENTE FORWARD para pasar al siguiente mensaje ANTERIOR PREVIOUS para repetir...

Страница 149: ...os antes de intentar borrarlos 12 4 Ajustes de Contestador Automático 12 4 1 Ajustar el Modo de Respuesta Puede seleccionar RESP GRABAR ANS REC el modo predeterminado si desea permitir que las personas que llamen dejen un mensaje o el modo SÓLO CONT ANSWER ONLY si no quiere que le dejen mensajes en el contestador automático En modo inactivo pulse M y para visualizar CONTES AUTO ANS MACHINE Pulse M...

Страница 150: ... ANS MACHINE Pulse M y para visualizar CONFIG CONT TAM SETTINGS Pulse M y para visualizar CONF MEN SAL OGM SETTINGS Pulse M y para seleccionar RESP GRABAR ANS REC o SÓLO CONT ANSWER ONLY Pulse M y para visualizar GRABAR MENS RECORD MESS Pulse M para empezar a grabar su mensaje saliente personal y GRABACIÓN RECORDING se visualiza en la pantalla Pulse M para detener y grabar su mensaje saliente pers...

Страница 151: ...4EUK06045 VT04EEU06045 ENTRADA 100 240VAC 50 60HZ 150MA SALIDA 6VDC 450MA TENPAO S003IB0600045 S003IV0600045 ENTRADA 100 240VAC 50 60HZ 150MA SALIDA 6VDC 450MA RJ AS060450B001 RJ AS060450E002 ENTRADA 100 240VAC 50 60HZ 150MA SALIDA 6VDC 450MA INFORMACIÓN DE BATERÍA TIPO NI MH BATERÍA RECARGABLE 400MAH 2 X 1 2V AAA 14 LIMPIEZA Y CUIDADO No limpie ninguna parte de su teléfono con benceno disolventes...

Страница 152: ...a telefónica y la red eléctrica Guarde todas las partes del sistema del teléfono utilizando el embalaje original Devuelva la unidad a la tienda donde la ha comprado asegurándose de llevar su recibo de compra Recuerde incluir el adaptador de red 15 2 Después de que la garantía haya expirado Si la unidad ya no está bajo garantía contáctenos vía www aegtelephones eu Este producto sólo funciona con ba...

Страница 153: ...del producto pueden ser reutilizados si los lleva a un punto de reciclaje Mediante la reutilización de algunas partes o materias primas de productos utilizados usted hace una importante contribución a la protección del medio ambiente Por favor póngase en contacto con sus autoridades locales en caso de que necesite más información sobre los puntos de recogida en su zona Se deben quitar las baterías...

Страница 154: ...ança ao usar o seu equipamento de telefone para reduzir o risco de incêndio de choque elétrico e de ferimentos Leia e compreenda todas as instruções Siga todos os avisos e instruções marcadas no produto Desligue o produto da tomada da parede antes de o limpar Não utilize produtos de limpeza líquido ou de aerossóis Utilize um pano húmido para a limpeza Mantenha o seu telefone afastado de condições ...

Страница 155: ... interferência e ou danos na unidade ou redondezas O fabricante não será responsabilizado por danos resultantes do não cumprimentos destas instruções Não utilize pontos de carregamento de terceiros Pode provocar danos nas pilhas Por favor assegure que as pilhas estão inseridas com a polaridade correta Desfaça se das pilhas de forma segura Não queime não mergulhe em água não desmonte nem fure as pi...

Страница 156: ...nterior do compartimento de pilhas Aviso Use apenas as pilhas recarregáveis de NiMH fornecidas Posicione a cobertura traseira sobre a parte de trás do telefone e pressione a para baixo até ouvir um clique Coloque o telefone na base e carregue o durante 15 horas antes de usar o telefone pela primeira vez O telefone fará um bip duplo quando estiver posicionado corretamente na base e o indicador de c...

Страница 157: ...rante uma chamada prima para aceder ao Intercomunicador Intercom à Agenda Phonebook às Chamadas efetuadas Redial list às Chamadas recebidas Call list 2 No modo de repouso prima para iniciar uma chamada de intercomunicação No menu principal prima para voltar para o ecrã de repouso No modo de submenu prima para voltar para a opção anterior ou mantenha premido para voltar para o ecrã de repouso No mo...

Страница 158: ...olume Enquanto o telefone toca prima para diminuir o volume de toque 5 No modo de repouso modo de pré marcação Chamadas efetuadas Redial list Chamadas recebidas Call list Agenda Phonebook prima para fazer uma chamada Enquanto o telefone toca prima para atender uma chamada Durante uma chamada prima para ligar desligar o altifalante 6 O Durante uma chamada prima para terminar uma chamada e voltar pa...

Страница 159: ...s do número da chamada que recebeu se aplicável 8 F Durante uma chamada prima para enviar um sinal de Recall também designado Flash para os serviços de telecomunicações 9 Microfone 10 Altifalante 11 Bloqueador de chamadas 6 2 Apresentação geral da estação de base ver P4 1 TECLADO ALFANUMÉRICO Ao marcar ou ao guardar um número Pressione para introduzir os dígitos 2 Ao marcar ou ao guardar um número...

Страница 160: ...à lista de intercomunicação caso esteja registado mais do que um auscultador ou realize uma chamada de intercomunicação directamente se apenas estiver registado um auscultador 11 No modo inactivo Pressione para encontrar chamar todos os auscultadores sem fios registados Pressione e mantenha pressionado para entrar no modo de registo 12 LED de utilização ACESO de forma contínua Durante uma chamada ...

Страница 161: ...base sendo que mais barras indicam um sinal mais forte Indica que há uma chamada em curso Pisca quando está a receber uma chamada Indica que o som de toque está desligado Indica que foi definido um alarme Pisca quando o alarme está a tocar Indica que o teclado está bloqueado Indica que a bateria está completamente carregada Os segmentos da bateria mudam durante o carregamento Indica que a bateria ...

Страница 162: ...posicionado à direita do último caractere introduzido Dicas para Escrever Uma vez selecionado um caractere o cursor irá mover se para a posição seguinte após uma curta pausa Pode mover o cursor aio longo do texto usando para corrigir o texto introduzido Pressione para apagar o último caractere Pressione e mantenha para apagar toda a entrada de texto 7 USAR O SEU TELEFONE 7 1 Fazer uma Chamada 7 1 ...

Страница 163: ... M e depois para selecionar CALL LIST LISTA DE CHAMADAS 7 1 5 Fazer chamadas através da Lista de Remarcação Pressione para aceder à lista de remarcação e pressione para selecionar o número que deseja remarcar Pressione para marcar o número selecionado que deseja remarcar 7 2 Atender uma Chamada Se o telefone não estiver na base de carregamento Quando o telefone tocar pressione para atender a chama...

Страница 164: ...tá ao telefone não o poderá ouvir Pressione outra vez para retirar o microfone do silêncio 7 5 Terminar uma Chamada Durante uma chamada pressione Opara terminar a chamada OU Pouse o telefone na base ou carregador para terminar a chamada 7 6 Bloqueio de Teclado LIGAR DESLIGAR Em inativo mantenha pressionado X para ligar o bloqueio do teclado O ícone aparecerá no LCD Para desbloquear o teclado mante...

Страница 165: ...locada em espera Se existir apenas um telefone registado na base este irá começar a tocar e pode ser atendido para iniciar a função de intercomunicador Se existirem dois ou mais telefones registados na base pressione o número de 1 a 4 para chamar o telefone associado a esse número o qual pode então atender a chamada para iniciar a função do intercomunicador Para terminar a função do intercomunicad...

Страница 166: ...e podendo então atender a chamada para iniciar a função do intercomunicador Para terminar a função do intercomunicador e regressar à chamada externa pressione Mpara apresentar INTERCOM e em seguida pressione Moutra vez Para transferir a chamada externa para a base ou para outro telefone pressione O Conversar Desligado 8 AGENDA TELEFÓNICA O seu telefone pode armazenar até 100 entradas de agenda tel...

Страница 167: ... 6uma vez para introduzir o m 8 2 Apagar uma Entrada da Agenda Telefónica Prima M e para selecionar AGENDA PHONEBOOK Prima novamente Mpara exibir TODOS CONT All CONTACTS Prima novamente M para aceder à agenda Prima para selecionar a entrada pretendida na agenda Prima M e para selecionar EXCLUIR DELETE Prima M para confirmar 8 3 Adicionar uma entrada da agenda à lista VIP Prima M e para selecionar ...

Страница 168: ...introduza a informação do ano Os últimos dois dígitos do ano irão piscar para introduzir o ano Pressione M e depois introduza a informação da data de acordo com o formato DD MM YY DD MM AA ou MM DD YY MM DD AA A data terá o formato que definiu Pressione M para confirmar 9 2 Configurações do Telefone 9 2 1 Alarme Pode usar este telefone para definir um alarme de relógio Quando um alarme é definido ...

Страница 169: ...ribuído ao telefone o próximo número de telefone disponível Este número de telefone é indicado no ecrã do telefone no modo standby 10 INDICAÇÃO DE QUEM ESTÁ A LIGAR DEPENDENTE DA REDE TELEFÓNICA 10 1 Lista de Chamadas Esta caraterística está disponível se subscreveu o serviço de Identificação da Linha de Quem Liga da sua companhia de telefones O seu telefone pode guardar até 50 chamadas recebidas ...

Страница 170: ...tirem registos na lista de chamadas Pressione para selecionar a entrada desejada OU Pressione M e para selecionar CALL LIST LISTA DE CHAMADAS Pressione M Pressione para selecionar a entrada desejada 11 BLOQUEADOR DE CHAMADAS CALL BLOCKER Se subscreveu o serviço de identificação de chamada pode usar a funcionalidade do bloqueador de chamadas para bloquear automaticamente determinadas chamadas adici...

Страница 171: ...a selecionar DESLIGADO OFF BLOQ TODAS BLOCK ALL PERMITIR VIP ALLOW VIP ou BLOQ LISTA BLOCK BLIST Prima M para confirmar Se DESLIGADO OFF estiver selecionado a configuração está concluída e todas as chamadas serão recebidas normalmente Se BLOQ TODAS BLOCK ALL PERMITIR VIP ALLOW VIP ou BLOQ LISTA BLOCK BLIST estiverem selecionadas aparecerá SEMPRE LIG ALWAYS ON Prima M se pretender que o modo de blo...

Страница 172: ...a rever o número e o nome da entrada selecionada na lista negra Se o número tiver mais de 12 dígitos prima para ver os outros dígitos 11 4 Apagar todas as entradas da lista negra Prima M e para exibir BLOQ CHAM CALL BLOCKER Prima M para exibir LISTA NEGRA BLACK LIST Prima M duas vezes e depois para exibir APAGAR TUDO DELETE ALL Prima M para exibir CONFIRM CONFIRM Prima M para confirmar Todas as en...

Страница 173: ...RAV CHEIO TAM FULL alternadamente com o nome do telefone e terá de apagar mensagens antes de serem gravadas novas Quando o atendedor de chamadas estiver cheio será apenas reproduzida a sua mensagem de saída de APENAS RESP Answer Only e a pessoa que lhe telefonou não poderá deixar uma mensagem 12 1 Ligar Desligar o atendedor de chamadas Pode ligar ou desligar o atendedor de chamadas usando o telefo...

Страница 174: ...a exibir SEC ELET ANS MACHINE Prima M para exibir REP MSG MSG PLAYBACK Prima M para começar a reprodução de mensagens através do seu altifalante Nota O ecrã mostra a data e a hora a que a mensagem foi gravada bem como um símbolo no topo do ecrã se for uma mensagem nova Para opções durante a reprodução Prima para aumentar ou diminuir o volume da reprodução Prima M e para as opções PARAR STOP para p...

Страница 175: ...entar apagar 12 4 Configurações do atendedor de chamadas 12 4 1 Definir o modo de atendimento Pode selecionar RESP GRAV ANS REC o modo por defeito se pretende que as pessoas que lhe telefonam possam deixar uma mensagem ou o modo APENAS RESP ANSWER ONLY se não quer que as pessoas que lhe telefonam deixem uma mensagem no atendedor de chamadas No modo de repouso prima M e para exibir SEC ELET ANS MAC...

Страница 176: ... para exibir SEC ELET ANS MACHINE Prima M e para exibir DEF TAM TAM SETTINGS Prima M e para exibir DEF OGM OGM SETTINGS Prima M e para selecionar RESP GRAV ANS REC ou APENAS RESP ANSWER ONLY Prima M e para exibir GRAVAR MSG RECORD MESS Prima M para começar a gravar a sua mensagem pessoal de saída OGM e GRAVANDO RECORDING é exibido no ecrã Prima M para parar e guardar a sua mensagem pessoal de saíd...

Страница 177: ...04EUK06045 VT04EEU06045 ENTRADA 100 240VAC 50 60HZ 150MA SAÍDA 6VDC 450MA TENPAO S003IB0600045 S003IV0600045 ENTRADA 100 240VAC 50 60HZ 150MA SAÍDA 6VDC 450MA RJ AS060450B001 RJ AS060450E002 ENTRADA 100 240VAC 50 60HZ 150MA SAÍDA 6VDC 450MA INFORMAÇÃO DA PILHA TIPO NI MH PILHA RECARREGÁVEL 400MAH 2 X 1 2V AAA 14 LIMPEZA E CUIDADO Não limpe nenhuma peça do seu telefone com benzeno diluentes ou outr...

Страница 178: ...a telefónica e a fonte de alimentação elétrica Empacote todas as peças do seu sistema de telefone usando a embalagem original Devolva a unidade à loja onde a comprou assegurando se de que leva consigo o seu recibo de compra Lembre se de incluir o adaptador principal 15 2 Depois de a Garantia ter expirado Se a unidade já não estiver coberta pela garantia contate nos através de www aegtelephones eu ...

Страница 179: ... esta situação Alguns dos materiais do produto podem ser reutilizados se os levar para o ponto de reciclagem Ao reutilizar algumas das peças ou matérias primas de produtos usados está a fazer uma contribuição importante para a proteção do ambiente Por favor contate as suas autoridades locais no caso de precisar de mais informação sobre os pontos de coleta na sua área As pilhas têm de ser removidas...

Страница 180: ...natone Communication Europe Bosstraat 54 4 3560 Lummen Belgium 2017 Binatone Electronics International Limited All rights reserved Subject to availability Rights of modification reserved AEG is a registered trademark used under license from AB Electrolux publ www aegtelephones eu ...

Отзывы: