COMPETENCE D5701-
5
Built-in Electric Multifunction Double Oven
Installation and Operating Instructions
PERFEKT IN FORM UND FUNKTION
12.00
Страница 1: ...COMPETENCE D5701 5 Built in Electric Multifunction Double Oven Installation and Operating Instructions PERFEKT IN FORM UND FUNKTION 12 00 ...
Страница 2: ...ave the grill pan handle in position when grilling as it will become hot Always support the grill pan when it is in the withdrawn or partially withdrawn position During use the appliance becomes hot Care should be taken to avoid touching heating elements inside the oven Ensure that all vents are not obstructed to ensure ventilation of the oven cavity Never line any part of the appliance with foil ...
Страница 3: ...rt 26 Pizza 27 Using Pizza 27 Things To Note 27 Hints And Tips 27 Rotitherm Roasting 28 Using Rotitherm Roasting 28 Things To Note 28 Hints And Tips 29 Rotitherm Roasting Chart 29 Speedcook 30 Using Speedcook 30 Selecting Speedcook 30 Things To Note 30 Fan Controlled Defrosting 31 Using Fan Controlled Defrosting 31 Things To Note 31 Hints And Tips 31 Care and Cleaning 32 Cleaning Materials 32 Clea...
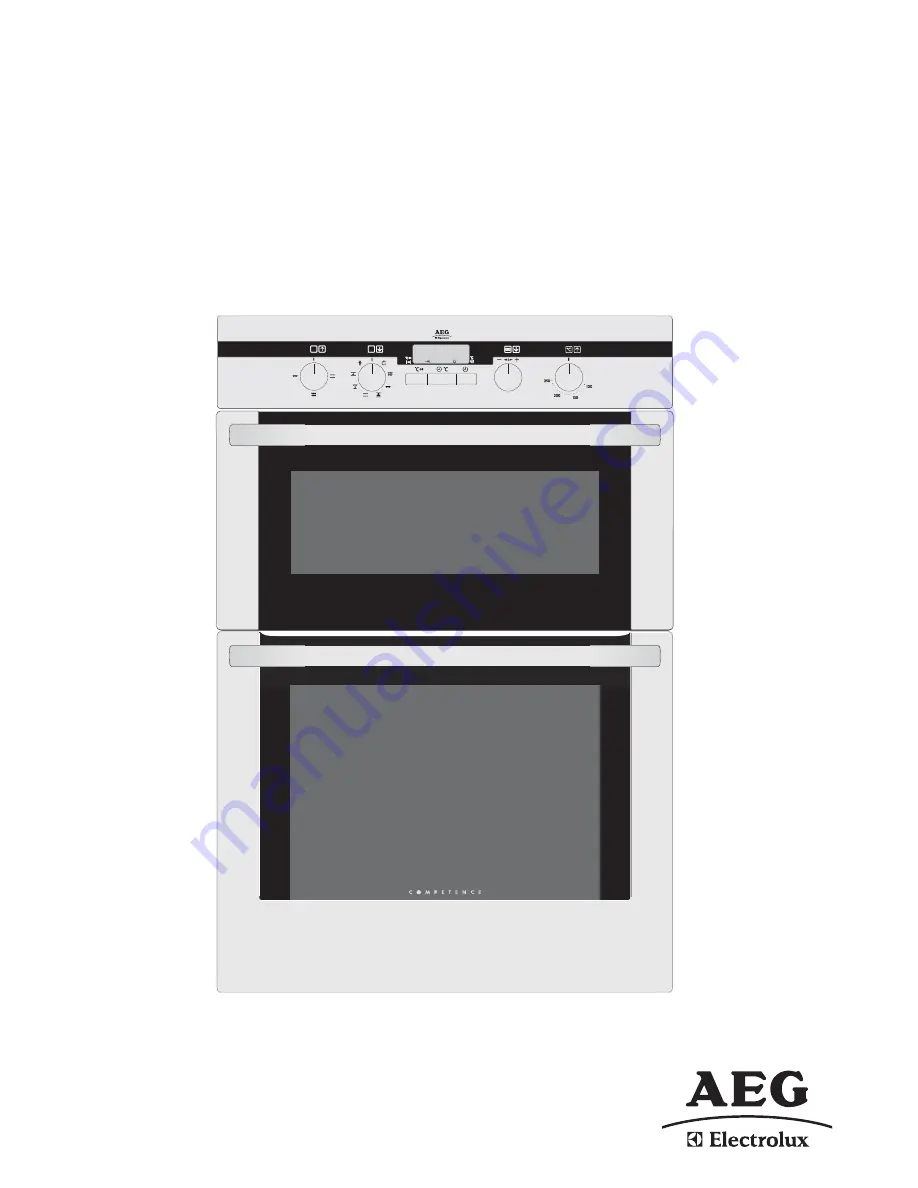
Страница 4: ...CTION DOUBLE OVEN Your built in oven comprises of a conventional second oven and dual grill in the top compartment The multifunction oven can be automatically controlled by the electronic timer 12 00 Electronic Timer Main Oven Control Panel Second Oven Grill ...
Страница 5: ...sion Fan Cooking Conventional Cooking Rotitherm Roasting Pizza Fan Controlled Defrosting D Multifunction Selector Neon E Electronic Timer F Main Oven Temperature Neons G Main Oven Increase Decrease Selector H Main Oven Increase Decrease Selector Neon I Second Oven Temperature Control J Second Oven Temperature Control Neon K Speedcook Button L Time Temperature Button M Time Selector Button 12 00 B ...
Страница 6: ...itted with telescopic runners in the grill and main oven To fit the shelf into the telescopic runner 1 Ensure the telescopic runners are pushed back into the oven cavity before fitting the shelf 2 Holding the front edge of the shelf with both hands place the rear shelf forms over the telescopic runners 3 Slide the shelf into position lifting slightly at the front so that the shelf locates into the...
Страница 7: ...rate as the instructions indicate the controls have been incorrectly set Return all controls to zero and reset following the instructions for the required setting POP IN POP OUT CONTROLS These control knobs can remain flush with the control panel when not in use or pushed and released to stand out from the panel for easy operation CONDENSATION AND STEAM When food is heated it produces steam simila...
Страница 8: ... will operate slowly at first and then more rapidly 2 HOW TO SET THE COUNTDOWN The Countdown gives an audible reminder at the end of any period of cooking This cooking period may be up to 99 mins It is not part of the automatic control To set press the Time Selector button until the Countdown indicator neon is illuminated the display reads 0 00 as Fig 3 To set the correct time duration turn the ma...
Страница 9: ... To set the length of cooking time press the Time Selector button until the Cook Time indicator neon is illuminated Turn the main oven increase decrease selector until the required length of cooking time is displayed e g 2 hrs 15 mins as Fig 7 v The maximum cooking time is 9 59 hours vi Release the buttons The Cook Time indicator neon will be illuminated Remember this must be completed within 5 se...
Страница 10: ... as Fig 11 vii To return the display to the time of day press the Time Temperature button NOTE The Multifunction Selector neon and the main oven Increase Decrease Selector neon will remain illuminated during programme 4 TO CANCEL AN AUTOMATIC PROGRAMME i To cancel an automatic programme press the Time Selector button until the Cook Time indicator neon flashes Turn the main oven increase decrease s...
Страница 11: ...s not to be consumed immediately Always ensure food in the oven has been covered before cooking if it is not possible to remove food immediately after cooking OTHER FUNCTIONS SWITCHING OFF THE DISPLAY You can save energy by switching off the clock display SWITCHING OFF THE CLOCK DISPLAY 1 Turn the main oven increase decrease selector to the right and hold it 2 In addition press the Time Selector b...
Страница 12: ...oven increase decrease selector to the left and hold it In addition press the Time Selector button until SAFE disappears from the display The child safety device is now deactivated and the oven is again ready for use OVEN SAFETY CUT OUT If not switched off after a certain time or if the temperature is not modified the oven switches off automatically The last temperature set flashes in the temperat...
Страница 13: ...the grill pop out and turn the second oven grill function selector for full grill Pop out and turn the second oven grill function selector for centre section only Turn the temperature control knob to the right as far as it will go This is the hottest setting To use the grill at lower settings turn the temperature control knob so that 110 C or 150 C on the panel lines up with the 0 on the knob THIN...
Страница 14: ...pan can be withdrawn on the shelf HINTS AND TIPS Most foods should be placed on the grid in the grill pan to allow maximum circulation of air to lift the food out of the fats and juices Adjust the grid and grill pan runner position to allow for different thicknesses of food Position the food close to the element for faster cooking and further away for more gentle cooking Food should be thoroughly ...
Страница 15: ...ns in total Bacon Rashers 5 6 Beefburgers 10 15 Chicken Joints 30 40 Chops Lamb 15 20 Pork 20 30 Fish Whole Trout Mackerel 15 25 Fillets Plaice Cod 10 15 Kebabs 20 30 Kidneys Lamb Pig 8 12 Liver Lamb Pig 10 20 Sausages 20 30 Steaks Rare 6 12 Medium 12 16 Well Done 14 20 Toasted Sandwiches Adjust grill setting and grill pan grid to suit different thicknesses of food 3 4 The times quoted above are g...
Страница 16: ...e required setting THINGS TO NOTE The oven light will illuminate The indicator neon will glow It may turn ON and OFF during use to show that the setting is being maintained The cooling fan for the controls may operate after a time Do not place dishes tins or baking trays directly onto the oven base as it becomes very hot and damage may occur TO FIT THE SECOND OVEN SHELF The shelf should be fitted ...
Страница 17: ...oven base and to help reduce cleaning The material and finish of the baking tray and dishes used will affect base browning Enamelware dark heavy or non stick utensils increase base browning Shiny aluminium or polished steel trays reflect the heat away and give less base browning Do not place baking trays directly on the oven base as it interferes with the oven air circulation and can lead to base ...
Страница 18: ...anufacturer s instructions Fish 1 170 190 20 30 Fish Pie Potato Topped 1 190 200 20 25 Fruit Pies Crumbles 1 190 200 40 50 Milk Puddings 1 140 150 1 2h Pasta Lasagne etc 1 170 180 40 45 Pastry Choux 1 180 190 30 35 Eclairs Profiteroles 1 170 180 20 30 Flaky Puff Pies 1 210 220 25 40 Shortcrust Mince Pies 1 190 200 15 20 Meat Pies 1 190 210 25 35 Quiche Tarts Flans 1 180 200 25 45 Roasting Meat Pou...
Страница 19: ...elector to Ventitherm Precision Fan Cooking Wait 5 seconds until your choice is confirmed The temperature will automatically set to 150 C If you wish to alter the set temperature you may do so by pushing out and turning the main oven increase decrease selector until the required temperature setting is reached THINGS TO NOTE If it is necessary to reach the required temperature in a shorter time the...
Страница 20: ...y located before using Note Should you wish to purchase a telescopic runner kit this can be ordered from your local Service Force Centre by quoting part number BAZ D02 HINTS AND TIPS Arrange the shelves in the required positions before switching the oven ON Shelf positions are counted from the bottom upwards When cooking more than one dish in the fan oven place dishes centrally on different shelve...
Страница 21: ...is reached THINGS TO NOTE If it is necessary to reach the required temperature in a shorter time the Speedcook Function can be used See Speedcook Function section When the required temperature is reached the three temperature indicator neons on the timer display will illuminate and an audible signal will sound The multifunction selector indicator neon and the main oven increase decrease selector n...
Страница 22: ...nt room around the baking tray or dish to allow for maximum circulation Stand dishes on a suitably sized baking tray on the shelf to prevent spillage onto the oven base and to help reduce cleaning The material and finish of the baking tray and dishes used will affect the degree of base browning Enamelware dark heavy or non stick utensils increase base browning Shiny aluminium or polished steel tra...
Страница 23: ...20 30 Madeira 140 150 2 160 170 1 1 h Rich Fruit 130 140 2 150 160 2 2 h Christmas 130 140 1 130 140 3 4 h depends on size Convenience Foods Follow manufacturer s instructions Fish 170 190 2 170 190 20 30 Fruit Pies and Crumbles 190 200 3 190 200 40 60 Milk Puddings 130 140 3 130 140 1 2h Pastry Choux 190 200 2 160 170 30 35 Shortcrust 190 200 3 190 200 15 20 Flaky 210 220 3 210 220 25 40 Puff 210...
Страница 24: ... to 3 kg 7lb then 10 minutes per kg 1lb over 3 kg 7lb Duck 160 180 C 25 35 minutes per kg 1lb and 25 30 minutes over Pheasant 160 180 C 35 40 minutes per kg 1lb and 35 40 minutes over Rabbit 160 180 C 20 minutes per kg 1lb and 20 minutes over The roasting temperatures and times given in the chart should be adequate for most joints but slight adjustments may be required to allow for personal requir...
Страница 25: ... so by pushing out and turning the main oven increase decrease selector until the required temperature setting is reached THINGS TO NOTE When the required temperature is reached the three temperature indicator neons on the timer display will illuminate and an audible signal will sound The multifunction selector indicator neon and the main oven increase decrease selector indicator neon will glow Th...
Страница 26: ...id when grilling meats When toasting bread we suggest that the top runner position is used with the grid in its high position Preheat the grill on full setting for a few minutes to seal meat or for toasting Adjust the heat setting and the shelf position as necessary during cooking The food should be turned over during cooking as required GRILLING CHART FOOD SHELF GRILL TIME mins in total Bacon Ras...
Страница 27: ...il the oven has reached the desired temperature and then stop When the oven has been switched off the bars that are still lit indicate the remaining residual heat in the oven The cooling fan for the controls may operate after a time The oven light will illuminate If an automatic programme has been set the oven fan and light do not come on until cooking begins Some internal noise may be heard durin...
Страница 28: ...selector to Rotitherm Roasting Wait 5 seconds until your choice is confirmed The temperature will automatically set to 180 C If you wish to alter the set temperature you may do so by pushing out and turning the main oven increase decrease selector until the required temperature setting is reached THINGS TO NOTE If it is necessary to reach the required temperature in a shorter time the Speedcook Fu...
Страница 29: ...lasagne etc are piping hot throughout before serving A temperature range of 140 C 220 is suitable for most foods Be prepared to make suitable adjustments during cooking to suit individual requirements If Rotitherm Roasting on more than one level it may be necessary to interchange the food on the shelves during cooking ROTITHERM ROASTING CHART FOOD SHELF TEMP C TIME mins In total Bacon Rashers 4 20...
Страница 30: ...and temperature as explained in the previous pages Press the Speedcook control button The Speedcook neon will illuminate and the temperature indicator neons C will flash When the required temperature is reached the three temperature indicator neons on the timer display will illuminate and an audible signal will sound The Speedcook neon will go out The selected cooking function will resume THINGS T...
Страница 31: ...perature On warm days defrosting will be faster than on cooler days It is preferable to thaw fish meat and poultry slowly in the fridge However this process can be accelerated by using the defrost function Small or thin fish fillets frozen peeled prawns cubed or minced meat liver thin chops steaks etc can be thawed in 1 2 hours A 1kg 2 lb oven ready chicken will be thawed in approximately 5 hours ...
Страница 32: ...Stainless Steel cream cleaners are abrasive and should be avoided as they may dull the surface finish Any spillage on the stainless steel finish must be wiped off immediately Do not attempt to remove any of the control knobs from the panel as this may cause damage and is a safety hazard Under no circumstances should the door assembly be detached from the product for cleaning REMOVING AND REPLACING...
Страница 33: ...n hour or two per week to ensure continued good performance from the Stayclean finish Slight discolouration and polishing of the Stayclean surfaces may occur in time This DOES NOT affect the Stayclean properties in any way Use minimal if any extra oil or fat when roasting meat potatoes only require brushing with fat before cooking Extra fat in the oven during roasting will increase splashing and s...
Страница 34: ...cation points under the handle With your other hand hold the outer door to ensure it does not spring shut on removing the inner panel 5 Close the oven door If the door glass panel becomes chipped or has deep scratches the glass will be weakened and must be replaced to prevent the possibility of the panel shattering Please contact your local Service Force Centre who will be pleased to advise furthe...
Страница 35: ...grid and oven shelves may be cleaned using a soap impregnated steel wool pad Soaking first in hot soapy water will make cleaning easier REPLACING AN OVEN LIGHT BULB MAIN OVEN Disconnect the appliance from the electricity supply before replacing the bulb The type of bulb required is a 300 C 25 watt small Edison Screw 1 Make sure the appliance is cool before replacing the bulb 2 Open the door and re...
Страница 36: ... Make sure the appliance is cool before replacing the bulb 2 Open the door and remove the shelves and wirework runners 3 Remove the glass cover by turning it to the left 4 Unscrew the bulb by turning it to the left 5 Fit a new bulb and then replace the glass bulb cover 6 Refit the wirework runners and replace the oven shelves 7 Restore the electricity supply and reset the time of day ...
Страница 37: ... time Ensure the cooling fan is running when the grill is on If the cooling fan fails the grill will not operate correctly Contact your local Service Force Centre Leave the grill door open and allow the grill to cool After a couple of hours check that the grill works as normal The timer does not work Check that the instructions for the operation of the timer are being closely followed The indicato...
Страница 38: ...lear and concise details of the fault 4 The model and serial number of the appliance found on the rating plate 5 The purchase date Please note that a valid purchase receipt or guarantee documentation is required for in guarantee service calls For Customer Service in Ireland please contact us at the address below AEG Electrolux Electrolux Group Irl Ltd Long Mile Road Dublin 12 Republic of Ireland T...
Страница 39: ...Repairs carried out under guarantee do not extend the guarantee period for the appliance Parts removed during guarantee repairs become the property of AEG Electrolux 6 The Purchaser s statutory rights are not affected by this guarantee European Guarantee If you should move to another country within Europe then your guarantee moves with you to your new home subject to the following qualifications T...
Страница 40: ...Wattage 5 8 6 3kW Height 897 mm Width 592 mm Depth 563 mm excluding handles and knobs Weight 59kg This appliance complies with European Council Directive 73 23 EEC EMC Directive 89 336 EEC CE Marking Directive 93 68 EEC Energy Label Directive 2002 40 EC ...
Страница 41: ...d dimensions as shown Fig 3 If your cabinet interior dimension is between 565 570mm the oven may still be fitted However a minor modification to the cabinet will be required to reduce the aperture size down to 560 565 mm to allow the product to be securely screwed into the cabinet The dimensions given provide adequate air circulation around the unit within the cabinet ensuring compliance with BS E...
Страница 42: ...int See Fig 2 NOTE It is good practice to Fit an Earth Leakage Circuit Breaker to your house wiring Wire your appliance to the latest IEE regulations PREPARING CABINET FOR FITTING OF OVEN Make sure that the cabinet is the correct size for the appliance to be fitted Ref Fig 3 If the size is between 565 570mm then the cabinet should be modified so that at the screw fixing points the recommended dime...
Страница 43: ...43 RECOMMENDED CABINET DIMENSIONS IN MILLIMETRES Fig 3 Built In Installation Cross section through cabinet showing oven positioned ...
Страница 44: ...er is given these operating instructions Important Switch off at the mains miniature circuit breaker and if appropriate remove fuse before commencing any electrical work TO REMOVE COVER OF MAINS TERMINAL From the rear of the appliance remove mains input terminal cover to gain access to terminal block First remove retaining screw with pozidrive screwdriver See Fig 4 Prise cover loose using screwdri...
Страница 45: ... each one in turn Clamp the mains cable securely ensuring 5mm of the outer insulation is inside the terminal block and that the wires are not taught but not so slack as to cause any fouling See Fig 7 Place fuse miniature circuit breaker in circuit and switch on at mains CHECKING ELECTRICAL CONNECTIONS Correct electrical connection can be confirmed when switching on the appliance as the timer will ...
Страница 46: ...either side of the appliance b Tilt the appliance so that your hands can support the underside of the appliance c Keeping your back straight raise the appliance to the correct height by straightening at the knees d Rest the rear underside of the appliance on the cabinet floor while your hands support the front e The appliance can be pushed fully into the cabinet Take care to avoid fouling the main...
Страница 47: ...NOTES 47 ...
Страница 48: ...e This instruction booklet is accurate at the date of printing but will be superseded if specifications or appearance are changed AEG ELECTROLUX MAJOR APPLIANCES ADDINGTON WAY LUTON BEDFORDSHIRE LU4 9QQ TELEPHONE 0870 5 350350 To buy accessories consumables and spare parts at our online shop please visit http www aeg electrolux co uk Part Number 311807800 ...