background image

REVISION DATE

20191206

DOCUMENT NUMBER

TERMS OF USE:

 Automotive Data Solutions Inc. (“ADS”) products are strictly intended for installation by 

Certified Technicians who are employed by a registered business specialized in the installation of auto-

motive aftermarket electronics products. Prior to beginning installation of an ADS product in a vehicle, 

it is the Certified Technician’s responsibility to review the most current Product Guide, Install Guide 

and vehicle-specific notes available in Weblink®. ADS is not responsible for any damages whatsoever, 

including but not limited to any consequential damages, incidental damages, damages for loss of time, 

loss of earnings, loss of profit, commercial loss, loss of economic opportunity and the like that may or 

may not have resulted from the use, misuse, improper installation or operation of its products. ADS 

reserves itself the right to suspend any Weblink® account without notice and decline to offer technical 

support to non-Certified Technicians, non-compliant Certified Technicians or end users.

BEFORE INSTALLATION

1- Connect module to computer

2- Login to Weblink account

3- Flash firmware to module (module is not preloaded with firmware)

4- Use accessories accordingly (accessories are sold separately)

Patent No. US 8,856,780 CA 2759622

INSTALL GUIDE

COM-GM(RS)-GM7-[FT-GM7-DC]-EN

HARDWARE

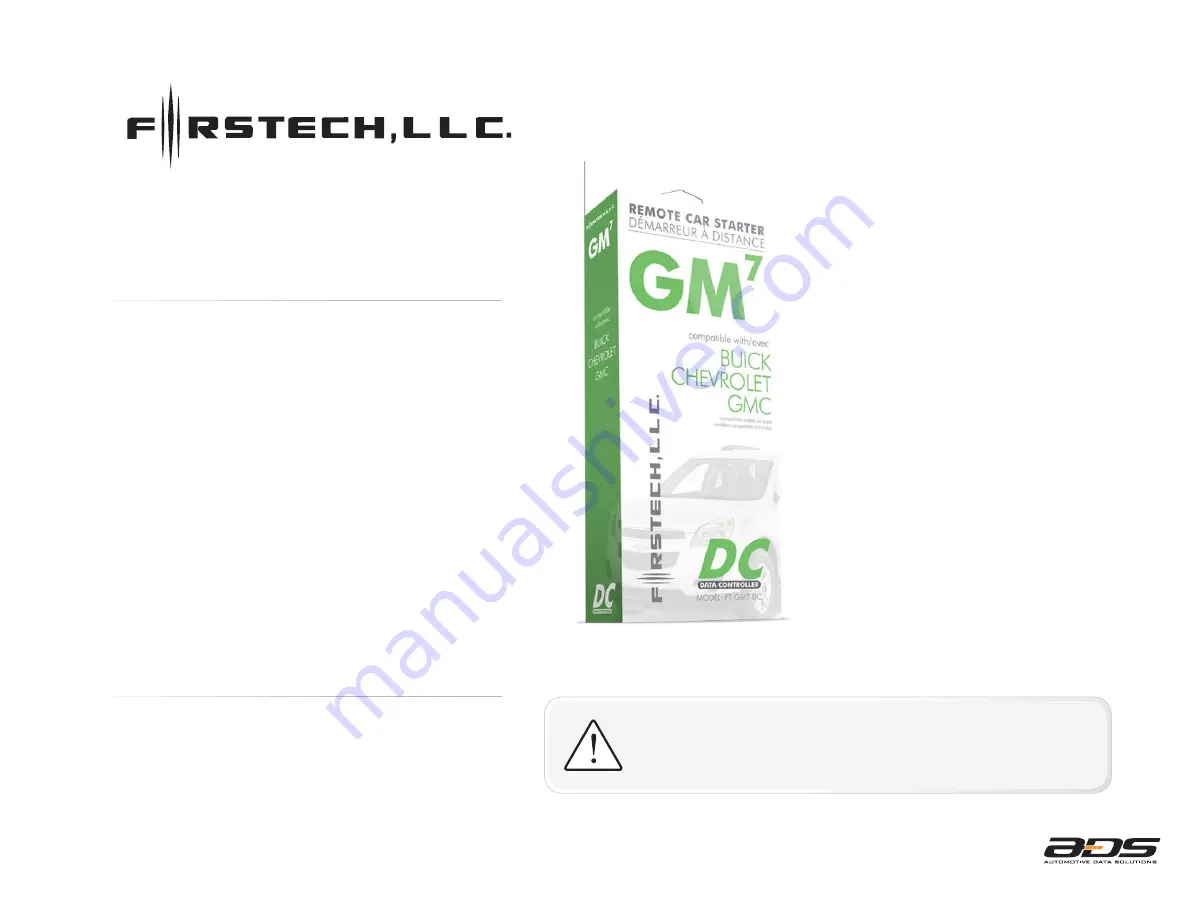
FT-GM7-DC

ACCESSORIES

ADS-USB (REQUIRED)

COMPATIBLE RF-KIT (OPTIONAL) 

DRONE MOBILE DR-2000 (OPTIONAL) 


FIRMWARE

COM-GM(RS)-GM7-[FT-GM7-DC]

compustar.idatalink.com

Automotive Data Solutions Inc. © 2019

68188

Содержание Firstech FT-GM7-DC

Страница 1: ...nings loss of profit commercial loss loss of economic opportunity and the like that may or may not have resulted from the use misuse improper installation or operation of its products ADS reserves itself the right to suspend any Weblink account without notice and decline to offer technical support to non Certified Technicians non compliant Certified Technicians or end users BEFORE INSTALLATION 1 C...

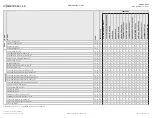
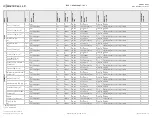
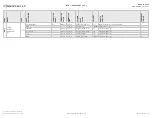
Страница 2: ...T 10 17 1 Impala Flip Key AT 14 16 1 Malibu Malibu Limited Flip Key AT 13 16 1 Orlando Flip Key AT 11 14 1 Silverado 1500 STD Key with OnStar AT 14 16 2 Silverado 1500 STD Key without OnStar AT 14 16 3 Silverado 2500HD STD Key with OnStar AT 15 16 2 Silverado 2500HD STD Key without OnStar AT 15 16 3 Silverado 3500HD STD Key with OnStar AT 15 16 2 Silverado 3500HD STD Key without OnStar AT 15 16 3 ...

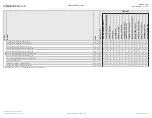
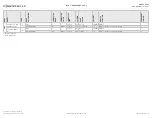
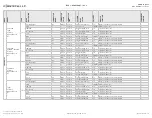
Страница 3: ...Star AT 15 16 1 Canyon STD Key without OnStar AT 15 16 4 Sierra 1500 STD Key with OnStar AT 14 16 2 Sierra 1500 STD Key without OnStar AT 14 16 3 Sierra 2500HD STD Key with OnStar AT 15 16 2 Sierra 2500HD STD Key without OnStar AT 15 16 3 Sierra 3500HD STD Key with OnStar AT 15 16 2 Sierra 3500HD STD Key without OnStar AT 15 16 3 Terrain Flip Key AT 10 17 1 Yukon STD Key AT with OnStar AT 15 16 2 ...

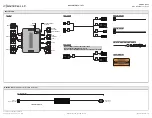
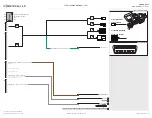
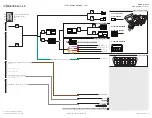
Страница 4: ...LE WARNING STICKER 10 PIN CONNECTOR 12 PIN CONNECTOR BLUE PROGRAMMING BUTTON LED 2 LED 1 MODULE BLACK BLACK BLACK RF PORT WEBLINK PORT BLACK BLUE TELEMATIC PORT WHITE THE ADS HRN RS GMC07 2 CABLE IS INCLUDED IN KITS MANUFACTURED AFTER 07 01 2015 CONTACT YOUR AUTHORIZED DEALER IF THIS CABLE IS NOT INCLUDED WEBLINK CABLE required accessory sold separately WEBLINK CABLE COMPUTER USB PORT 4 PIN BLACK ...

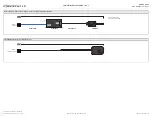
Страница 5: ... 26 20191206 COMPATIBLE ACCESSORIES 1 OF 1 RF KIT RF KIT Visit our website to see if this accessory is included with your product ANTENNA FLASH RF DECODER BEFORE INSTALLATION RF DECODER BLUE CABLE BLACK CABLE NC RED NC BLACK BLACK BLUE MODULE RF PORT MODULE TELEMATIC PORT DRONE NC TELEMATIC KIT accessory sold separately DOC 68188 ...

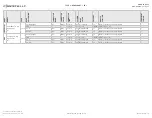
Страница 6: ...te 26 pin 22 Green Gray BCM left side of steering column Cruze Cruze Limited Flip Key AT 10 16 Swc 16 pin 01 Green DATA OBDII Parking Light X1 White 26 pin 22 Green Gray BCM left side of steering column Equinox Flip Key AT 10 17 Swc 16 pin 01 Green DATA OBDII Parking Light X1 White 26 pin 22 LtBlue BCM left side of steering column Impala Impala Limited Flip Key AT 14 16 Swc 16 pin 01 Green DATA OB...

Страница 7: ...D Key with OnStar AT 15 16 Swc 16 pin 01 Green DATA OBDII Parking Light X1 White 26 pin 22 Green Gray BCM left side of steering column Terrain Flip Key AT 10 17 Swc 16 pin 01 Green DATA OBDII Parking Light X1 White 26 pin 22 LtBlue BCM left side of steering column Early production Late production compustar idatalink com Automotive Data Solutions Inc 2019 COM GM RS GM7 FT GM7 DC EN PAGE 7 OF 26 201...

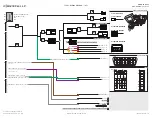
Страница 8: ... 17 18 01 02 03 04 05 06 TELEMATIC PORT RF PORT WEBLINK PORT GREEN WHITE SWC DATA OUTPUT PARKING LIGHT SWC DATA 01 TYPE 1 WIRING DIAGRAM 1 OF 1 VEHICLE IGNITION SWITCH OBDII CONNECTOR 04 GRAY WHITE HOOD STATUS INPUT 01 BROWN BLACK PARKING LIGHT OUTPUT 06 PURPLE GREEN NC 08 BLUE GREEN NC 12 DKGREEN GREEN NC 11 GRAY GREEN HORN OUTPUT 02 GRAY NC A1 PK3 CONNECTOR B1 IGNITION CONNECTOR A2 PK3 HARNESS B...

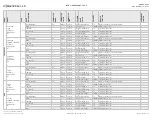
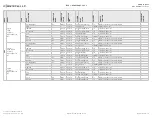
Страница 9: ...en 06 pin 03 Purple Yellow Ignition connector 12V Green 06 pin 04 Red Blue Ignition connector Mux Green 06 pin 05 White Purple MUX Ignition connector Tahoe STD Key with OnStar AT 15 16 Parking Light X1 White 26 pin 22 LtGreen Gray BCM left side of steering column SWC 16 pin 01 Green DATA OBDII connector Ignition Green 06 pin 02 Purple Black Ignition connector Accessory Green 06 pin 03 Purple Yello...

Страница 10: ...Light X1 White 26 pin 22 LtGreen Gray BCM left side of steering column SWC 16 pin 01 Green DATA OBDII connector Ignition Green 06 pin 02 Purple Black Ignition connector Accessory Green 06 pin 03 Purple Yellow Ignition connector 12V Green 06 pin 04 Red Blue Ignition connector Mux Green 06 pin 05 White Purple MUX Ignition connector compustar idatalink com Automotive Data Solutions Inc 2019 COM GM RS...

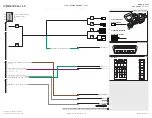
Страница 11: ...NECTOR B1 IGNITION CONNECTOR B1 IGNITION CONNECTOR A2 PK3 HARNESS B2 IGNITION HARNESS TYPE 2 WIRING DIAGRAM 1 OF 1 01 BROWN BLACK PARKING LIGHT OUTPUT 08 BLUE GREEN NC 11 GRAY GREEN HORN OUTPUT 02 GRAY NC 06 PURPLE GREEN NC 12 DKGREEN GREEN NC 01 02 03 05 06 07 08 09 10 04 GRAY WHITE HOOD STATUS INPUT IGNITION 02 IGNITION 02 ACCESSORY 03 ACCESSORY 03 12V 04 12V 04 MUX 05 MUX 05 PINK PINK BROWN BRO...

Страница 12: ... Ignition connector Lock X2 Blue 27 pin 19 Brown Yellow BCM left side of steering column Unlock X2 Blue 27 pin 15 Brown White BCM left side of steering column Suburban STD Key without Onstar AT 15 16 Parking Light X1 White 26 pin 22 LtGreen Gray BCM left side of steering column SWC 16 pin 01 Green DATA OBDII connector Ignition Green 06 pin 02 Purple Black Ignition connector Accessory Green 06 pin ...

Страница 13: ...ing column SWC 16 pin 01 Green DATA OBDII connector Ignition Green 06 pin 02 Purple Black Ignition connector Accessory Green 06 pin 03 Purple Yellow Ignition connector 12V Green 06 pin 04 Red Blue Ignition connector Mux Green 06 pin 05 White Purple MUX Ignition connector Lock X2 Blue 27 pin 19 Brown Yellow BCM left side of steering column Unlock X2 Blue 27 pin 15 Brown White BCM left side of steer...

Страница 14: ...OR A1 PK3 CONNECTOR B1 IGNITION CONNECTOR B1 IGNITION CONNECTOR A2 PK3 HARNESS B2 IGNITION HARNESS TYPE 3 WIRING DIAGRAM 1 OF 1 01 BROWN BLACK PARKING LIGHT OUTPUT 08 BLUE GREEN NC 11 GRAY GREEN HORN OUTPUT 02 GRAY NC UNLOCK 15 LOCK 19 06 PURPLE GREEN LOCK OUTPUT 12 DKGREEN GREEN UNLOCK OUTPUT BCM X2 BLUE 01 02 03 05 06 07 08 09 10 04 GRAY WHITE HOOD STATUS INPUT IGNITION 02 IGNITION 02 ACCESSORY ...

Страница 15: ...nector Lock X2 Blue 27 pin 19 Brown Yellow BCM left side of steering column Unlock X2 Blue 27 pin 15 Brown White BCM left side of steering column GMC Canyon STD Key with OnStar AT 15 16 Parking Light X1 White 26 pin 22 Green Gray BCM left side of steering column SWC 16 pin 01 Green DATA OBDII connector Lock X2 Blue 27 pin 19 Brown Yellow BCM left side of steering column Unlock X2 Blue 27 pin 15 Br...

Страница 16: ... 04 05 06 TELEMATIC PORT RF PORT WEBLINK PORT GREEN WHITE SWC DATA OUTPUT PARKING LIGHT SWC DATA 01 VEHICLE IGNITION SWITCH OBDII CONNECTOR A1 PK3 CONNECTOR B1 IGNITION CONNECTOR A2 PK3 HARNESS B2 IGNITION HARNESS TYPE 4 WIRING DIAGRAM 1 OF 1 01 BROWN BLACK PARKING LIGHT OUTPUT 03 04 05 07 08 BLUE GREEN NC 09 10 11 GRAY GREEN HORN OUTPUT 02 GRAY NC UNLOCK 15 LOCK 19 06 PURPLE GREEN LOCK OUTPUT 12 ...

Страница 17: ...key into ignition Turn key to ON position Wait LED will flash GREEN rapidly Turn key to OFF position Remove key LED will turn solid RED Insert key into ignition Turn key to ON position LED will turn OFF Turn key to OFF position Remove key Insert key into ignition Turn key to ON position Wait LED will turn solid GREEN for 2 seconds Turn key to OFF position Module Programming Procedure completed comp...

Страница 18: ...ll remain functional See RF kit user manual for alternate valet mode programming Time restriction Complete next step within 7 seconds Cycle ignition ON five times 5x OFF ON rapidly Wait LED 1 will turn solid RED for 2 seconds Set ignition to OFF position Valet Mode Programming Procedure completed To exit valet mode repeat steps 1 to 5 compustar idatalink com Automotive Data Solutions Inc 2019 COM ...

Страница 19: ... ignition ON five times 5x OFF ON rapidly LED 1 will turn solid RED Time restriction Complete next step within 2 seconds from previous step Press once 1x on LOCK button of aftermarket remote LED 1 will flash GREEN once 1x LED 1 will turn solid RED To program additional remotes repeat steps 4 to 7 using each additional remote Wait LED 1 will turn OFF Set ignition to OFF position Aftermarket Remote P...

Страница 20: ...es LED 1 will flash RED an equal amount of times continuously TO ACCESS THE SETTINGS Press and hold programming button until LED 1 turns solid GREEN LED 1 will flash GREEN as many times as the current or default setting number continuously IN THE SETTINGS Press the programming button as many times as necessary to access your setting LED 1 will flash GREEN an equal amount of times continuously To retu...

Страница 21: ... AFTER SHUTDOWN 01 OFF 02 ON 04 FORCE UNLOCK ALL ON FIRST PRESS 01 OFF 02 ON 05 TAKEOVER 01 ENABLE 02 DISABLE 06 N A 01 N A 07 N A 01 N A 08 MODULE RUN TIME 01 03 MIN 02 05 MIN 03 10 MIN 04 15 MIN 05 25 MIN 06 30 MIN 07 35 MIN 08 15 MIN 09 WAIT TO START DELAY 01 02 SEC 02 05 SEC 03 08 SEC 04 10 SEC 05 15 SEC 06 20 SEC 07 25 SEC 08 30 SEC 10 N A 01 N A 11 N A 01 N A 12 N A 01 N A 13 N A 01 N A Vehi...

Страница 22: ...RN EVENT TRIGGER 01 DOUBLE LOCK 02 LOCK UNLOCK 03 LOCK UNLOCK START 04 DOUBLE LOCK START 15 HORN CHIRPS WIDTH 01 30 mSEC 02 15 mSec 03 60 mSec 02 07 Technical Support only 01 N A 01 N A Vehicle will shutdown when a door is opened compustar idatalink com Automotive Data Solutions Inc 2019 COM GM RS GM7 FT GM7 DC EN PAGE 22 OF 26 20191206 DOC 68188 ...

Страница 23: ...HUTDOWN ERROR CODES NOTES Y NUMBER OF PARKING LIGHT FLASHES DIAGNOSTIC I WARNING The following applies only when the parking lights are connected and supported by the system 01 Engine tach signal is lost 02 N A II If the engine shuts down after a remote starter sequence Press and hold the Trunk button and the Start button at the same time for 2 5 seconds when using a 1 WAY remote OR Press once 1x ...

Страница 24: ...correctly programmed Solid RED Module incorrectly programmed Flashing GREEN Module correctly programmed and operational Solid GREEN then OFF Reset in progress OFF Invalid ground when running status from remote starter III WITH IGNITION OFF Flashing RED Module incorrectly programmed or connected Solid RED Module not programmed Waiting for more vehicle information Flashing GREEN False ground when ru...

Страница 25: ... programming button while connecting the BLACK 20 PIN connector Wait LED 1 will flash RED RELEASE programming button LED 1 will turn RED for 2 seconds Module RESET completed Reconnect all connectors Repeat programming procedure Failure to follow procedure may result with a DTC or a CHECK ENGINE error message compustar idatalink com Automotive Data Solutions Inc 2019 COM GM RS GM7 FT GM7 DC EN PAGE ...

Страница 26: ...ions Repeat the test and call technical support if the problem persists 8 Press the START STOP button once 1x on the aftermarket keyfob to remote start vehicle Question 6 Does the vehicle remote start YES Go to next step NO Verify the remote programming the RF connections and check the remote start error codes Repeat the test and call technical support if the problem persists 9 Press the START STO...

Отзывы: