


26
Operating Instructions
5. Operating Instructions
5.1. Getting Started
Before installation, you must create an Ubuntu USB installation stick on a Windows PC. To install Ubuntu and ROS
on the NeuronBot, you need to connect a USB keyboard, mouse, and monitor to the DisplayPort connector. ROS
has many different distributions, each requiring a different Ubuntu version. For example, if you want to use ROS 1
Kinetic, you have to install Ubuntu 16.04. For ROS 1 Melodic, Ubuntu 18.04 is required. Confirm the ROS
distribution and required Ubuntu version before starting the development of your ROS application.
Refer to the ROS wiki (
http://wiki.ros.org/Distributions
) to find the right Ubuntu version for your ROS 1 application:
https://index.ros.org/doc/ros2/Releases/
to to find the right Ubuntu version for your ROS 2
application.
5.1.1. Ubuntu Installation
Follow the steps below to install Ubuntu on the NeuronBot.
1. Download an Ubuntu desktop image to your Windows PC:
a. Get ubuntu-18.04.4-desktop-amd64.iso from
https://releases.ubuntu.com/18.04/
b. Or, get ubuntu-20.04-desktop-amd64.iso from
https://releases.ubuntu.com/20.04/
2. Create a bootable Ubuntu USB installation stick on your Windows PC. Refer to the following tutorial:
https://ubuntu.com/tutorials/create-a-usb-stick-on-windows
3. Insert the USB stick into the NeuronBot and power it on.
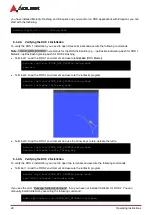
4. When the ADLINK logo appears onscreen, press the Delete key to enter the BIOS menu.