
www.adeept.com
64
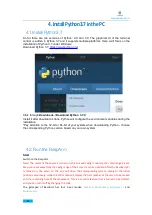
4.InstallPython3.7inthePC
4.1.Install Python3.7
So far there are two versions of Python: 2.X and 3.X. The graphical UI of the terminal
control is written in Python 3.7 and it supports multiple platforms. Here we'll focus on the
installation of Python 3.7 under Windows.
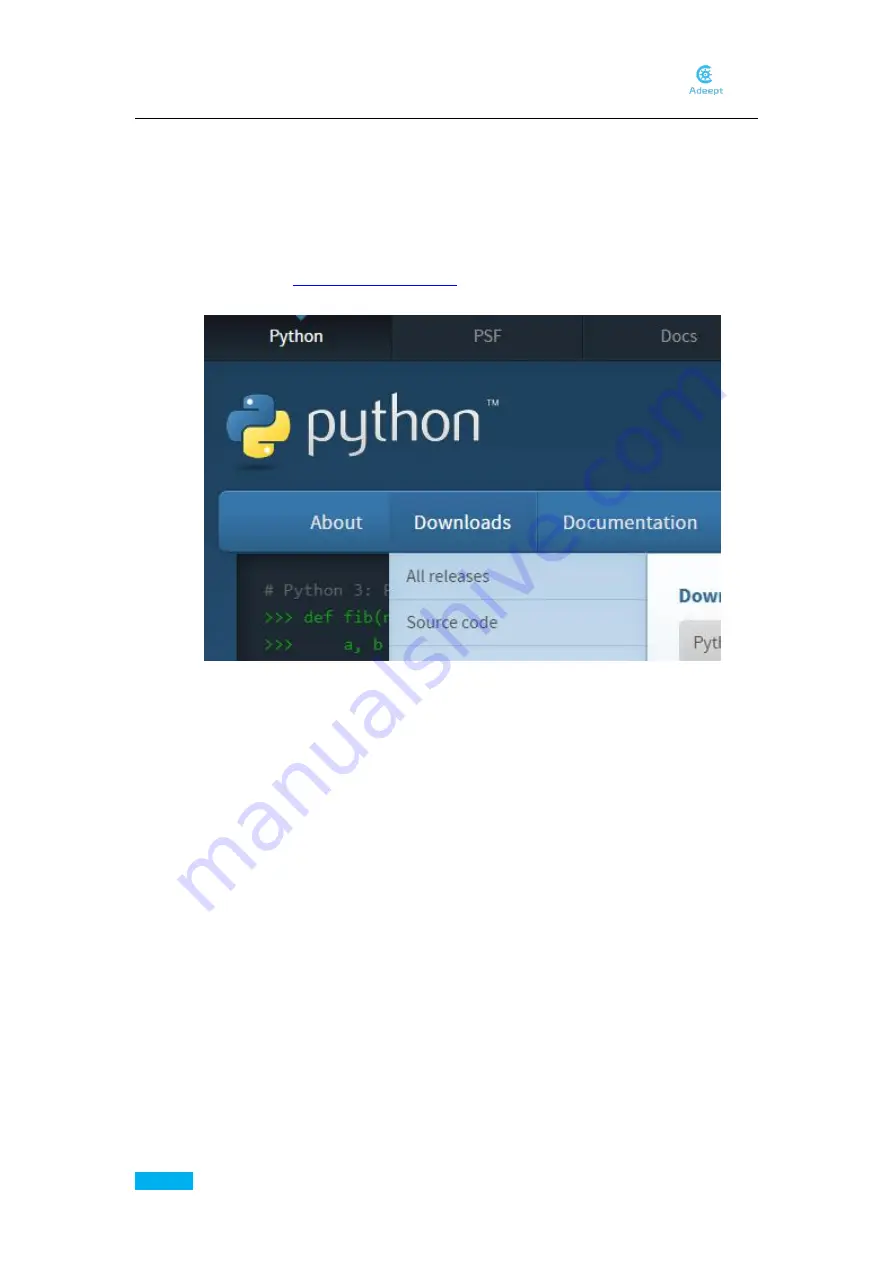
Download Python 3.7:
Click through
Downloads
->
Download Python 3.7.0
.
Install it after download is done. Python will configure the environment variables during the
installation.
*Pay attention to the 32-bit or 64-bit of your system when downloading Python - choose
the corresponding Python version based on your own system.
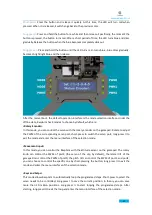
4.2. Run the RaspArm
Start
Switch on the RaspArm.
Note: The moment the power is turned on, the arm will swing randomly at a small range. Please
keep your eyes away from the swing range of the arm as much as possible. After the Raspberry Pi
is turned on, the servo on the arm will drive the corresponding joint to swing to the initial
position successively, while the LCD screen will display the port number of the servo to be moved
and the remaining time of the movement. This is a security feature that is turned on by default,
and you can turn it off by changing the code.
The gamepad of RaspArm has four input modes:
Rotation
,
Short-press
,
Long-press I
and
Long-press II
.
Содержание RaspArm
Страница 1: ...www adeept com 1...
Страница 14: ...www adeept com 11 If a warning window prompts click Yes...
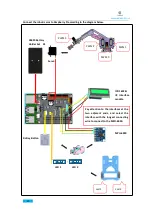
Страница 25: ...www adeept com 22 2 Connect the battery holder and Raspberry Pi Note that the switch is OFF...
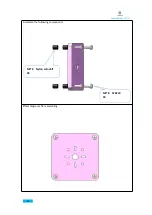
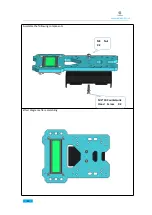
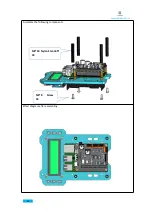
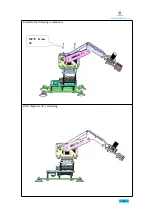
Страница 38: ...www adeept com 35 Assemble the following components Effect diagram after assembling M3 25 Screw X3 M3 Nut X3...
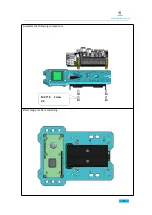
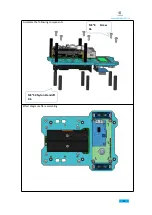
Страница 40: ...www adeept com 37 Assemble the following components Effect diagram after assembling M3 25 Screw X2 M3 Nut X2...
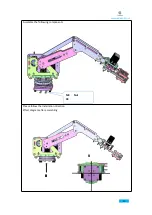
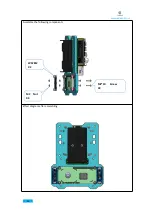
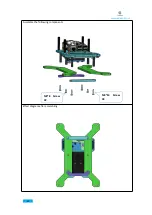
Страница 49: ...www adeept com 46 Assemble the following components Effect diagram after assembling M3 35 Screw X6 M3 Nut X6...
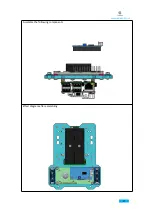
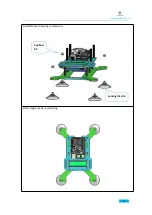
Страница 51: ...www adeept com 48 Assemble the following components Effect diagram after assembling M3 Nut X4 M3 16 Screw X4...
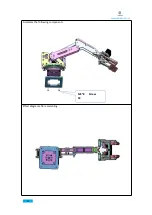
Страница 55: ...www adeept com 52 Assemble the following components Effect diagram after assembling M3 8 Screw X4...
Страница 58: ...www adeept com 55 Assemble the following components Effect diagram after assembling M2 5 8 Screw X4...
Страница 60: ...www adeept com 57 Assemble the following components Effect diagram after assembling...
Страница 64: ...www adeept com 61 Assemble the following components Effect diagram after assembling Cap Nut X4 Sucking Disc X4...
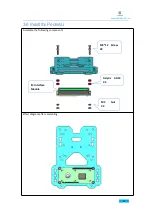
Страница 66: ...www adeept com 63 Assemble the following components Effect diagram after assembling M3 8 Screw X4...
Страница 70: ...www adeept com 67...