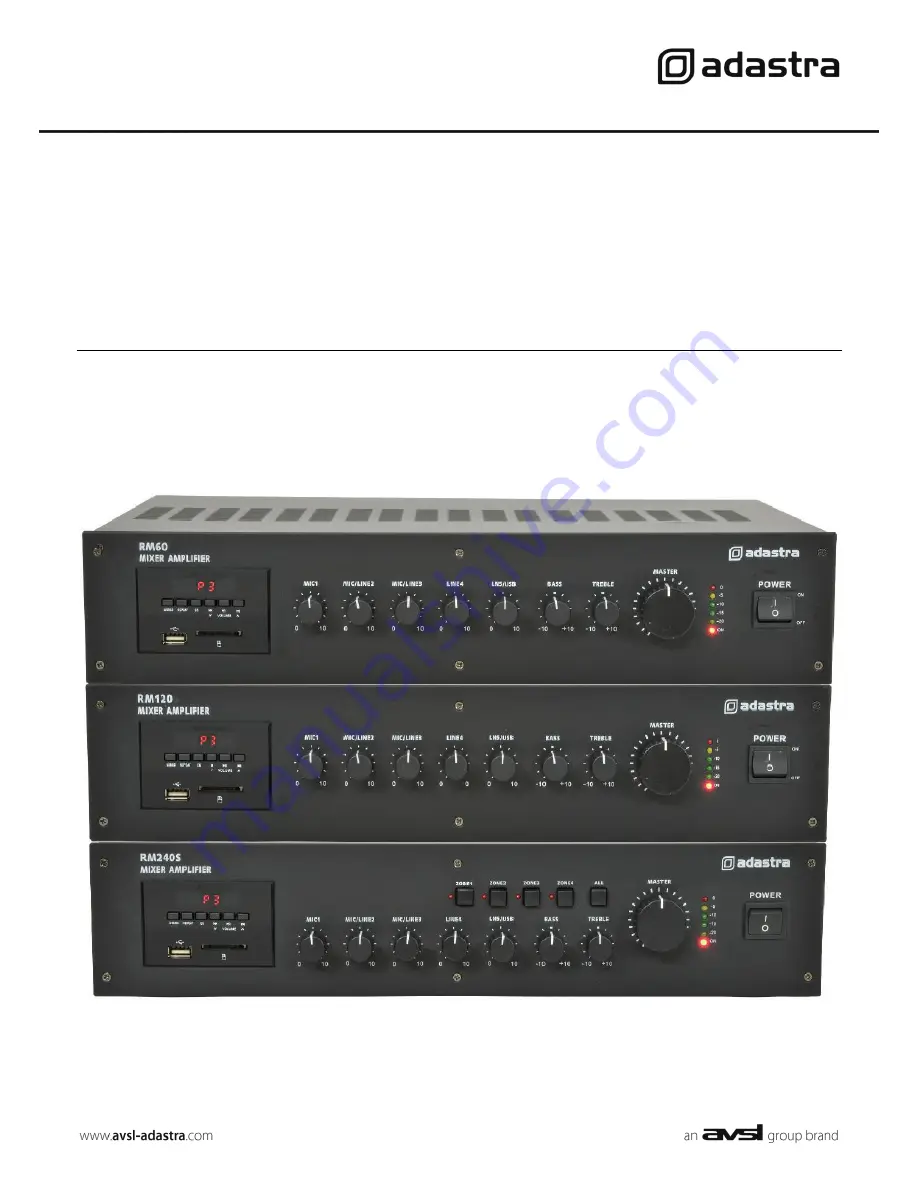
RM SERIES
Rackmount 100V mixer-amplifiers
Item ref: 953.110UK, 953.111UK, 953.112UK
User Manual
Страница 1: ...RM SERIES Rackmount 100V mixer amplifiers Item ref 953 110UK 953 111UK 953 112UK User Manual ...
Страница 2: ...ation to the case No user serviceable parts inside Do not open the case refer all servicing to qualified service personnel Safety Check for correct mains voltage and condition of IEC lead before connecting to power outlet Use double insulated speaker wire with adequate current rating for 100V speaker connections Do not use 8Ω and 100V terminals at the same time Do not allow any foreign objects to ...
Страница 3: ... LEDs 11 POWER switch 12 Speaker zone switches RM240S only 13 Mains voltage switch 14 IEC mains inlet fuse holder 15 DC power terminals 16 COM speaker terminal 17 8Ω speaker terminal 18 100V speaker terminal s Note 4 zones for RM240S 19 LINE OUT connectors RCA 20 LINE 5 input RCA 21 LINE 4 input RCA 22 MIC LINE 3 input 6 3mm jack 23 MIC LINE 2 input 6 3mm jack 24 DIP switches see DIP switches sect...
Страница 4: ...mal when MIC 1 signal is silent These features are set by DIP switches 24 as shown here Moving the DIP switch down will switch the feature ON MIC LINE 2 23 and MIC LINE 3 22 jack inputs can be set to MIC or LINE sensitivity to suit the type of input being used Moving the relevant DIP switch down selects LINE sensitivity Moving the DIP switch up selects MIC sensitivity Be sure to make these DIP swi...
Страница 5: ...onnect as many speakers as needed with a combined wattage of no more than 90 of the amplifier s output power rating The terminals of a 100V speaker are connected to a transformer and in some cases this transformer may be tapped for different power ratings These tappings can be used to adjust the wattage and output volume of each speaker in the system to help achieve the ideal total power of the sy...
Страница 6: ...flash of this LED may be indicating distortion or clipping of the output signal and the MASTER should be turned down If a microphone is connected to MIC 1 input make sure it is switched on and if it requires phantom power make sure this feature is enabled Gradually increase the MIC 1 control 2 whilst speaking into the microphone until the required volume level is reached The microphone should not ...
Страница 7: ...t the type of music or compensate for room acoustics Pressing the Previous track button 6 briefly steps backwards through tracks on the memory device Press and hold this button to decrease the playback volume Pressing the Next track button 8 briefly steps forwards through tracks on the memory device Press and hold this button to increase the playback volume To pause the current track press the Pla...
Страница 8: ...Check memory device is connected properly remove and re insert Check file types standard compressed digital audio files required Check memory device works on a PC or Mac for standard playback Output is very loud or distorted Check level of input signal is not too high Reduce MIC LINE IN USB SD and or MASTER level Output is working but at very low level Check input audio source level is not too low...