96
If the above conditions cannot be met,
it may be necessary to increase the
distance. This depends on the specific
garden design. Either way, it is rec-
ommended that you have at least 1 cm
extra distance, as the boundary wire
may shift slightly after some time as the
grass root network grows.
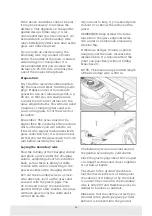
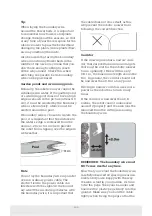
If you create an obstacle using the
boundary wire (e.g. around a flower
bed in the middle of the lawn or buried
swimming pool/ trampoline), it is
recommended that you increase the
distance to 25-30 cm to minimise the
risk of the mower falling down.
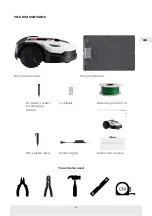
Preparation:
First, find the reel with cable and iden-
tify the loose end. Next, find the plastic
pegs. Prepare a ruler or homemade
spacer for use as a measuring stick, e.g.
20 cm, so that you can easily ensure
a uniform and correct distance to the
grass edge/obstacles. You will also need
a hammer, clamping pliers and scis-
sors/cutting pliers to cut the wire (not
included).
Remember: The grass must not be
higher than 60 mm before the machine
starts, otherwise you will need to cut
it first with a regular lawnmower (with
grass collection box). It is recommend-
ed that you cut the grass down to 35-40
mm before installing the robot.
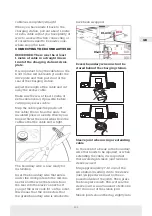
Laying the boundary wire
Start the cabling at the charging station
and place a piece under the charging
station, extending about 50 cm further
back, so that there is plenty of cable
to work with when connecting to the
power sockets at the charging station.
Roll out the boundary wire in a clock-
wise direction, lay it on the grass and
secure it with the plastic pegs. You
do not need to bury the cable in the
ground. Within a few months, the grass
will have grown over the cable and it
will not be visible.
(If you want to bury it, you should place
it about 2 cm below the surface of the
grass)
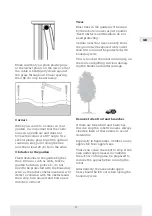
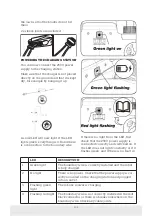
REMEMBER: Keep at least 20 cm dis-
tance from the grass edge/obstacles.
Use a ruler or homemade measuring
stick for this.
If there are hedges, flowers or plants
hanging over the lawn, increase the
distance here. It is important that the
robot can pass freely without hitting
branches etc.
NOTE: The maximum permitted length
of the boundary wire is 300 m.
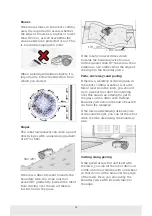
The boundary wire is now laid around
the garden according to your sketch.
Place the plastic pegs about 80 cm apart
on straight sections and closer together
at corners or bends.
The closer to the ground the cable is
laid, the less risk there is of falling over
the cable or of it being cut by the robot-
ic mower. The current in the boundary
wire is only 20V and therefore poses no
danger to humans or animals.
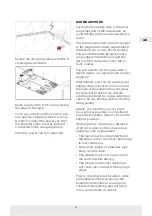
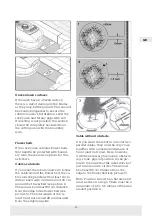
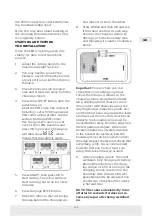
Make sure that the cable is correctly po-
sitioned in the plastic peg (see picture)
before it is knocked into the ground.
Содержание 33888
Страница 1: ...Brugsanvisning Bruksanvisning Instruction manual DK GB SE Model 33888...
Страница 37: ...37 DK TILBEH R Der findes ekstraudstyr reservedele til robotten Kontakt din lokale Harald Nyborg butik...
Страница 79: ...79 SE TILLBEH R Valfria reservdelar finns tillg ngliga f r roboten Kontakta din lokala Harald Nyborg butik...
Страница 121: ...121 GB ACCESSORIES Optional spare parts are available for the robot Contact your local Harald Nyborg store...
Страница 128: ......

