background image

All rights reserved. Product description and product specifications are subject to change without notice. 

For lastest product information, please v isit Acnodes’ website at www.acnodes.com 

14628 Central Ave. Chino, CA 91710    Tel: 909.597.7588 

Fax: 909.597.1939

© C opyright 2015 Acnodes C orp.


Содержание MKD6017U

Страница 1: ...n and productspecifications aresubject to changewithout notice For lastest product information pleasevisit Acnodes website atwww acnodes com 14628 Central Ave Chino CA91710 Tel 909 597 7588 Fax 909 59...

Страница 2: ...en the chassis Opening it yourself could damage the equipment and invalidate its warranty If any part of the equipment becomes damaged or stops functioning have it checked by qualified service personn...

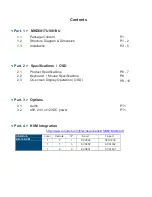
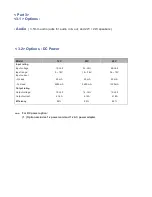
Страница 3: ...t Specifications 2 2 Keyboard Mouse Specifications 2 3 On screen Display Operation OSD P 6 7 P 8 P 9 10 Part 3 Options 3 1 Audio 3 2 48V 24V or 12VDC power P 11 P 11 Part 4 KVM Integration http www ac...

Страница 4: ...onitors and monitor screens can scratch the LCD display or strip off the finish Do not spray any kind of liquid directly onto the screen or case of your monitor Spraying liquids directly onto the scre...

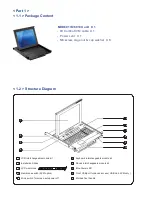
Страница 5: ...asher X 8 5 1 6 7 2 8 3 9 4 1 LCD interchangeable module kit 2 Installation Slides 3 LCD membrane 4 Membrane switch KVM option 5 Micro switch for screen auto power off 10 6 Keyboard interchangeable mo...

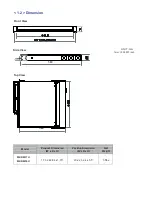
Страница 6: ...imension Front View Side View UNIT mm 1mm 0 03937 inch 580 Top View 580 Model Product Dimension W x D x H Packing Dimension W x D x H Net Weight MKD6017U MKD6019U 17 3 x 22 84 x 1 75 23 2 x 32 4 x 5 5...

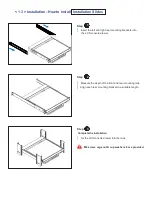
Страница 7: ...rear mounting brackets into the LCD console drawer Step 2 Measure the depth of the front and rear mounting rails Align each rear mounting bracket to a suitable length Step 3 Complete the installation...

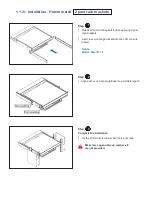
Страница 8: ...ars before applying 2 post rack brackets Insert rear mounting brackets into the LCD console drawer Option Model MB 751 12 Step 2 Align each rear mounting bracket to a suitable length Step 3 Complete t...

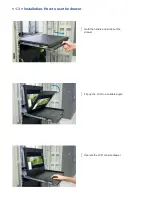
Страница 9: ...1 3 Installation How to use the drawer Hold the handle and slide out the drawer Flip up the LCD to a suitable angle Operate the LCD console drawer...

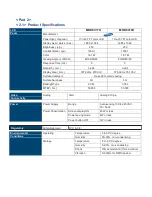
Страница 10: ...32H x 301 05V Surface treatment Haze 25 Hard coating Surface hardness 3H 3H Backlight Type CCFL CCFL MTBF hrs 50 000 50 000 Video Connectivity Analog VGA Analog 0 7Vp p Power Power Supply Range Auto s...

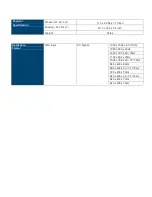
Страница 11: ...2 x 32 4 x 5 5 inch Weight 35lbs Applicable Format VGA Input PC Signal 1280 x 1024 x 60 75Hz 1280 x 960 x 60Hz 1280 x 760 x 60 75Hz 1152 x 864 x 75Hz 1024 x 768 x 60 70 75Hz 848 x 480 x 60Hz 800 x 600...

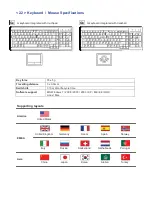
Страница 12: ...force 55 5g Travelling distance 3 0 3mm Switch life 10 million life cycle time Software support MS Windows 7 2008 2003 2000 XP ME 98 DOC Linux Mac Supporting layouts America EMEA Asia United States Un...

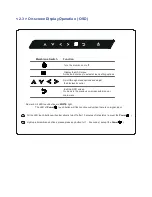
Страница 13: ...ayed control Exit the OSD screen Go back to the previous on screen sub menu or main menu Remark All LED touch buttons in WHITE light The LED of Power touch button will flash continuously when there is...

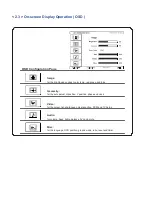
Страница 14: ...ast color temp red green and blue Geometry for the auto adjust H position V position phase and clock Video for the colour tint sharpness noise reduction DCDi and TV Setup Audio for volume bass treble...

Страница 15: ...g Input voltage 12 Volt 24 Volt 48 Volt Input range 9 18V 18 36V 36 75V Input current No load 50 mA 50 mA 50 mA Full load 4950 mA 2450 mA 1220 mA Output rating Output voltage 12 Volt 12 Volt 12 Volt O...

Отзывы: